Difference between revisions of "X-Lite softphone"
From Zenitel Wiki
(→X-Lite 4.0) |
|||
| Line 36: | Line 36: | ||
The X-Lite will now try to register to the SIP Registrar node in AlphaCom and show “Ready” in the display if registration is successful. | The X-Lite will now try to register to the SIP Registrar node in AlphaCom and show “Ready” in the display if registration is successful. | ||
| + | <br style="clear:both;" /> | ||
== M-key and Door Opening feature from X-Lite == | == M-key and Door Opening feature from X-Lite == | ||
Revision as of 07:59, 5 October 2011
Contents
X-Lite 3.0
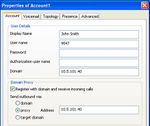
The X-Lite 3.0 softphone is freeware. Download X-Lite from http://www.counterpath.com and install the program. During installation you are asked to create a SIP account. Take a look at the screen shot to the right.
1. In “User Details” fill in:
- Display Name: This is the display text shown in the intercom display when receiving calls from the X-Lite
- User name: The directory number of the SIP phone. The number must also be defined as a global number (feature 83) in AlphaCom
- Domain: The IP address of the AlphaCom
2. In “Domain Proxy” enable proxy and set Address = IP address of the AlphaCom
3. Save the changes
You can modify the SIP account later by right-click on the X-Lite phone and select “SIP Account Settings”.
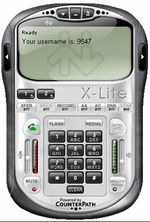
The X-Lite will now try to register to the SIP Registrar node in AlphaCom and show “Ready” in the display if registration is successful.
X-Lite 4.0
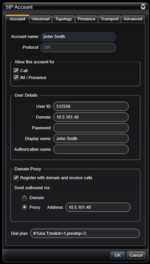
The X-Lite 4.0 softphone is freeware. Download X-Lite from http://www.counterpath.com and install the program. During installation you are asked to create a SIP account. Take a look at the screen shot to the right.
1. Fill in an Account Name 2. In “User Details” fill in:
- User ID: The directory number of the SIP phone. The number must also be defined as a global number (feature 83) in AlphaCom
- Domain: The IP address of the AlphaCom
3. In “Domain Proxy” enable Proxy and set Address = IP address of the AlphaCom
4. Save the changes by pressing the OK button
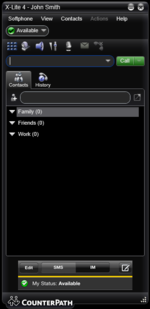
You can modify the SIP account later by selecting Account Settings under the Softphone menu.
The X-Lite will now try to register to the SIP Registrar node in AlphaCom and show “Ready” in the display if registration is successful.
M-key and Door Opening feature from X-Lite
In order to make the buttons *, # (M-key operation) and 6 (door opening) to work from the X-Lite during conversation, the X-Lite must be enabled for SIP INFO messages.
AlphaCom use SIP INFO type signaling during connection. The X-Lite has DTMF support for SIP INFO messages, in addition to RFC 2833 and inband DTMF. But in order to use SIP INFO you need to disable the other two options.
Follow these steps on the X-Lite:
- Dial ***7469 (send)
- Now you get the advanced options menu up. Filter first for "DTMF". Find the system:dtmf:force_send_in_band entry, double click and change the value to 0.
- Then filter for "2833". Find the rtp:2833:enabled line, double click and change this value to 0.
- Setting both to 0 will result in your X-Lite sending SIP INFO DTMF.
Configuration of AlphaCom E
The AlphaCom E needs to be configured with a SIP registrar node. Not needed from AMC10.55


