ECPIR-3P
From Zenitel Wiki
The ECPIR-3P call panel is developed for console mounting. The call panel features three fully programmable buttons.

Contents
- 1 Highlights
- 2 InterCom connections
- 3 Starting up
- 4 Configuration
- 5 Advanced Network Settings
- 6 Software Upgrade
- 7 Station Indication LEDs
- 8 Restore Factory Defaults
- 9 Board Connections
- 10 ECPIR Dimensions & Mounting Instructions
- 11 Additional Documentation on Zenitel.com
- 12 Installation
- 13 Configuration
- 14 Related Articles
Highlights
- Network call panel for console mounting
- Compatible with AlphaCom and Exigo systems
- Three programmable buttons with individual labels and status indicators
- Separate PTT button
- Optional button protection covers
- Indicators for power, call and fault
InterCom connections
Starting up
Configuration
Advanced Network Settings
Software Upgrade
Station Indication LEDs
Restore Factory Defaults
Board Connections
ECPIR Dimensions & Mounting Instructions
Additional Documentation on Zenitel.com
Installation
Remap input 1-6 as DAK 101 - 106 (Default 11-16)
The following setting under Station Type in AlphaPro needs to be checked when using the button expansion module.
This is to move the input mapping of input 1-6 to 101 - 106 from default 11-16.

EBMDR-8 (1023253008)
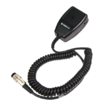
Handheld Microphone EMMAR-1H
Insert the 5-pin DIN plug on the handheld microphone in the microphone connector socket on the ECPIR-3P
Select "Handheld microphone" under Accessory in the ECPIR-3P web interface.

Configuration
Redirection of DAK keys
In general every user in AlphaCom has DAK tables for 20 DAK keys. Because the ECPIR can use up to 35 DAK keys with the extension modules, one have to "borrow" DAK tables from other, unused stations.
DAK tables are "borrowed" by pointing to the other users in the DAK table of the ECPIR-3P. This is done by using the symbol ">", followed by the physical number of the station from where we want to use the DAK table. Any free physical number in the range 1 to 552 can be used. However, it is recommended to use higher numbers to avoid conflicts if the system is expanded in the future.

The actual DAK key configuration must be entered in the DAK table of the station to which the ECPIR-3P DAK table is pointing:

Several ECPIR-3P stations may redirect to the same DAK tables if they should use the same DAK layout.
LED Indication
The DAK keys on the ECPIR-3P and on the button expansion panels have two LED's each. The two LED's (red and green) are controlled using the IND command in the Event Handler.
- Remember to re-map the inputs as described in the previous section.
Call Request
To turn on the red led, flashing fast, in the associated DAK key when a Call Request is received, create this event:

Outgoing Conversation
To turn on the green led in the associated DAK key when an outgoing call is made, create this event:

Incoming Conversation
To turn on the green led in the associated DAK key when an incoming call is received, create this event:

Door Status
An input of the IP substation can be connected to a door magnet, providing indication on the DAK panel, showing if the door is open or closed.
Example:
To turn on the red led in the associated DAK key when input 3 of the IP substation 159 is activated, create this event:

Action Command:
OWN r 105
IND %2.phy %2.dak(I%1.dir) 1 1
105 is the directory number of the ECPIR-3P
Station faults
To turn on the red and green led in the associated DAK key when a station is reported faulty, create this event:

Action Command:
OWN r 105
IND %2.phy %2.dak(I%1.dir) 1 1
IND %2.phy %2.dak(I%1.dir) 2 1
105 is the directory number of the ECPIR-3P
See article: TFIE Indication LEDs
Related Accessories
| 100px | 
|
|
|
|
| EBMDR-8 | MB-30G | EMMAR-1H | EMBR-1 | EMBR-2 |