PACOM GMS - ICX-AlphaCom integration
From Zenitel Wiki
Contents
Introduction
PACOM GMS (Graphical Management System) is a multi-site security management platform, providing integration between access control, alarm monitoring, video surveillance, elevator, intercom, fire, building automation and many other building services into a single, remotely-accessible solution.
Installation
Please contact PACOM to obtain the PACOM GMS software
A license file is required to install the PACOM GMS server.
A number of documents are available in the download directories of the PACOM GMS system describing how to install and configure the system.
Directory _GMS VersionsGMS v4.40:
- PACOM GMS v4_40.pdf (Release Note)
- PACOM GMS v4.40 Installation Guide.pdf
- PACOM GMS v4.40 Configuration Guide.pdf
Directory _Intercom Module\Intercom Gateway:
- GMS Intercom User Guide.docx
Directory _Intercom Module\Plugins\Stentofon:
- GMS Stentofon Intercom Plugin implementation overview.docx
Installation of the PACOM GMS server
Run the installation program “_GMS VersionsGMS v4.40\PACOM GMS v4.40\4.40.0.35\Core\setup.exe”.
You will be asked for where the license file is stored. The e-mail service is not necessary to install.
Default installation directory is “C:\GMS”, but you may choose another place (for instance “C:\Program Files (x86)”)
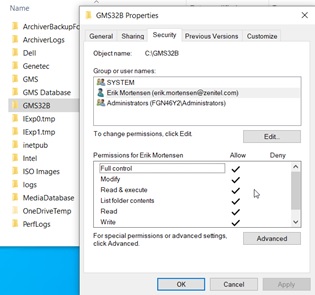
The directory “C:\GMS32B” properties must be set to “Shared”. Give Users “Full Controll”. Right-click on directory and select “Properties”.
Installation of the Intercom Gateway
Run the installation program “C:\Projects\PACOM_GMS\GMS\_Intercom Module\Intercom Gateway\Ver 2.0\ PACOM GMS Intercom Gateway.exe”. The gateway will be installed in the directory “C:\Program Files (x86)\PACOM Systems\PACOM GMS Intercom Gateway”
Installation of the Stentofon Plugin
Copy the files
to the gateway install directory “C:\Program Files (x86)\PACOM Systems\PACOM GMS Intercom Gateway”
Documentation
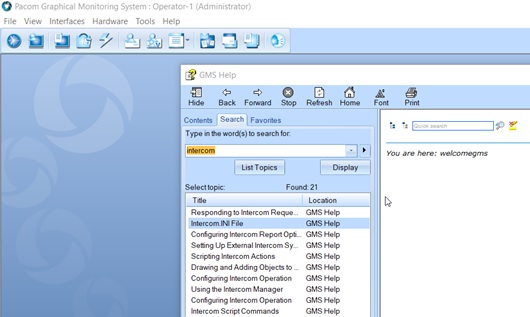
Documentation is available on the server. Select Help->Contents and enter for instance “Intercom”.
PACOM GMS Demo System
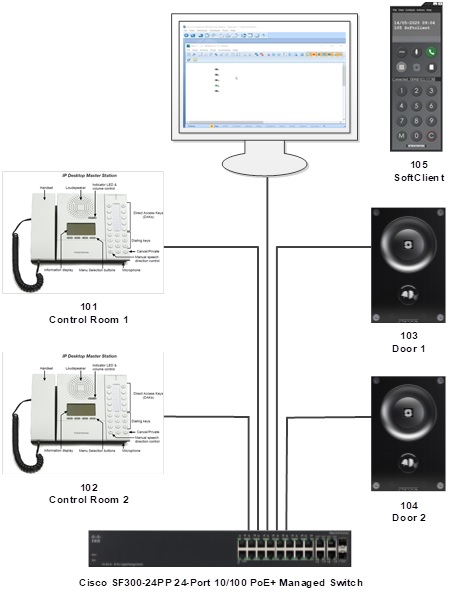
The drawing below shows the PACOM GMS test system configuration. A description of how the integration with the ICX is established can be found in the document:
- GMS Stentofon Intercom Plugin implementation overview.docx - stored in the directory “_Intercom Module\Plugins\Stentofon”.
The system operation from the PACOM GMS GUI is described in the document
- GMS Intercom User Guide.docx - stored in the directory “_Intercom Module\Intercom Gateway”.
Please observe - Only call requests (623 + directory number) are registered by the PACOM GMS.
Incoming intercom call requests are registered in the Intercom Manager. The Intercom Manager is shown pushing the Intercom Manager button in the tool box line.
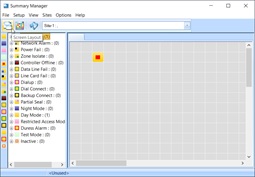
The site map is shown by selecting the Summary Manager (from the View menu in the tool box line) and picking the right site.
Displaying the Transaction Manager from the View-menu may also be of interest.
PACOM GMS Demo System Configuration
To configure the PACOM GMS correctly the following components have to be setup:
- PACOM GMS Server
- PACOM GMS Intercom Gateway
- Stentofon Plugin
Configuration of the PACOM GMS Server
The files to change are (server installed in "C:\GMS")
- C:\GMS\Customer\Updatable\GMS32_COMMON.INI
- C:\GMS\Customer\Updatable\GMS32_SERVERS.CONFIG
- C:\GMS\Customer\Intercom\Intercom.ini
Changes in in GMS32_COMMON.INI
Probably no changes. Check with documentation.
Changes in in GMS32_SERVERS.CONFIG
The section [SA SERVER] configures the Stand Alone Server.
The database name is the default name.
“Name” is the computer name.
"Share" uses default value.
SQL Database is accessed using Windows authentication.
Administrator Operator logs in automatically.
[SA SERVER]
GMS Database name=GMS32DBASE
Name=FGN46Y2
;Share=
SQL Connection Trusted=1
AutoLogon=1
Changes in Intercom.ini
The sections [Intercom Gateway] and [dispatch] have to be changed. Use your computer name for the “Host”.
[Intercom Gateway]
;host name of a PC running the intercom gateway service
Host=FGN46Y2
[dispatch]
; WS_NO=siteID/IntercomDvcId, siteID/IntercomDvcId...
; all values are 1-based. IntercomDvcId can be * for 'all'. WS_NO can be * for all.
; example: 5=3/*, 8/1, 9/12 meaning "workstation 5 should receive all intercom requests from site 3, and requests from 8/1 and 9/12</nowiki>
; use 65 for ActiveServer, 1 for Standalone.
;
;*=*/*
1=1/3,1/4,1/5
;65=1/*
Creating a Site Map
A site map is created by adding a new site to the “Summary Manager”.
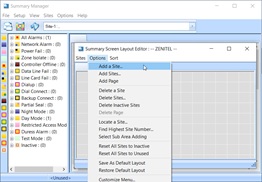
Push the “Screen Layout”-button in the toolbox of the “Summary Manager”
Select “Options” and “Add a site”
Select a Site no.
and place the site on the map.
Editing a Site Definition
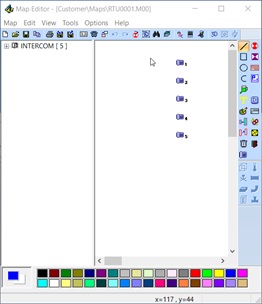
To edit a site definition select “Tools”->”Site Map Editor” in tools line.
Select the site number and area.
Select ”Intercom” device from the tool-box on the right and drag and drop it on the map:
For editing each intercom device push the ![]() - button to enter edit mode and select an intercom device.
- button to enter edit mode and select an intercom device.
Select a “Device ID” and a “Location”.
Select the “Intercom Parameters” tab and enter “Device Short Name”. Select device type as “External” and “Source ID”, which is the directory number of the intercom device.
Edit all used intercom devices and select their ID, Name and Source ID.
Configuration of the Intercom Gateway
The Intercom Gateway is configured via the files
- IntercomGatewayWindowsService.exe.config
- StentofonDriverConfig.xml
Changes in IntercomGatewayWindowsService.exe.config
In this file the value for the key “GmsServer1” is set to the name of the computer and the value for the key “Driver1” is set to “PACOM.StentofonDriver.dll”.
<?xml version="1.0"?>
<configuration>
<startup><supportedRuntime version="v4.0" sku=".NETFramework,Version=v4.5"/></startup>
</configuration>
Changes in StentofonDriverConfig.xml
<?xml version="1.0"?> <StentofonConfiguration>
 <System>
   <MasterInterComStation>101</MasterInterComStation>
   <Debug>1</Debug>
   <DisableMasterTimer>30</DisableMasterTimer>
   <DelayTimeAfterReqWait>1500</DelayTimeAfterReqWait>
 </System>
 <GMSToDirNoMapping>
   <DirNo GMSWorkStationNo="1" DisableMaster="YES">101</DirNo>
   <DirNo GMSWorkStationNo="2" DisableMaster="YES">102</DirNo>
   <DirNo GMSWorkStationNo="3" DisableMaster="YES">103</DirNo>
   <DirNo GMSWorkStationNo="4" DisableMaster="YES">104</DirNo>
   <DirNo GMSWorkStationNo="5" DisableMaster="YES">105</DirNo>
 </GMSToDirNoMapping>
</StentofonConfiguration>
IntercomGatewayWindowsService Log On Type
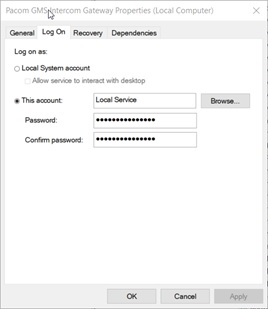
Change the Log-on type for the IntercomGatewayWindowsService to “Local Service”:
Right Click Start->Run and enter “services.msc”. Find “PACOM GMS Intercom Gateway” and set the “Log On As” to “Local Service”. Password is the user password.
Configuration of the Stentofon Plugin
The configuration of the ICX IP connection is defined in the file StentofonConfig.xml. The driver is storing its configuration file in the directory “C:\Windows\ServiceProfiles\LocalService\AppData\Roaming\STENTOFON\SDK” Please edit this file – not the one at the driver directory. It will be created automatically on gateway activation
<?xml version="1.0" encoding="utf-8"?> <AlphaComConfig>
 <AlphaNetConfig>
   <ClientConfig>
     <AlphaComIP>10.5.117.90</AlphaComIP>
     <AlphaComPort>61113</AlphaComPort>
     <AlphaComNodeList />


