Difference between revisions of "Grandstream BudgeTone 100"
From Zenitel Wiki
(→Configuration of AlphaCom XE) |
|||
| (10 intermediate revisions by 2 users not shown) | |||
| Line 1: | Line 1: | ||
| − | + | {{A}} | |
| − | [[Image:Grandstream Budge Tone 100.jpg| | + | [[Image:Grandstream Budge Tone 100.jpg|left|300px|thumb|Enter password: admin]] |
| − | + | <br style="clear:both;" /> | |
| + | |||
Set IP address of the phone: | Set IP address of the phone: | ||
| − | * | + | *Press the '''Menu''' key on the phone and scroll inside the menu with the arrow keys |
Configuring the phone: | Configuring the phone: | ||
*The remaining configuration is done from the web interface | *The remaining configuration is done from the web interface | ||
| − | *Log on to the phone via your web-browser using the IP address above | + | *Log on to the phone via your web-browser using the IP address entered above |
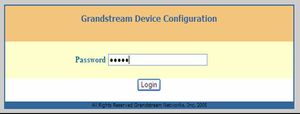
*Password: '''admin''' (small letters) | *Password: '''admin''' (small letters) | ||
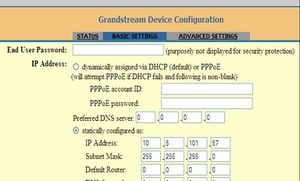
*In '''Basic Settings''' the IP-address & Subnet Mask can be changed | *In '''Basic Settings''' the IP-address & Subnet Mask can be changed | ||
| + | [[Image:Grandstream Budge Tone 100.2.jpg|left|300px|thumb|Set IP address]] | ||
| + | <br style="clear:both;" /> | ||
Select '''Advanced Settings''' | Select '''Advanced Settings''' | ||
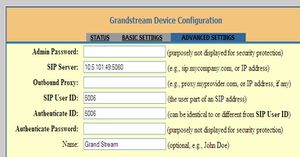
| − | *Enter the IP address of the AlphaCom | + | *Enter the IP address of the AlphaCom XE exchange |
*Enter SIP User ID – must be identical to the Directory Number entered in AlphaPro | *Enter SIP User ID – must be identical to the Directory Number entered in AlphaPro | ||
| + | [[Image:Grandstream Budge Tone 100.3.jpg|left|300px|thumb|Enter AlphaCom IP address and User ID]] | ||
| + | <br style="clear:both;" /> | ||
*'''Update''' and '''Reboot''' | *'''Update''' and '''Reboot''' | ||
| − | |||
| − | |||
| − | |||
| + | === Configuration of AlphaCom XE === | ||
| + | The AlphaCom XE needs to be configured with a [[SIP registrar node - configuration|SIP registrar node]]. | ||
| − | [[Category:SIP]] | + | [[Category:AlphaCom - SIP Integration]] |
Latest revision as of 22:31, 10 October 2017
Set IP address of the phone:
- Press the Menu key on the phone and scroll inside the menu with the arrow keys
Configuring the phone:
- The remaining configuration is done from the web interface
- Log on to the phone via your web-browser using the IP address entered above
- Password: admin (small letters)
- In Basic Settings the IP-address & Subnet Mask can be changed
Select Advanced Settings
- Enter the IP address of the AlphaCom XE exchange
- Enter SIP User ID – must be identical to the Directory Number entered in AlphaPro
- Update and Reboot
Configuration of AlphaCom XE
The AlphaCom XE needs to be configured with a SIP registrar node.


