SDS-1: Difference between revisions
From Zenitel Wiki
| Line 34: | Line 34: | ||
# Navigate to Status > Network Status and press the Menu key to check the IP address. | # Navigate to Status > Network Status and press the Menu key to check the IP address. | ||
# Enter the phone’s IP address in your PC’s browser | # Enter the phone’s IP address in your PC’s browser | ||
# Log in by entering the default Username: admin and Password: alphaadmin | |||
Log in by entering the default Username: admin and Password: alphaadmin | [[File:SDS config1.png|thumb|left|500px]] | ||
<br style="clear:both;" /> | |||
Register the account on the SDS-1 by selecting '''ACCOUNTS > Account 1/2 > General Settings''' to configure '''Account Name''', '''SIP Server''' (AlphaCom or Pulse), '''SIP User ID''' (Extension Number). | Register the account on the SDS-1 by selecting '''ACCOUNTS > Account 1/2 > General Settings''' to configure '''Account Name''', '''SIP Server''' (AlphaCom or Pulse), '''SIP User ID''' (Extension Number). | ||
[[File:SDS config2.png|thumb|left|500px]] | |||
<br style="clear:both;" /> | |||
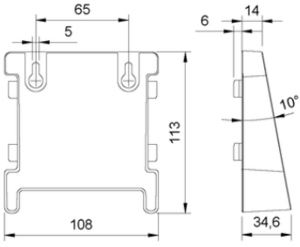
== Dimensions == | == Dimensions == | ||
Revision as of 13:19, 4 March 2019
Getting Started
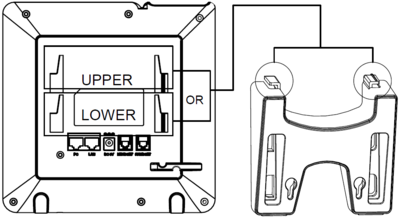
Installing the Phone with Phone Stand
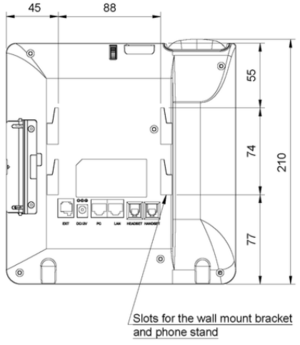
- Insert the hooks on top of the stand into the slots on the back of the phone. (You can either use the upper OR the lower slots)
- Firmly slide the stand upward to lock it in place
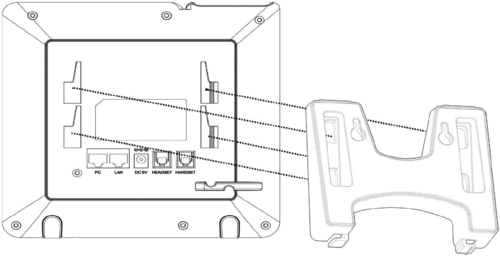
Installing the Phone with Wall Mount
- Insert all 4 hooks located at the front of the wallmount into the slots on the back of the phone.
- Firmly slide the wall mount upward to lock it in place.
- Attach the phone to the wall via the wall mount holes.
- Pull out the tab from the handset cradle (see figure below).
- Rotate the tab and plug it back into the slot with the extension up to hold the handset while the phone is mounted on the wall.
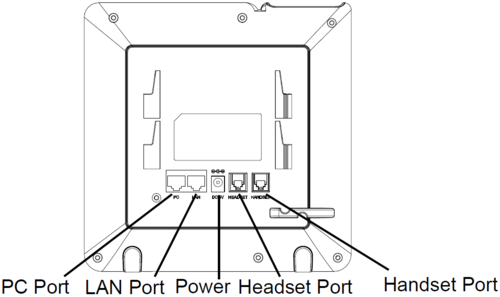
Connecting the phone
- Connect the handset and main phone case with the phone cord.
- Connect the LAN port of the phone to the RJ-45 socket of a PoE switch using the Ethernet cable.
The LCD will display provisioning or firmware upgrading information. Before continuing, please wait for the date/time display to appear. - Using the web configuration interface or the keypad configuration menu, you can further configure the phone using either a static IP or DHCP.
Configuration
The IP phone can only operate in SIP mode.
- Ensure your phone is properly powered up and connected to the Internet.
- Press the Menu key to enter the menu of the phone.
- Navigate to Status > Network Status and press the Menu key to check the IP address.
- Enter the phone’s IP address in your PC’s browser
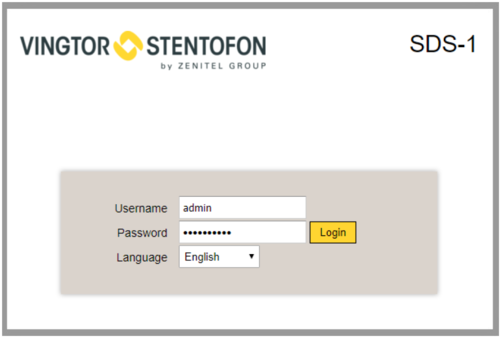
- Log in by entering the default Username: admin and Password: alphaadmin
Register the account on the SDS-1 by selecting ACCOUNTS > Account 1/2 > General Settings to configure Account Name, SIP Server (AlphaCom or Pulse), SIP User ID (Extension Number).
Dimensions
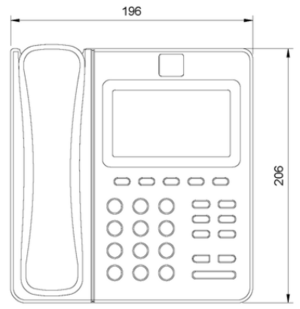
- Phone dimensions
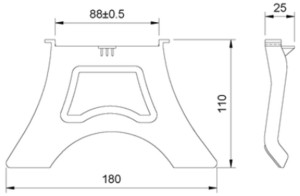
- Bracket dimensions


