Grandstream HT802: Difference between revisions
From Zenitel Wiki
ZenitelAus (talk | contribs) No edit summary |
|||
| Line 10: | Line 10: | ||
==IP Address discovery== | ==IP Address discovery== | ||
{{obs|The | {{obs|The HT802 MUST be connected to a DHCP Server for initial configuration. You may need to perform this step before bringing the unit to site, or use a DHCP Server application on the configuration PC}} | ||
{{obs|A telephone with a keypad is required for initial configuration}} | {{obs|A telephone with a keypad is required for initial configuration}} | ||
The HT802 is by default configured to obtain the IP address from a DHCP server. <br> | The HT802 is by default configured to obtain the IP address from a DHCP server. <br> | ||
Revision as of 12:45, 28 April 2022
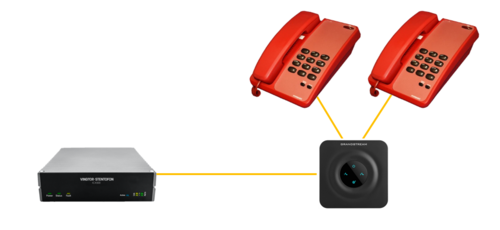
HT801 is an Analog Telephone Adapter (ATA) with 2 FXS ports. This device allows for the connection of 2 PSTN style telephone to ICX-AlphaCom, AlphaCom or IC-Edge platforms.
Licensing
To use the HT-801 with ICX-AlphaCom or AlphaCom, you require 1 SIP Station License per FXS port (ICX:1002600700, AlphaCom:1009643001)
For IC-EDGE, you require a SIP Client Extension License per FXS port (1009661201)
Configuration
IP Address discovery

|
The HT802 MUST be connected to a DHCP Server for initial configuration. You may need to perform this step before bringing the unit to site, or use a DHCP Server application on the configuration PC |
The HT802 is by default configured to obtain the IP address from a DHCP server.
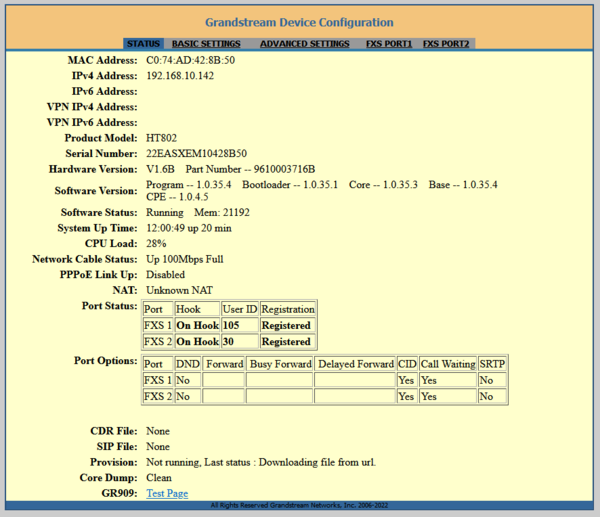
In order to discover the IP address assigned to your HT802, you should access the “Interactive Voice Response Menu” of your adapter via the connected phone and check its IP address mode.
- Connect a telephone to the HT802 and enter '***' on the keypad to launch the IVR.
- Choose option '02' to have the device readback it's current IP ddress
Web Configuration
Login with password admin. You can change the password from the Advanced Settings page.
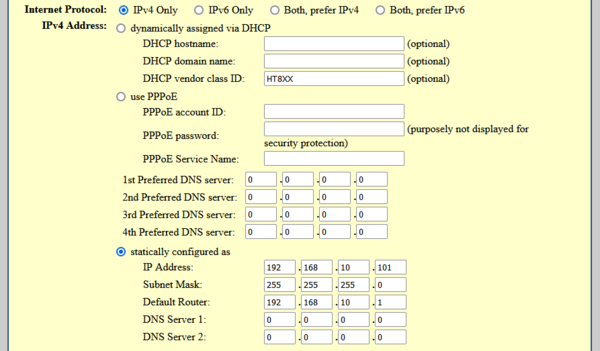
IP Address Settings
Set a Static IP Address from the Basic Settings. Press the Apply button, followed by Reboot.
FXS Line Settings
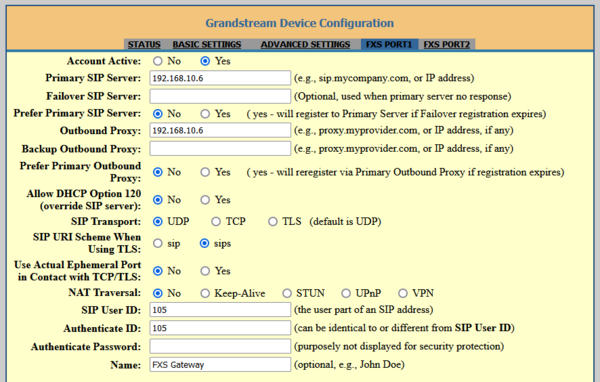
In each FXS Port tab, FXS Port 1 and FXS Port 2, set the following;
- Account Active to Yes
- Primary SIP Server: IP Address of the ICX or EDGE controller
- Outbound Proxy: Same as the Primary SIP Server
- User ID: The Directory Number as configured in the ICX or IC-EDGE Controller
- Authenticate ID: Same as the User ID
- Authenticate Password: The password as configured in the IC-EDGE Controller. Enter 0000 for ICX-AlphaCom (This field is not used by ICX-AlphaCom)
- Name: Any Name to identify this account
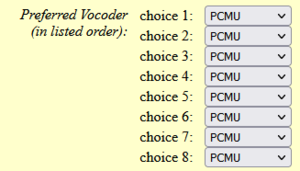
Set preferred codec to be “PCMU” (G711μlaw) on all choices
Line Monitoring
To speed up detection of a failed SIP connection to the HT801, reduce the Registration Expiry to 1 minute, with Reregistration occuring 20 seconds before expiry.
Dial Plan
To speed up dialed extension time, set the Dial Plan to 2, 3 or 4 digit numbering by placing 2, 3 or 4 'x' in the Dial Plan field. Here, the example is for 3 digit numbering with Group Call.
Hotline Call
If you have a device without keypad, and you need the unit to place a call when the handset is lifted, configure the Off Hook Autodial from the Basic Settings


