ICX-500 software upgrade
From Zenitel Wiki
This article describes how to upgrade the software of the ICX-500 Gateway.
During the upgrade process the users (intercom stations and other devices connected) will be out of service for approximately 35 seconds. Any ongoing conversations will be cancelled and not restored.
Backup customer data
Customer data must be backed up by doing a GetAll operation from AlphaPro before the upgrade is performed.
Software Upgrade
- Download the software image file vsfx-1.xyz.swu. This file is a complete image, and includes both the Linux OS and all applications.
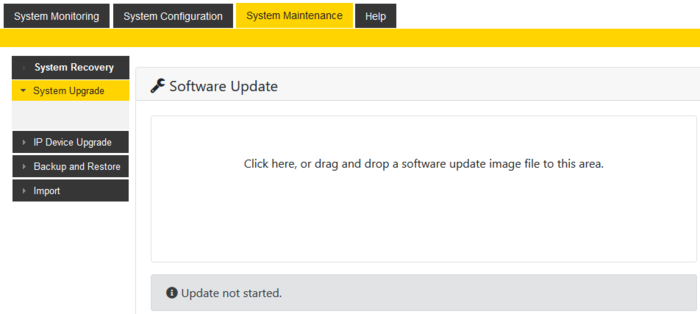
- Use an internet browser and log on to the ICX Web interface and select System Maintenance > System Upgrade.
- Click inside the "Software Update" box and browse to the software image file
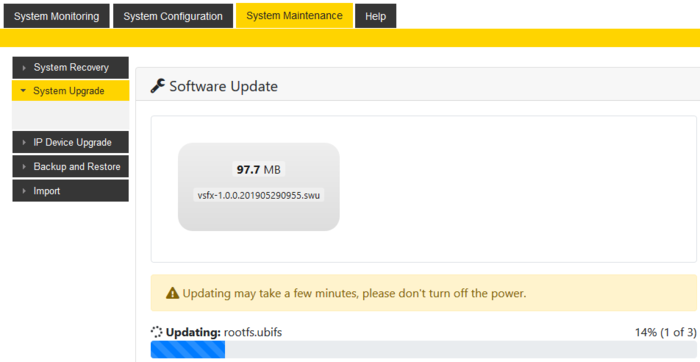
- The upgrade status is shown in the web browser.
- When the software installation is finished the system will restart with the new software image.
Restore customer data
The customer data is normally automatically restored after the software upgrade.
If that is not the case, restore the customer data by doing a SendAll operation from AlphaPro. Reset the gateway when the SendAll is finished.
Roll back
The ICX-500 has two memory partitions. When upgrading the software, the partition which is not currently in use will be updated. When the update is finished, the ICX-500 will restart using the updated partition.
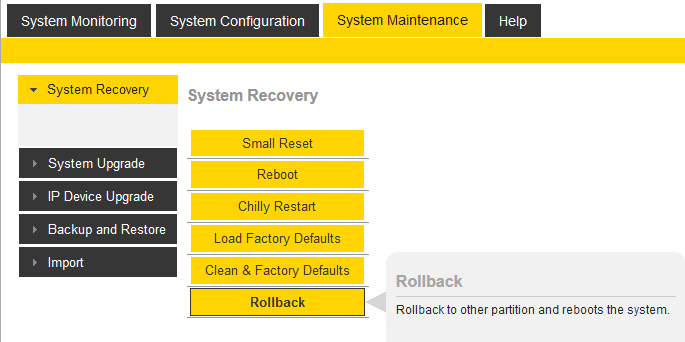
If for some reason the newly updated partition don't work properly, it is possible to roll back to the other partition:
In System Monitoring > System Information you can see which partition is currently active (A or B).
Image recovery from SD Card
In the unlikely event of a system crash, it is possible to recover the system by inserting a SD Card with a recovery image.
Prerequisites
- Micro SD card, minimum 1 GB
- The PC must have the software Win32DiskImager installed
Create SD Card
- Download the zipped image file, e.g. "vsfx-prod-1.0.0.3.img.zip"
- The zip file contains one file sdcard_archive.img. Unzip the file to a known location on the PC.
- Insert the SD card in your computer
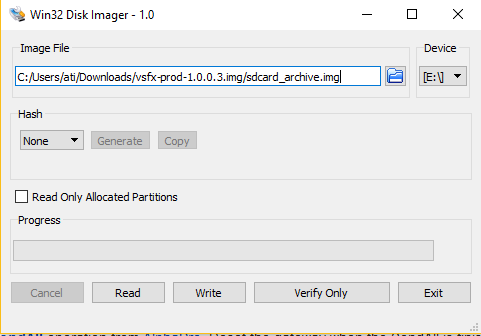
- Start Win32DiskImager
- Select the image file sdcard_archive.img
- Verify that correct "Device" is used for the SD card, in this example the SD card is available as drive "E:"
- Press "Write" to start burning the SD card.
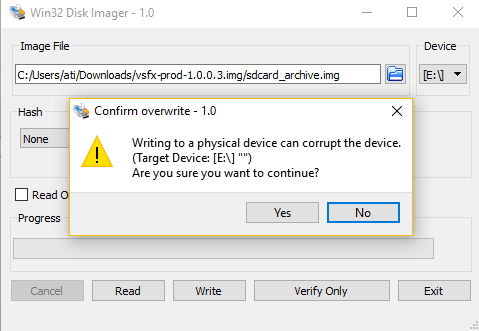
- Confirm overwrite by Yes:
- A progress bar shows the write procces, which takes approx 30 seconds.

