AudioCodes MP114/118, v4.8 and higher
From Zenitel Wiki
Config guide SIP Gateway - AudioCodes MP114/118 here
Contents
AlphaCom Configuration
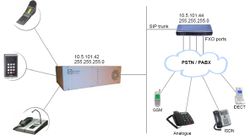
The configuration of AlphaCom E with SIP gateway includes the following steps:
Using AlphaWeb
- Assign IP address to the AlphaCom Ethernet port
- Insert SIP Trunk licenses
- Firewall (filter) settings
Using AlphaPro
- Create a SIP Trunk Node
- Create AlphaCom / SIP Audio links
- Define the AlphaCom / SIP routing
- Create prefix numbers
- Update the exchange
AlphaWeb Configuration
Assign IP address to the AlphaCom E Ethernet port(s)
Log on to AlphaWeb and enter a valid IP address on the Ethernet port. In the example below, Ethernet port 1 is used. Consult your network administrator to obtain the IP address.
Insert SIP Trunk licenses
Log on to AlphaWeb and install the SIP Trunk license.
Firewall (filter) settings
Enable the SIP protocol on the desired Ethernet port (default enabled for Ethernet port1).
AlphaPro Configuration
Create a SIP Trunk Node
From the AlphaPro main menu, use the ‘+’ button next to the ‘Select Exchange’ dropdown list to create a new exchange. The exchange type must be set to ‘SIP Node’.
Set the parameters as follows:
The SIP Trunk IP address must be identical to the IP address of the SIP Gateway.
Note: If the AlphaCom is configured with a SIP Registar node in addition to the SIP Trunk node, the SIP Registar node must have a lower node number than the SIP Trunk node.
Create AlphaCom/SIP Audion links
This paragraph is only relevant for AMC software 10.04 or earlier.
From AMC 10.05 the audio links are assigned dynamically whenever needed, and there is no need to specify the links in AlphaPro. Proceed Define the AlphaCom / SIP routing.
However, if you want to reserve VoIP channels for the SIP Gateway, you can do so by following the description below.
In Exchange & System > NetAudio use the Insert button to create one or several audio (VoIP) links between the AlphaCom and the SIP Gateway. The physical number specifies the VoIP channel and must be in the range 605 – 634 (start with 605). Normally the number of audio links will be equal to the number of phone lines connected to the SIP Gateway.
Define the AlphaCom / SIP routing
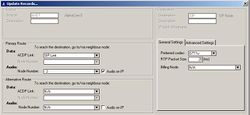
In Exchange & System > Net Routing use the Insert button to create a route between the AlphaCom and SIP Gateway. Set Preferred codec to G711u and RTP Packet Size to 10 ms.
Create Prefix number
The directory number (prefix) used to access the telephone line must be programmed in the AlphaCom directory table with feature 83 and Node = SIP Trunk node number (100 in this example). In the example below the default directory number 0 has been modified to be used as a prefix.
Update the exchange
Log on to the exchange and update the exchange by pressing the SendAll button.
AudioCodes MP-144/118 Configuration
Configure Network Parameters
The AudioCodes MP-114/118 VoIP Gateway comes with default network parameters (factory default parameters).
Before you can set up the gateway in the network, you have to change the default IP address to a fixed IP address in your network environment. The unit is configured from a web browser, e.g. Internet Explorer or Navigator. Consult the network administrator to get the correct IP address.
Follow these steps:
Load factory network parameters and reset the username and password to its default settings (username: Admin, password: Admin) by pressing the reset button at the rear of the AudioCodes MP-114/118 unit for minimum 6 seconds.
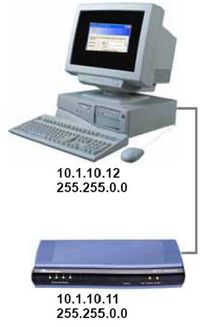
- The VoIP Gateway will now get the IP address 10.1.10.11, submask
255.255.0.0.
Change the IP address of your PC to 10.1.10.12, submask 255.255.0.0.
Connect the LAN port of the PC to the Ethernet port of the Gateway. Use a crossed cable or connect the PC and the VoIP Gateway to a common switch using straight cables.
Start your Web Browser and type '''http://10.1.10.11''' in the URL field.
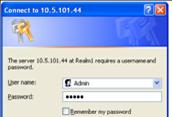
Type in user name Admin and password Admin. (Case-sensitive!)
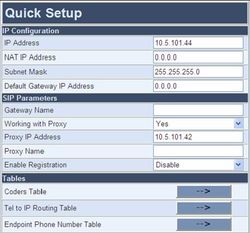
The ‘Quick Setup’ screen opens.

