IP Flush Connections
From Zenitel Wiki
Introduction
The table below is an overview of the main connectors involved when installing the IP Flush Master Stations.
| LAN | 10/100 Mbps RJ-45 port for LAN (uplink) connection. Supports PoE (802.3af). Draws power from either spare line or signal line. |
| AUX | 10/100 Mbps RJ-45 ports for auxiliary equipment such as PC and IP camera. |
| Handset Port | RJ11 |
| Headset Port | RJ11 |
| Input/Output | Pluggable screw terminal |
| Extension Unit (IP DAK-48) | RJ45 |
| Local Power | Plugable screw terminal, 19-27 VDC Idle 4W, max. 8W |
Power Supply
The IP Station supports Power over Ethernet (PoE, IEEE 802.3 a-f) where power can be drawn from either the spare line or signal line.
If PoE is not available, the IP Flush Master Station can be connected to a 24 VDC local power supply.
See Related Article IP Flush Master Station Board Connections for local power supply connections.
Network Connection
There are two RJ45 ports on the IP Stations:
- LAN port: for connecting to the network and the AlphaCom XE Audio Server.
- AUX port: for connecting to auxiliary equipment such as a PC or IP Camera.
Handset
- Item number: 1008097100
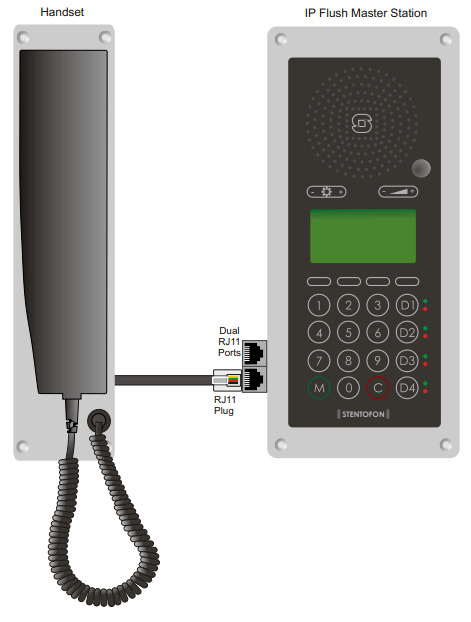
The Handset accessory is available for the IP Flush Master Station, the IP OR Station, and the IP Master Kit.
To connect the Handset:
- Insert the RJ11 plug of the handset into the lower port of the dual RJ11 ports on the lower left of the station.
See Related Article IP Station Board Connections and Indications for Station Board Connections.
See also IP Flush Master and IP Flush Handset compatibility.
Installing the Handset
Headset
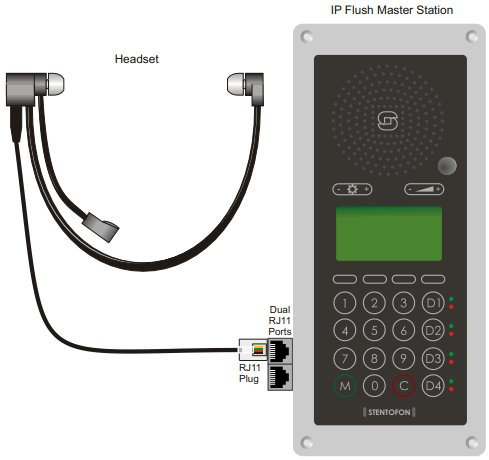
The IP Flush Master, IP OR Station and the IP Master Kit has an RJ11 port for a Headset accessory.
Zenitel does not supply headsets. Use headsets with an RJ11 plug.
To connect the headset:
- Insert the RJ11 plug of the headset into the upper port of the dual RJ11 ports on the lower left of the station.
See Related Article IP Station Board Connections and Indications.
Installing the Headset
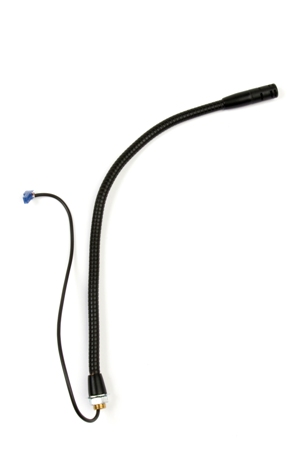
Gooseneck Microphone for IP Master
- Item number: 1008097500
This item applies to the IP Flush Master Station and the IP Master Station Kit.
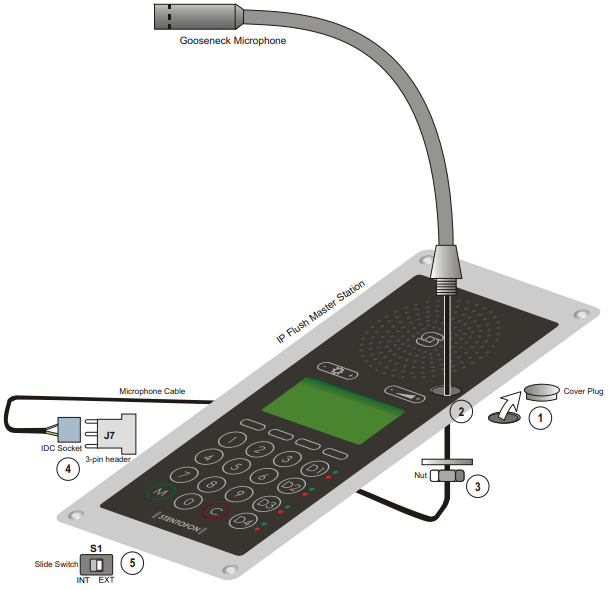
To install the Gooseneck Microphone:
- Remove the cover plug from the opening for the microphone on the front panel.
- Thread the microphone cable through the opening, the lock washer and nut.
- Tighten the nut on the microphone’s threaded stud.
- Insert the microphone’s IDC socket into the upper two pins of the 3-pin header (J7) located at the lower left side of the station. The signal wire (white) should be on the top pin while the ground wire (green) should be on the bottom pin.
- Slide the S1 switch (bottom back of station) to EXT to activate the external microphone function.
See Related Article IP Station Board Connections and Indications.
Installing the Gooseneck Microphone
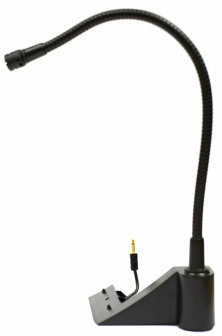
Gooseneck Microphone for IP Dual Display
- Item number: 1007007010
This item applies to the IP Dual Display Station only.
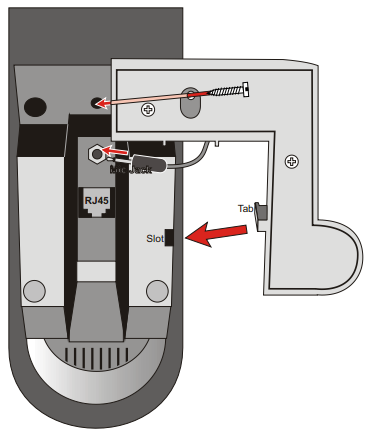
To install the Gooseneck Microphone:
- Flip the station over so that the bottom side is facing up
- Slide the tab on the microphone foot into the slot on the side of the station
- Secure the microphone foot to the station with a screw as shown
- Plug the microphone jack into the socket just above the RJ45 port
The internal microphone is automatically disconnected when the gooseneck microphone jack is inserted.
See also: IP Dual Display station: Noise from gooseneck mic
IP DAK-48 Unit
- Item number: 1008010100
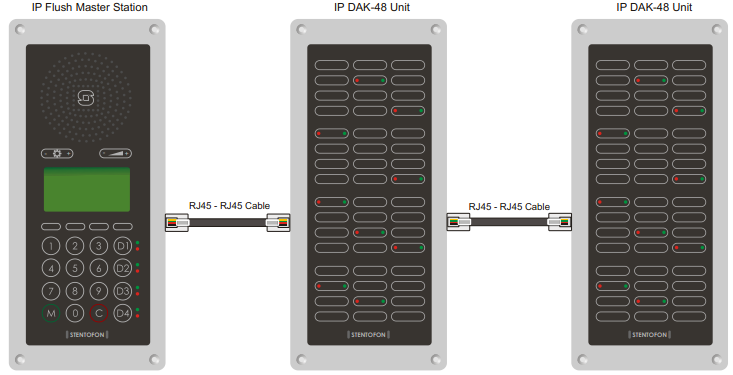
The IP DAK-48 unit expands the IP Flush Master station with an additional 48 Direct Access Keys. This unit can also be used with the IP OR Station and the IP Master Station Kit.
Before installation, disconnect power from the IP Flush Master station
The accompanying RJ45-RJ45 cable is used to install the DAK unit on an IP Flush Master station. This cable has an RJ45 plug at both ends. The two ends are interchangeable. Up to two DAK units can be installed per station. Each DAK unit has two RJ45 ports, one located on the left side and one on the right side.
To install the IP DAK-48 Unit:
- Plug one end of the RJ45-RJ45 cable into the RJ45 port on the right of the station (when the station is viewed from the front).
- Plug the other end of the RJ45-RJ45 cable into the left (when the unit is viewed from the front) RJ45 port on the DAK unit.
To add another DAK unit, plug one end of an RJ45-RJ45 cable into the RJ45 port of
the installed unit and plug the other end into the RJ45 port of the new unit.
Input/Output Connections
There are I/O connection options for all IP Stations, except the IP Desktop Station and the IP Dual Display Station. These I/O connections include:
- 3 digital inputs (P4)
- 1 logical output (TP9)
- 1 relay output (P3)
These connections are used as relay contacts for door lock control and external I/O devices.
For pin settings on the P3 and P4 connectors on the station board, see See Related Article IP Station Board Connections and Indications.


