Milestone XProtect - IC-EDGE plug-in
From Zenitel Wiki

Introduction
The interface between IC-EDGE and Milestone XProtect VMS is through an integration module which is available on the download page of Zenitel Wiki. This article assumes that the reader is
- familiar with setup and operation of the Milestone XProtect VMS
- that the Milestone XProtect VMS is operational, with all to the system connected cameras configured
Only points which are specific to this integration and to it connected intercom stations are described.
Compatibility
- Milestone XProtect Smart Client 2019 R3 and higher
- IC-EDGE: 5.1.3.0 and higher
Licensing
The integration is licensed.
Milestone license
Installing and using the Milestone Video Management Software requires a license.
For demo and test Milestone offers a license-free version - Milestone XProtect Essential++
IC-EDGE
IC-EDGE does not require a specific license for integration.
Installation
This description assumes that the Milestone XProtect VMS has been installed and is running. It is also assumed that the Milestone XProtect VMS has been licensed appropriately.
Prerequisite
The interface module uses .NET 4.6.2. Please make certain that this version of the .NET framework is installed prior to installing the interface module itself.
Milestone Management Client / Smart Client
When installing (or uninstalling) the plugin all Milestone Clients (Management Client and Smart Client) must be closed.
Plugin Installation
The name of the installation file is VS.Milestone.Plugin.x.x.x.x.exe, where x.x.x.x is the version number. Double click the exe-file to start the installation procedure. Click through the installation option screens, making the appropriate choices, and select Install to do the actual plugin installation.
The plugin will installed in the directory C:\Windows\Program Files(x86)\Vingtor Stentofon\VS-MilestonePlugin
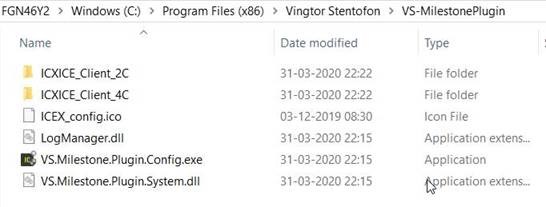
The Plugin comes in two versions: ICXICE_Client_4C and ICXICE_Client_2C. ICXICE_Client_4C has a maximum of four cameras associated to each station, while ICXICE_Client_2C has a maximum of 2 cameras associated to each station.
Plugin Setup
The installation in Milestone VMS is carried out by starting the program VS.Milestone.Plugin.Config.exe:

Select the type of system (ICX/IC-EDGE) and select which plugin version should be installed – 4 camera, 2 camera or both. Press “Apply” to execute the update. The program can also be used for changing system type in which case you press “Load” – makes the system change – and press “Apply”.
- ICX - Select ICX also if the system to be integrated is AlphaCom XE (in the rest of this article only reference will be made to ICX, but the operation is the same for AlphaCom XE)
- IC-EDGE - Selects IC-EDGE system
Milestone XProtect Smart Client
The Milestone XProtect Smart Client is started in the following way:
- Insure the three servers - management, event and recording - are up running (the recording server is only necessary if camera is used). This can be checked by viewing the task bar. All icons should be shown with a green indicator.

- Click on icon
 and wait until the following picture will be shown:
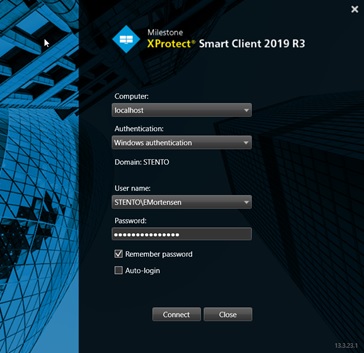
Press “Connect” and wait until the Milestone XProtect Client is started.
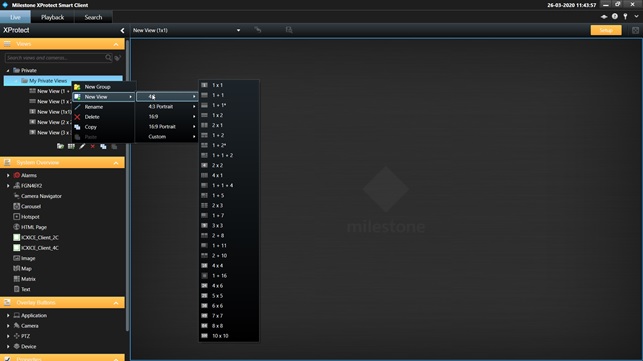
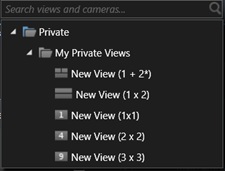
Ensure the “Setup” button in upper right corner so it is turned on with orange background as shown. The Milestone VMS is now in setup mode. It is now possible to define different views with different partitioning (split). For test it would be appropriate to create a view (1*1) and (3*3) (see picture above).
Select the (3*3) view and drag and drop the “ICXICE_Client_2C” plugin onto the view.
Select the (1*1) view and drag and drop the “ICXICE_Client_4C” plugin onto the view.
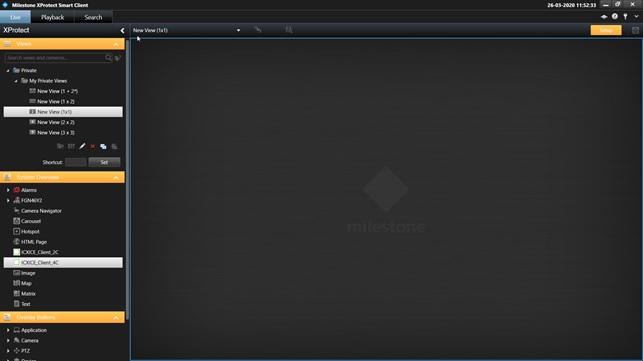
Press the orange "Setup" button.
You may push “<” in the panel ![]() to hide the left side panel.
to hide the left side panel.
You can easily switch between views by activating the “v” in the panel. ![]() and select the desired view from the list:
and select the desired view from the list:
The ICXICE-Client is now in setup mode. Switching between “Setup” and “Operation” is done by single left click on the icon ![]()
The ICXICE-Client options are configured by pushing the “Option” button when the client is in setup mode.
IC-EDGE - Configuration
It is assumed that the Milestone XProtect Smart Client is configured to run in IC-EDGE mode.
- Start the Milestone XProtect Smart Client
- Click the IC-EDGE-icon if the client is not running in setup mode.
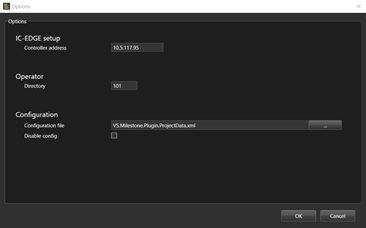
Make the changes as required in the Options-dialog and click OK to save the changes.
IC-EDGE setup
- Controller address - This is the IP-address of the Edge Controller
Operator
Enter the directory number of the station which will be used by the operator.
ITSV-1 as operator station in IC-EDGE
The ITSV-1 is a Vingtor-Stentofon SIP telephone.To be able to use it as an operator intercom in an IC-EDGE system, the following setting must be made:
- Log in into the ITSV-1 web page (default credentials: admin/alphaadmin)
- Navigate to SIP Settings related to the account that is used to connect to IC-EDGE.
- Make the setting as indicted in the picture below
- Navigate to Account/Account 1/SIP Settings and make the following settings:
- Register Expiration (m): 1
Configuration
Configuration file
All nodes and all stations can be auto-discovered. This information, together with settings related to operation and camera association is stored in an XML-file. By selecting an already existing file (in case the configuration has been done for a different operator already) it is not necessary to do the same task multiple times.
Simply do all configuration for one operator, and store the resulting file VS.Milestone.Plugin.ProjectData.xml in a location which can be reached by any operator workstation. Then simply point to this file every time a new workstation is configured.
Disable config
Setting this will disable the possibility for users of the Smart Client to make changes to the configuration. Configuration mode will not be available anymore. To provide access again:
- Navigate to the file VS.Milestone.Plugin.ConfigData.xml, normally located at C:\Program Files\Milestone\MIPPlugins\ICXICE_Client and edit it; Find the line <DisableConfig>true</DisableConfig> and change true to false; Save the file.
Explore
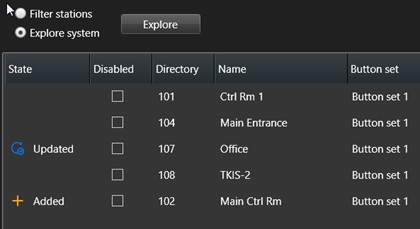
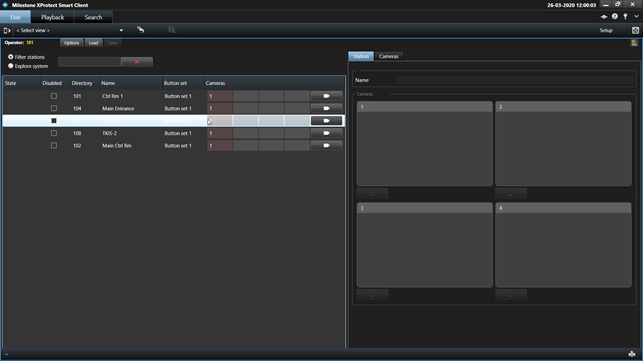
Select the radio-button Explore system and click Explore. All configured stations will be discovered and listed with directory number as defined in the Edge Controller. Newly discovered stations are indicated with +Added, station of which the name has changed since last discovery are indicated with Updated.
Station configuration
Cameras

Up to 4 cameras can be assigned to each station. These cameras can be displayed on an incoming call from that station or during a conversation.
To assign cameras, click on the TAB Cameras. Select a camera and drag/drop that camera onto a camera pane icon to the right of the station name with which the camera should be associated. A number will appear inside that camera pane icon, this number is the logical ID of that camera within the Milestone VMS.
To remove the camera association, right-click on the camera pane icon and select Remove camerax ..., where x is related to the camera pane number for that station.
Actions

]
Each discovered station gets by default Button set 1 assigned to it. This button set consists of a single button which gives the possibility to cancel an ongoing conversation with the operator. If it is not required to cancel conversations from the GUI for specific stations, then the button set can be removed for those stations:
- Select the button set for the specific station and right click
- Select Button set >
- Select Remove
Save and Load

When the configuration has been completed, click Save. The Save-button is enabled whenever any changes (not options) have been made. Options are saved when OK is pushed from within the menu.
If during configuration it is necessary to go back to the current setup click Load; this will undo all configuration changes which have not been saved yet.
Switch between configuration mode and operational mode
To change between operational mode and configuration mode, right click the IC-EDGE icon in the top right corner of the view ![]()
IC-EDGE - Operation
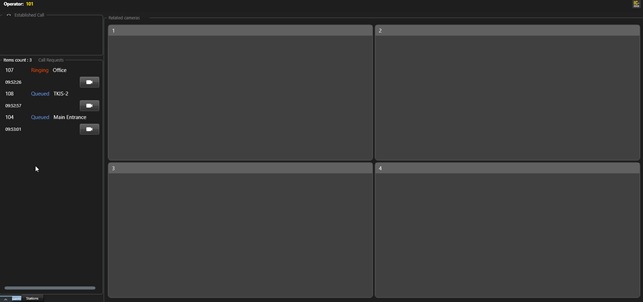
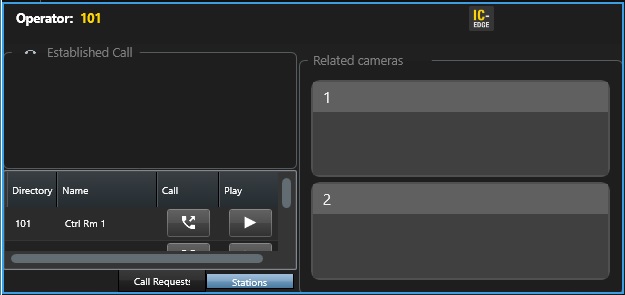
The main TAB in operational mode is the Call Requests-TAB. All call requests are listed in order of priority in the Call Requests-list; the time when the call request entered the list is shown below the station identification. If a station has 1 or more cameras associated with it, a camera-symbol will be shown; click on the symbol to display the camera(s) in the display pane(s). By double clicking on the title bar of a display pane it is possible to expand it; double click again to shrink to the original size.
An established call is shown in the top section of the TAB. A timer shows how long the conversation has been going on. The cameras are displayed immediately when the call is accepted. This display can be overridden by clicking on a camera-icon in the call request list; return to the cameras associated with the established call by clicking the icon in the established call pane; this icon is only available if there are cameras associated with the station in conversation.
The Stations-TAB allows selection of station for directly calling, or for selecting cameras associated with them. Note that in this screen the 'Play'-button is available even if there are no cameras associated with the station.
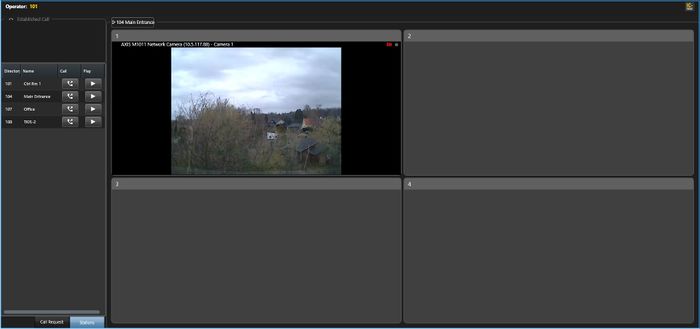
In case an enlargement of a view is required (for instance in a 3*3 view) - double left click on the view will enlarge the screen picture to full size. Return to original size - double left click on view again. This could for instance be appropriate when initiating an outgoing call from the "Stations" TAB in a 3*3 view (see picture below).
