Honeywell Pro-watch - ICX-AlphaCom integration
From Zenitel Wiki
Introduction
The integration between ICX or AlphaCom and the Pro-Watch from Honeywell is via the MPC protocol.
Pro-Watch supports both serial and IP data connections. AlphaCom also support both methods, while in ICX one must use an Ethernet to Serial Converter if serial data is needed.
Licenses
- When used with the ICX System, the following license is required in the ICX in order to enable the MPC protocol: 1002602400 - ILI-IF Interface enabling
Capabilities
- Once the ICX/AlphaCom has been defined in Pro-Watch, all individual intercom stations can be defined and be put onto graphical maps.
- Intercom stations can be associated with Pro-Watch workstations, allowing operators to set up calls directly from the workstation.
- Remote intercom stations (normally sub-stations) can be associated with logical devices such as doors. A call can then be made via for instance a right-click on the door icon. Intercoms may also be called from the Alarm Monitor, see the Pro-Watch Software Suite User Guide for more details.
- Intercom station statuses such as calls between stations, or canceled calls are shown in an event viewer. The ICX/AlphaCom produces more events than are required in a specific installation, it is, therefore, possible to select the events of interest during commissioning, see the Pro-Watch installation guide for details.
- All intercom calls, events and alarms that report into Pro-Watch are stored in the system database for future audit trail and reporting capabilities.
ICX System Configuration
Use AlphaPro, the standard ICX programming tool to enter the parameters to enable communication between ICX and Honeywell Pro-Watch.
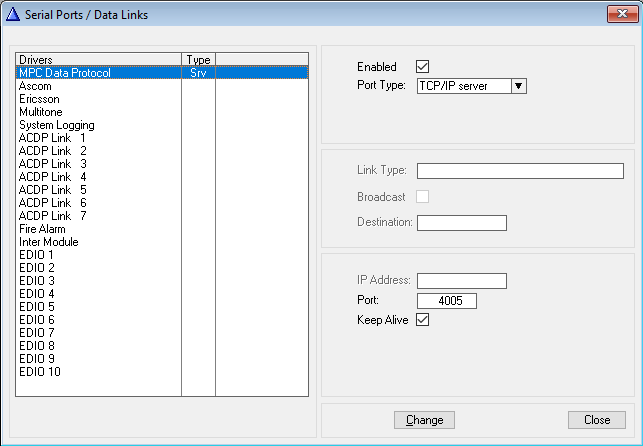
- Go to Exchange & System > Serial Ports and set the following parameters:
- MPC Data Protocol
- TCP/IP server
- Enter a Port number
- In the screenshot, port 4005 is used as an example.
Use a web browser to log into the ICX webserver, (default username/password = admin/alphaadmin)
- Select System Configuration > Filters
If the port is not in the list yet, use Add Filter to define it. In the above screenshot, it has been defined with the name Honeywell but any meaningful name can be given. Enable this TCP port on the relevant Ethernet port (Eth0 or Eth1).
Pro-Watch configuration
The following steps are done in Pro-Watch under Hardware Configuration.
Add a site
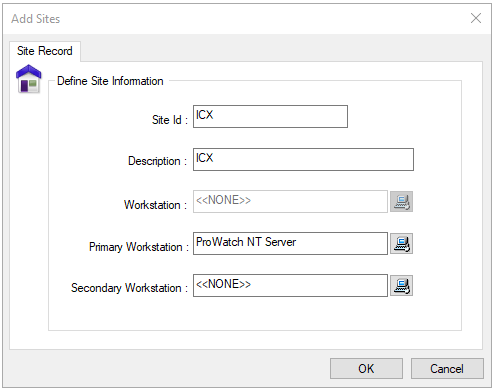
In the Hardware Configuration, create a site. To do this right-click in the Hardware Configuration tree view and select New
> Site to display the Add Sites dialog box.
Next, enter the required information:
- Enter a Site ID, a unique name that identifies the site. You cannot have duplicate Site IDs.
- Enter a Description of the site.
- Click the icon next to the Workstation field and select the workstation that will poll the panel on this site.
- Click the icon next to the Primary Workstation field and select the primary workstation that will poll the panel on this site.
- Click the icon next to the Secondary Workstation field and select the secondary workstation that will poll the panel on this site.
- Click OK. The new site appears in the tree view in the Pro-Watch Hardware Configuration window.
Add and define a channel
Add a channel
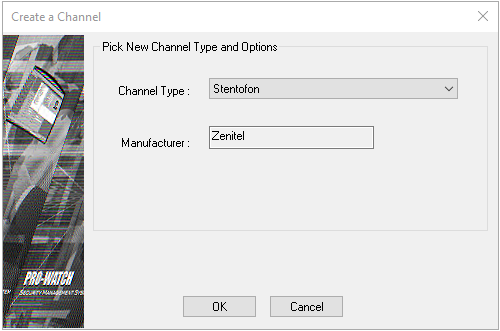
Select the added site in the Hardware Configuration tree view, right-click and select New > Channel. From the dropdown menu set the channel type to Stentofon and click OK to proceed to define the channel.
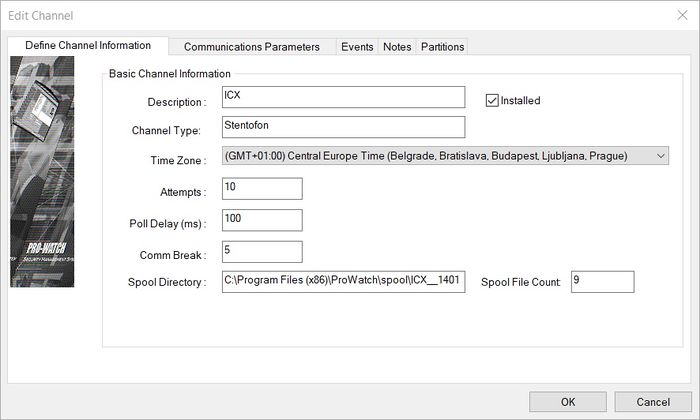
Define the channel
- In the Define Channel Information dialog box, enter an identifying channel description.
- Select the Installed check box. This assures the channel is installed and operational.
- Select a time zone from the drop-down list.
- Enter the maximum number of poll attempts.
- Enter the poll delay interval between each polling. This number is in milliseconds.
- Enter the communications break; the host must receive communication from the device within the specified time or the host will determine the communication as broken.
- The spool directory is automatically created; this is where spool files temporarily reside during a download. The spool directory is created within the Pro-Watch directory.
- Click Next to display the Communications Parameters dialog box.
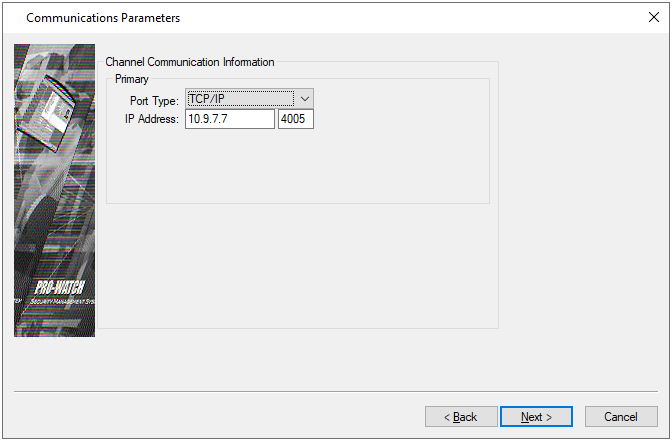
In the Communications Parameters window do the following steps:
- Select a port type. Set the port type to TCP/IP.
- If serial port is used for the integration, the port type should be set to Hardwired
- In the IP address field, enter the IP address of the ICX-Alphacom and the TCP port defined in the web interface in the next field. Click Next to display the Partitions dialog box.
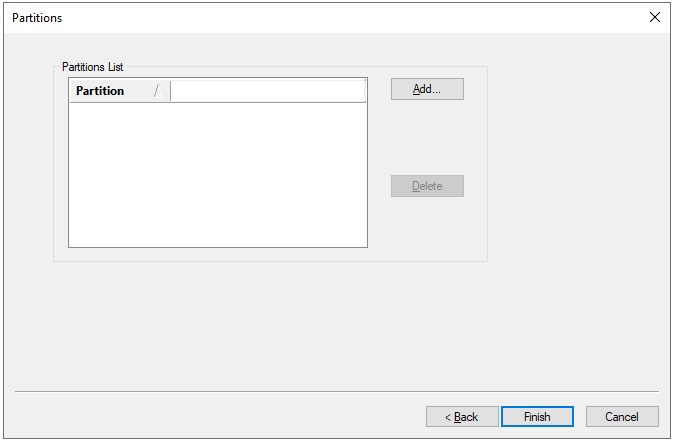
- Add a partition if needed.
- Click Finish on the Partitions dialog box to complete adding the channel. A warning message appears notifying you to add the channel to the appropriate routing group
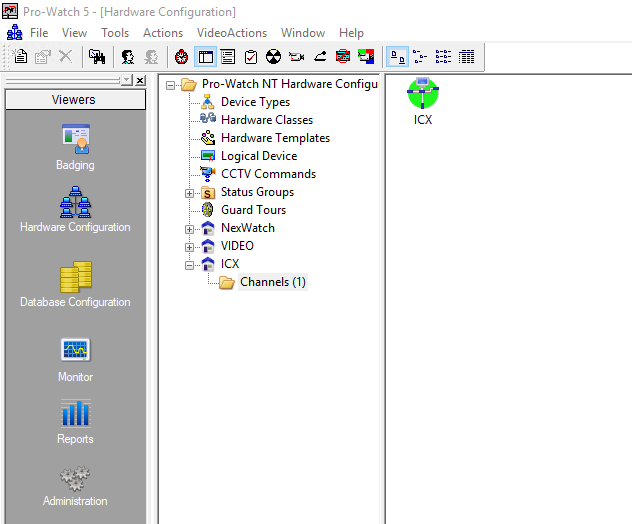
If the connection is successful, the channel icon will be green.
Add intercom
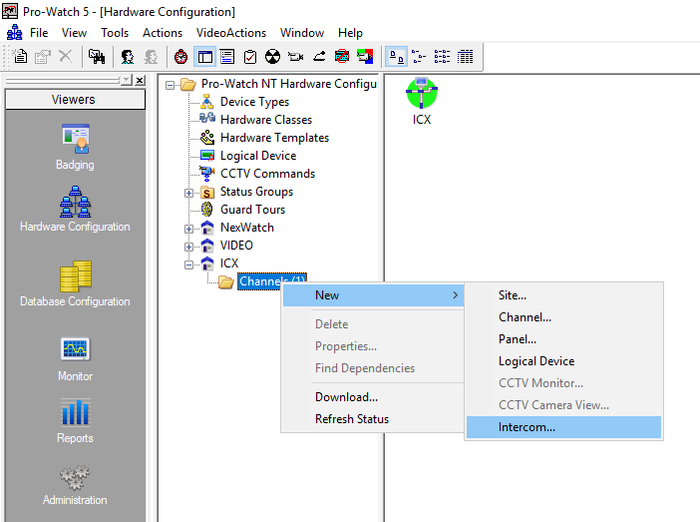
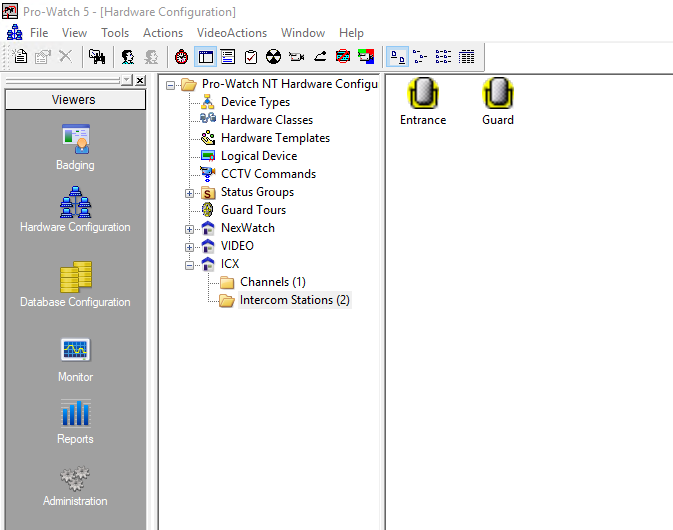
To add the intercoms in the system, in the hardware configuration tree view, right-click on the created channel
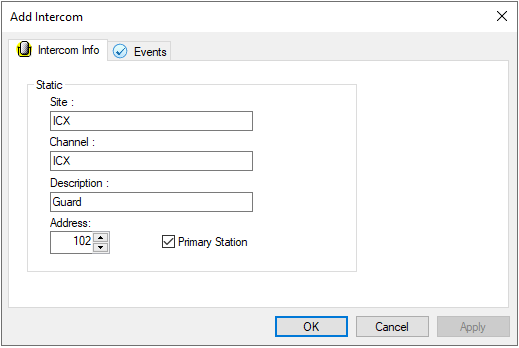
Enter the description for the intercom and in Address field enter the Directory number assigned to that intercom in the ICX-Alphacom If the intercom is to be a primary station, enable the primary station check box and click OK. In order for an intercom to be assigned to a workstation, the Primary station checkbox must be enabled. When an intercom is assigned to a workstation, that intercom allows a dispatcher to communicate with an individual at an access point.
Repeat the steps above for all intercoms that need to be added.
Assign an intercom to a workstation
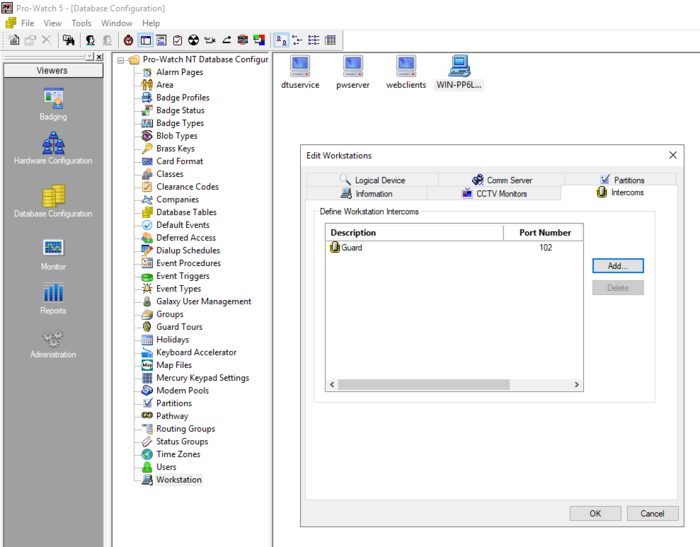
In the Pro-Watch Database Configuration tree list, click Workstations to display in the right pane the icons of currently-configured workstations. Right-click the workstation you want to edit, and select Properties. The Edit Workstations dialog box appears.
- Go to Intercoms tab.
- Click Add to see the list of primary stations.
- Select the station that should be assigned to the selected workstation and click OK
- Click OK to save the information
Intercom controls
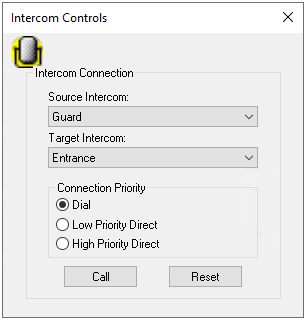
The Intercom Controls dialog box allows you to define a source and target intercom and initiate a connection between the two. Intercom controls also allow you to assign a connection priority.
To display the intercom control dialog box, click the intercom icon marked on the image bellow
In the intercom controls window do the following steps:
- Select the source intercom. The source intercom must be a primary intercom. You must add the primary intercom to the workstation before the drop-down list will be populated.
- Select the target intercom. The target intercom can be any other intercom in the system.
- Select the connection priority. Dial priority is the standard priority of a call. Low Priority Direct and High Priority Direct can be used to override calls that are in progress, which are of lower priority.


