Adding TCIV ONVIF camera to Avigilon Control Center
From Zenitel Wiki
This guide describes the configuration of Avigilon Control Center 6 (6.8.4.0). It is assumed that Avigilon Control Center has already been setup and is operational.
Add TCIV camera and start video
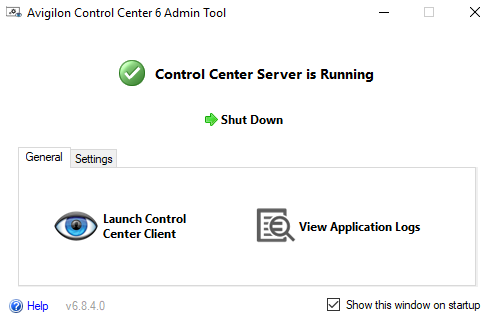
- Open Avigilon Control Center Admin Tool and click on Launch Control Center Client
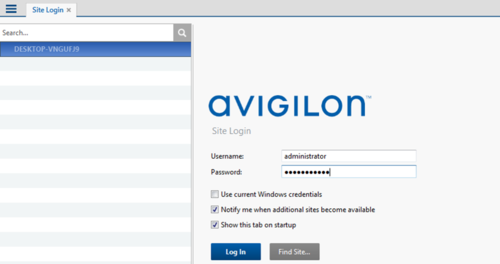
- Once the Client application is opened, select site on existing PC and enter credentials as used in your system.
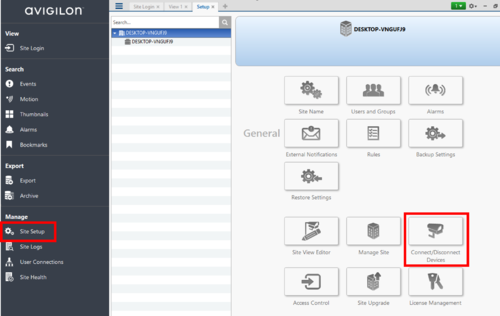
- From the side menu, choose Site Setup option and then click on Connect/Disconnect Devices:
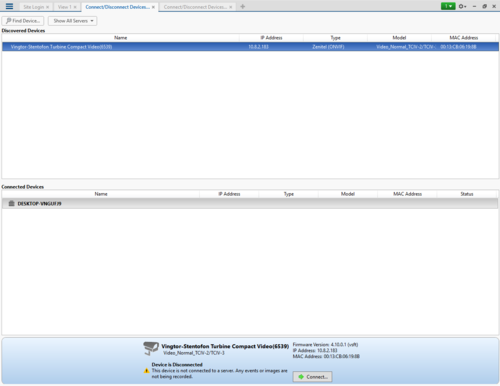
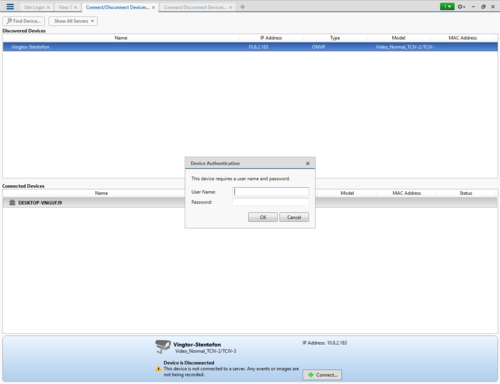
- The Discovery window will open and automatically find all ONVIF compliant devices. Click on the device and then click Connect... in order to connect device with the Avigilon server.
- If the device requires authentication (as all TCIV units do), Avigilon will prompt for username/password authentication. Default for TCIV is admin/alphaadmin.
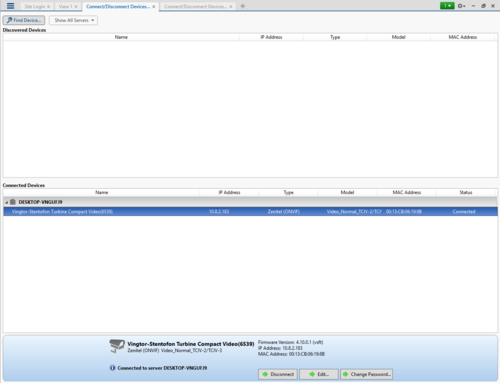
- Once device is connected to server it will show following status:
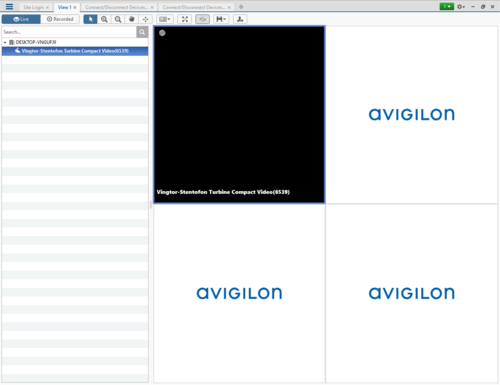
- Open the Site View Editor and all connected cameras will be listed there. Simply drag and drop cameras to the view, and you will be able to see the stream from camera.
Configure video stream settings
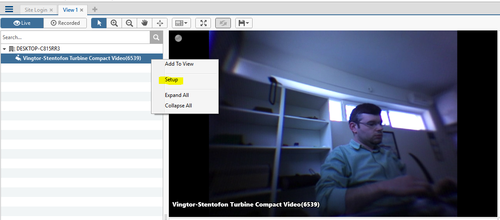
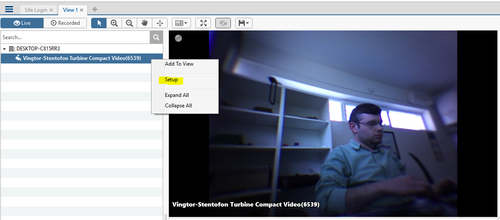
- Access the Setup menu of the device by right clicking on the device, then select Setup.
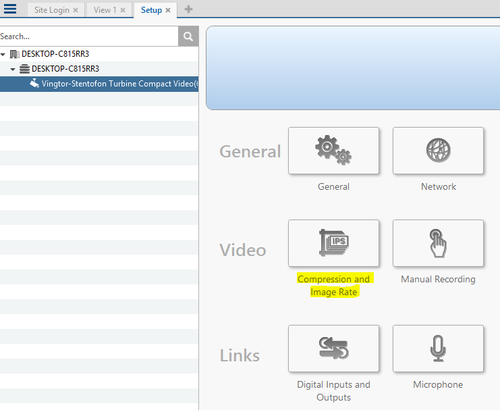
- Under Video click on the Compression and Image Rate:
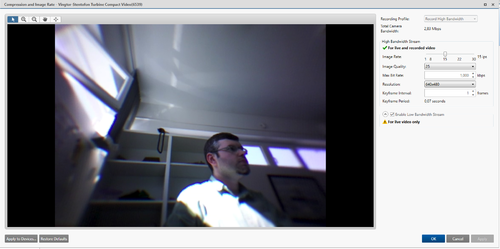
- Change the desired video settings and click on "Apply" when done. If you click on "Cancel" the previous settings will be restored.
Configure and start audio stream

|
This feature is only available in Standard and Enterprise license from Avigilon, Core license does not have this option. Audio playback is also not working with demo license. |
- Access the device Setup menu by right clicking on device and selecting Setup.
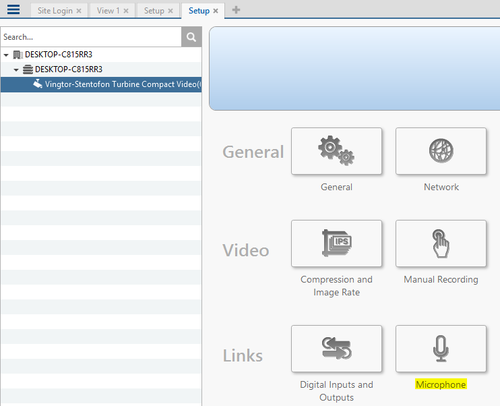
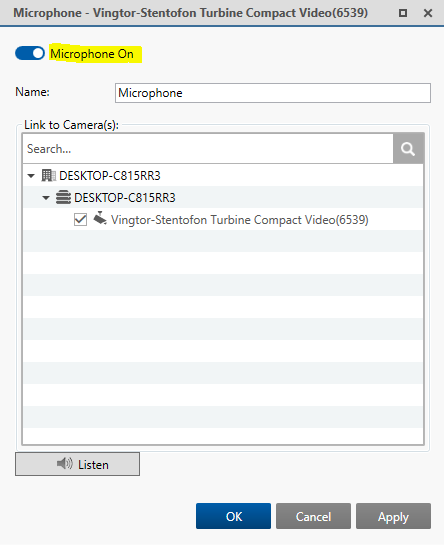
- Under Links click on Microphone:
- Ensure that the Microphone option is set to On (it's set to Off by default), click "Apply" and close the setup.
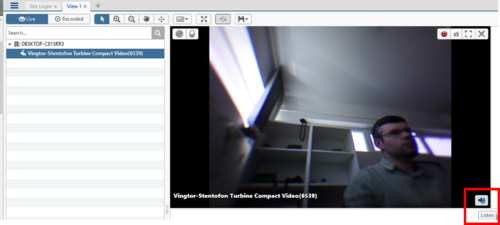
To open the audio stream, the device must be added to the main Avigilon screen and stream should be running. Hover over the stream and the Listen icon should appear in the lower right corner. Click on it to activate audio.
Configure and operate relays

|
This feature is only available in Standard and Enterprise license from Avigilon, Core license does not have this option. |
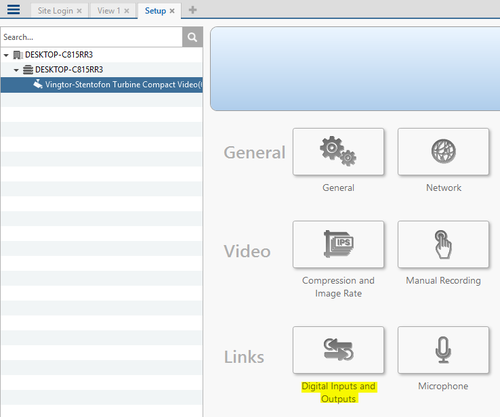
- Access the device Setup menu by right clicking on device and selecting Setup.
- Under Links click on the Digital Inputs and Outputs.
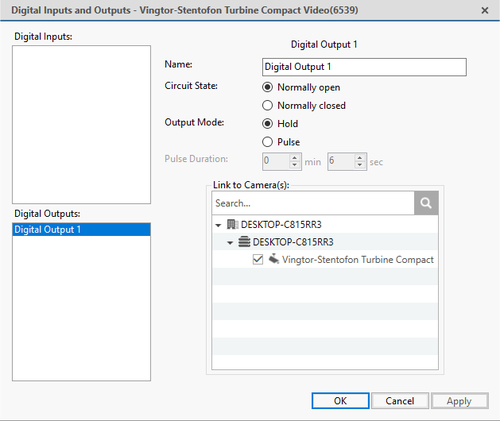
- Configure the relay with desired behavior, consult Avigilon manual/help for detailed description of the options available. When done click on Apply and close the setup.
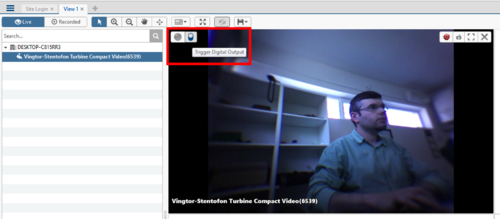
- To operate the relay, the device must be added to the main Avigilon screen and stream should be running. Hover over the stream and the Operate relay icon should appear in the upper left corner. Click on it to operate the relay.

