Difference between revisions of "Avigilon Control Center - Adding ONVIF compliant Zenitel devices"
From Zenitel Wiki
Lennert.werf (talk | contribs) |
Lennert.werf (talk | contribs) |
||
| Line 110: | Line 110: | ||
<br style="clear:both;" /> | <br style="clear:both;" /> | ||
| − | [[Image:Avigilon step | + | [[Image:Avigilon step 6.png|thumb|left|800px|Disconnect the device]] |
<br style="clear:both;" /> | <br style="clear:both;" /> | ||
| Line 116: | Line 116: | ||
Next we select what has to happen when the rule is activated. | Next we select what has to happen when the rule is activated. | ||
In this example we choose "Activate digital output" | In this example we choose "Activate digital output" | ||
| + | |||
| + | [[Image:Avigilon step 8.png|thumb|left|800px|Disconnect the device]] | ||
| + | <br style="clear:both;" /> | ||
And again if we click the blue link you can specify the output to be triggered. | And again if we click the blue link you can specify the output to be triggered. | ||
| + | |||
| + | [[Image:Avigilon step 9.png|thumb|left|800px|Disconnect the device]] | ||
| + | <br style="clear:both;" /> | ||
The third step is to specify if a condition has to be met for the rule to be active. | The third step is to specify if a condition has to be met for the rule to be active. | ||
| + | |||
| + | [[Image:Avigilon step 10.png|thumb|left|800px|Disconnect the device]] | ||
| + | <br style="clear:both;" /> | ||
And the last step is to specify a name, description and a schedule for the rule to be active. | And the last step is to specify a name, description and a schedule for the rule to be active. | ||
| − | + | [[Image:Avigilon step 11.png|thumb|left|800px|Disconnect the device]] | |
| + | <br style="clear:both;" /> | ||
=== Further Information === | === Further Information === | ||
Revision as of 14:20, 26 September 2022
This guide describes the process of adding Zenitel devices to Avigilon Control Center. It is assumed that Avigilon has already been setup and is operational and the user is familiar with the operation.
Contents
Supported Devices
Video Intercoms
- Turbine Video intercom and kit: TCIV+
- Turbine Video kit: TKIV+
- Turbine Video intercom TCIV (obsolete)
Non-Video Intercoms
- Turbine Compact series TCIS
- Turbine Industrial series TFIE
- Turbine kits TKIE and TKIS
- EX intercoms series TFIX
- V2 Master Stations
- IP Speakers
Pre-requisites
- VS-IS 6.4.3.0 must be installed in the Zenitel Device
- The latest Avigilon Control Center must be installed.
Configuration in the Zenitel Devices
Additional ONVIF configuaration is available from the Web Interface of the device:
- To receive information about Call Button pressed, "Report DAK as Digital Input in ONVIF" option must be enabled in the Zenitel device prior to discovery.
- To receive information about Station Call Events (In Conversation, Ringing, In call queue), the "Report station events as Digital Input in ONVIF" must be enabled in the Zenitel device prior to discovery.
Add and configure Zenitel device
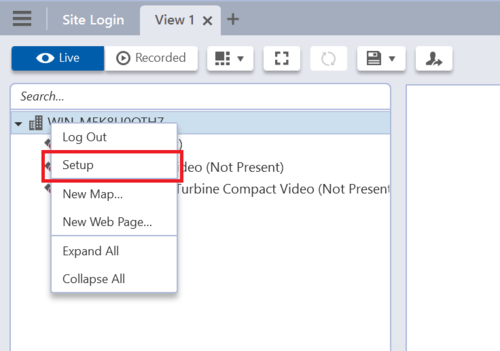
- Open Avigilon Control Center Client and connect to the site.
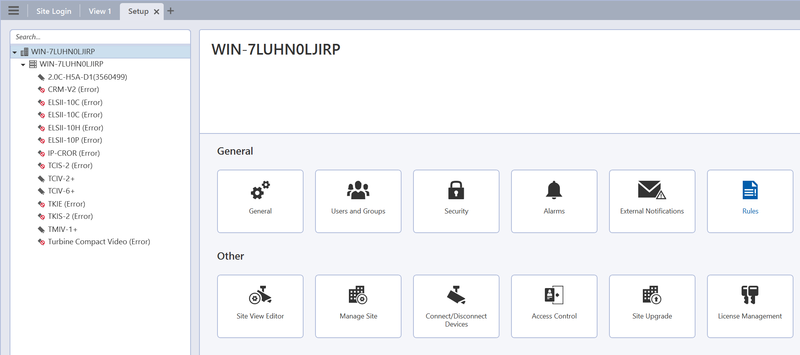
- Right click on the site in the top level of the tree on the left side, select Setup.
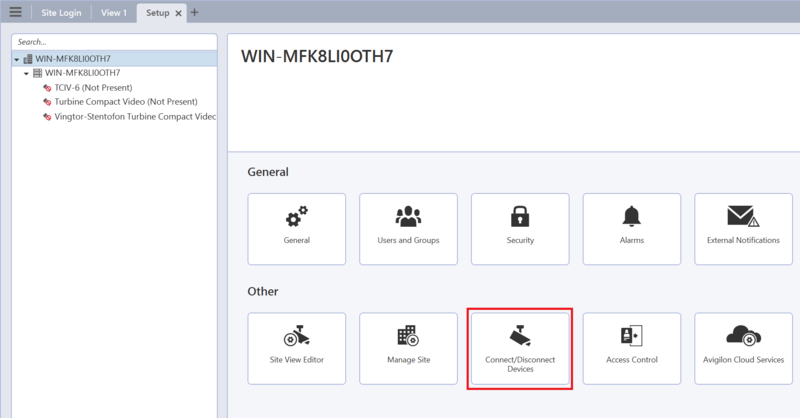
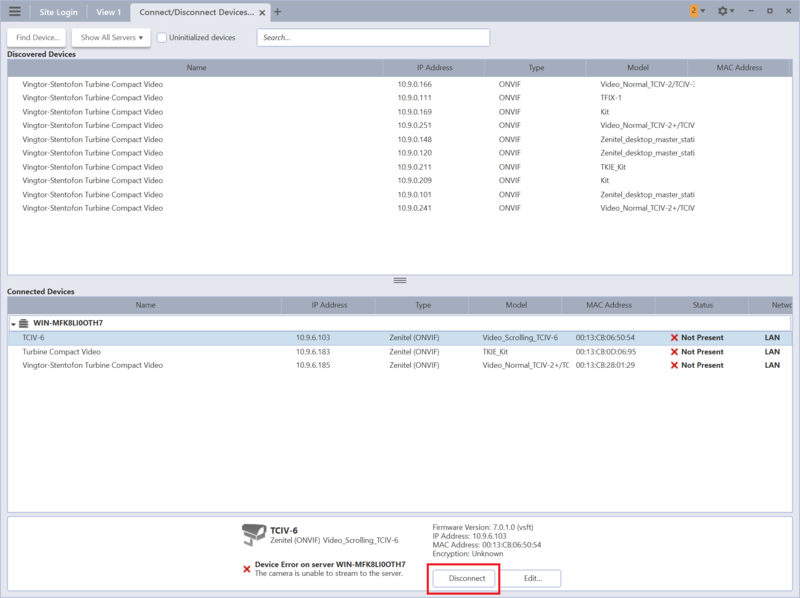
- Click on the tile Connect/Disconnect devices, this will open a new window.
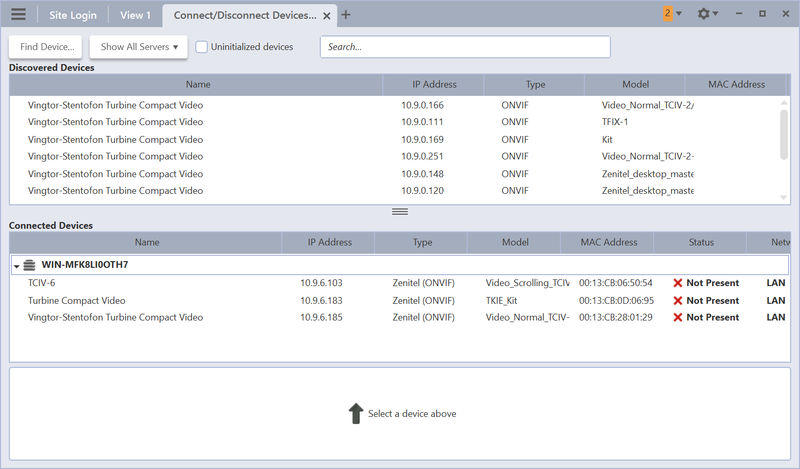
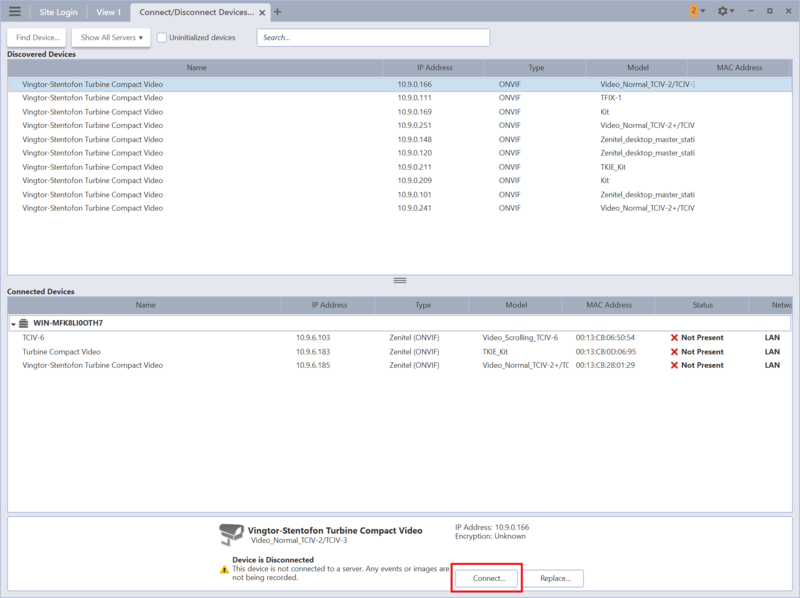
- In the top part of the new window you will find a list with the auto discovered devices.
- In the bottom part of the window you will see the list of devices already connected to the server.
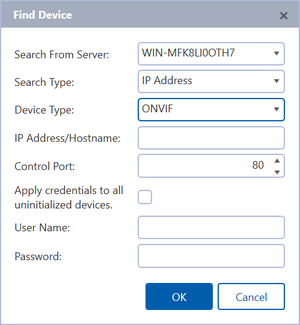
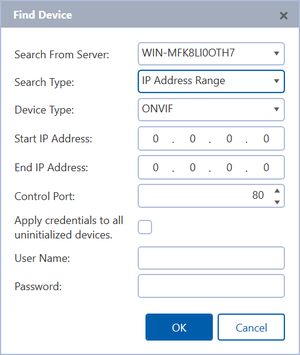
- If your device is not in the discovered devices list you can search for it by clicking Find Device....
- In the pop-up set the Search Type to IP Address for a single device or IP Address Range to scan an entire range.
- Set Device Type to ONVIF
- Fill in the remaining fields with the correct information and click OK
To start using the device you have to connect it
- Select the device in the list of discovered devices.
- Click the Connect button at the bottom of the window.
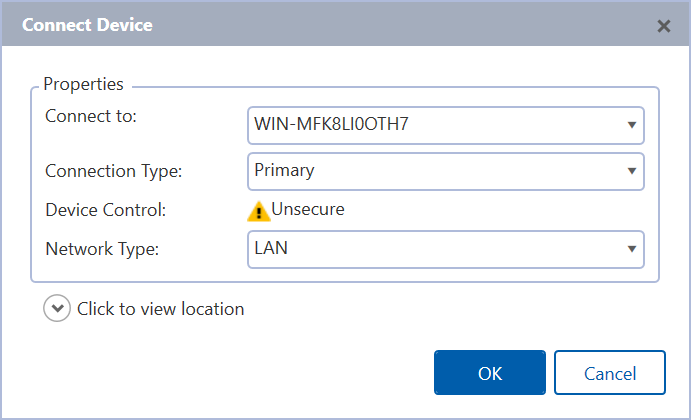
- You will be prompted with a window to define where to connect to, click OK.
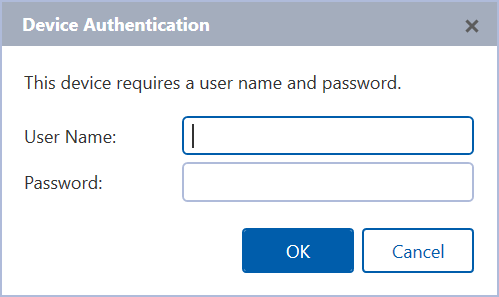
- When prompted supply the credentials and click OK.
To stop using the device and free up licenses you need to disconnect the device.
- Select the device in the list of connected devices.
- Click the Disconnect button at the bottom of the window.
All video, audio and GPIO options are now available in Avigilon Control Center.
Example rule setup
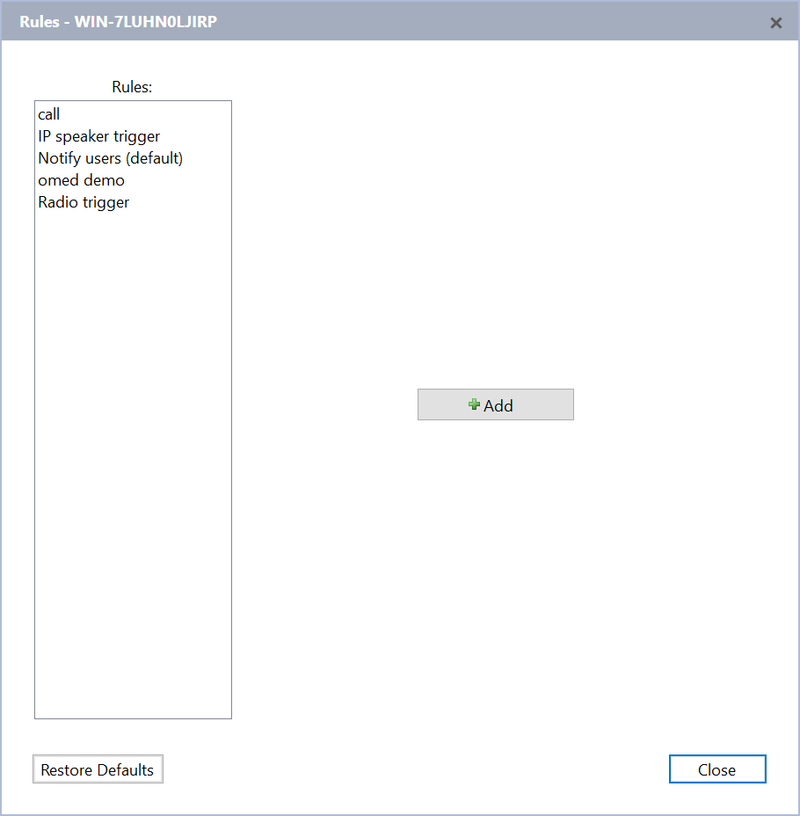
Under setup go to the top level system and click rules.
Click the "Add" button.
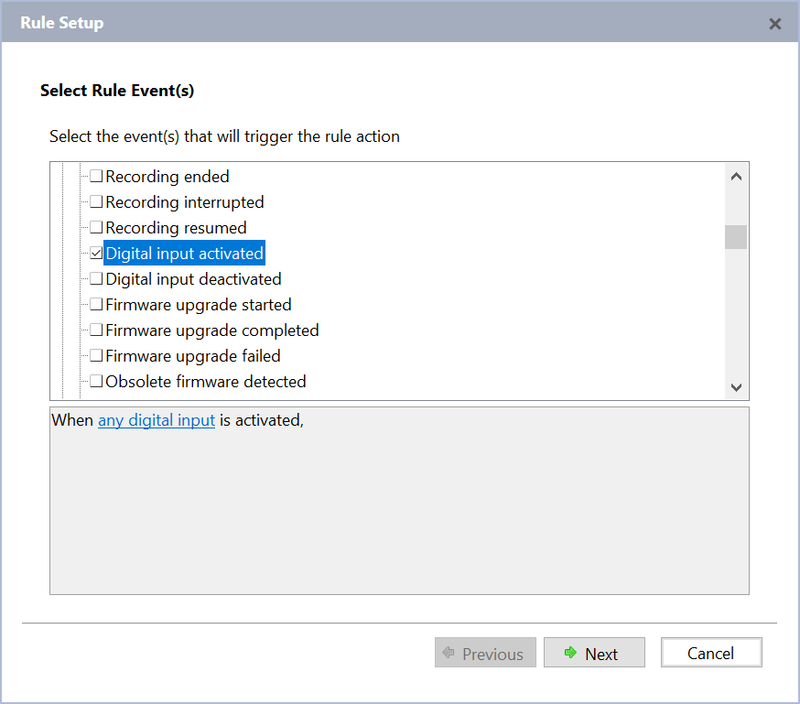
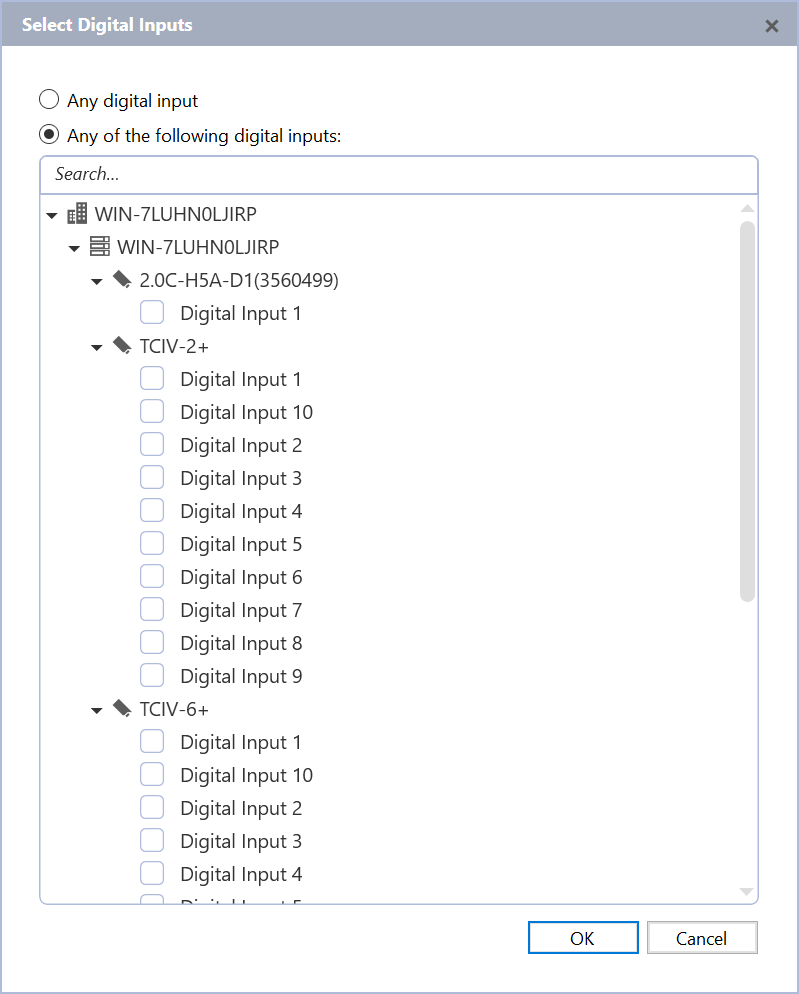
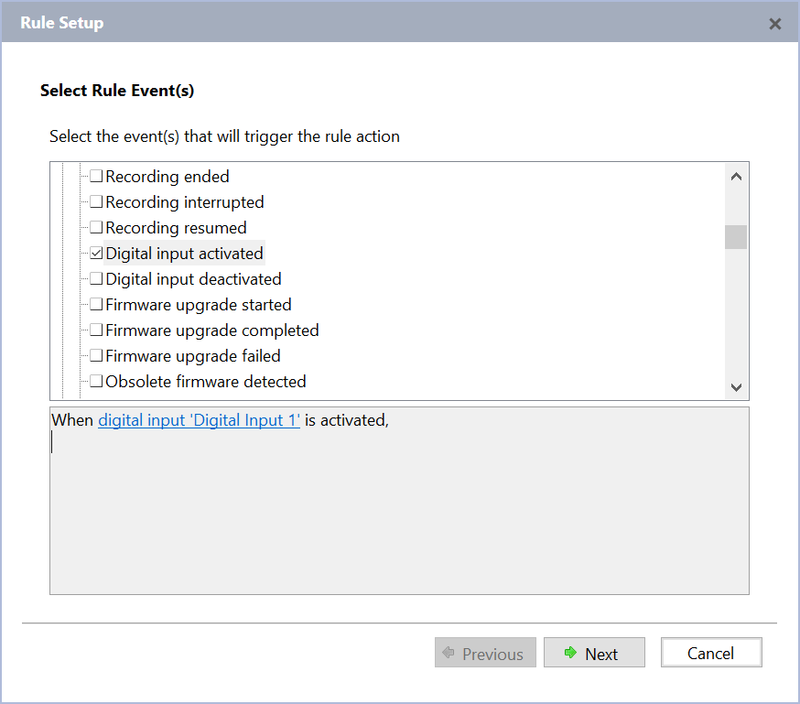
First we select an event to trigger the rule. In this example we choose "Digital input activated"
When you click the blue link you can specify which digital input. Tip: add the "custom keyboard command" for debugging ease
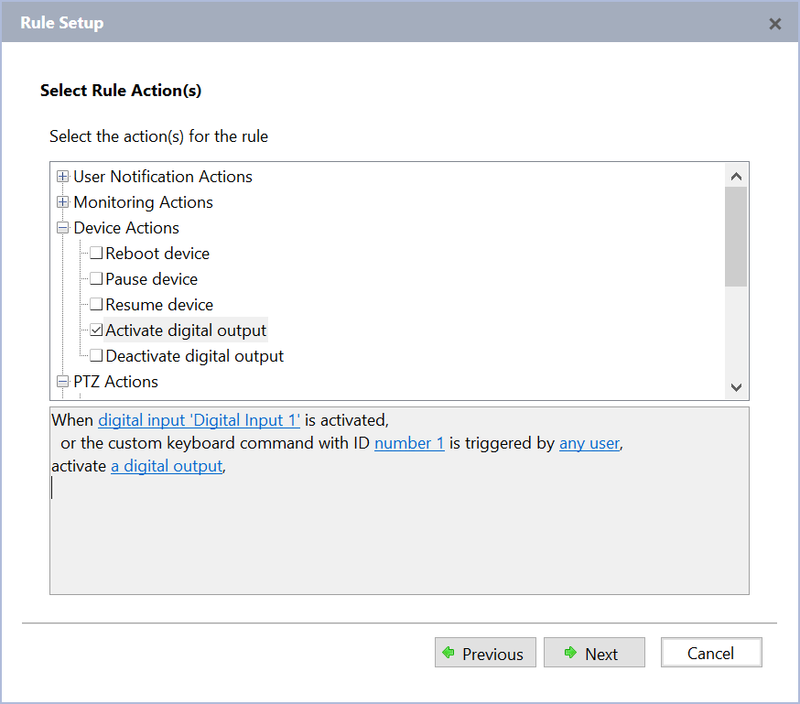
Next we select what has to happen when the rule is activated.
In this example we choose "Activate digital output"
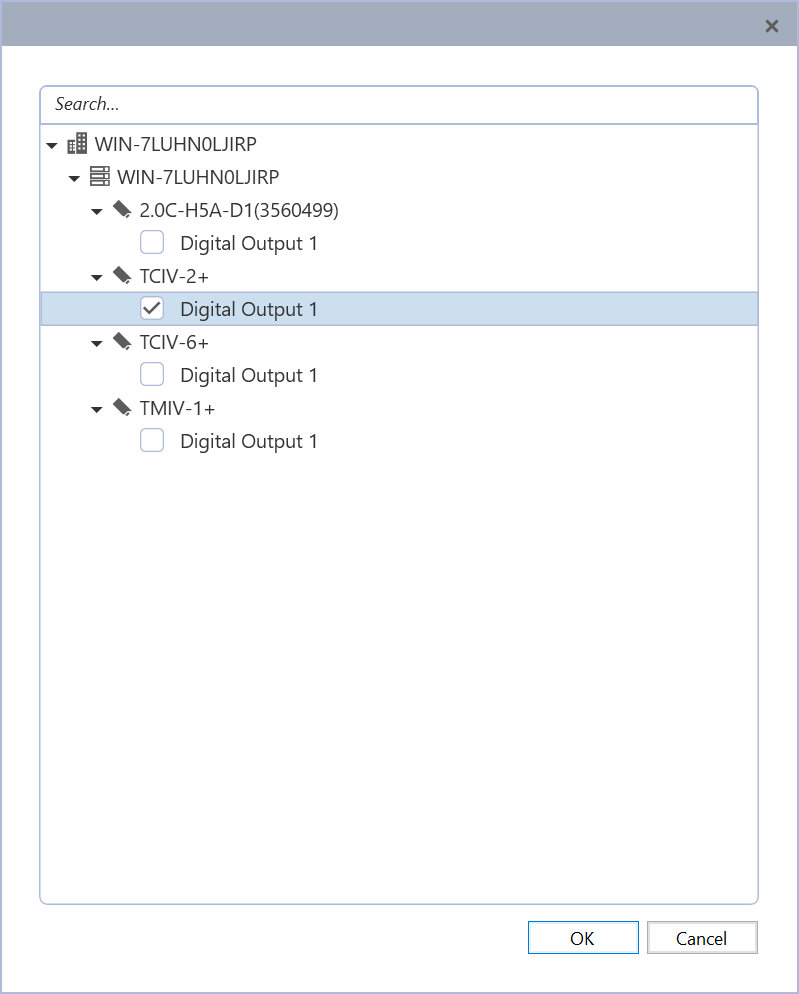
And again if we click the blue link you can specify the output to be triggered.
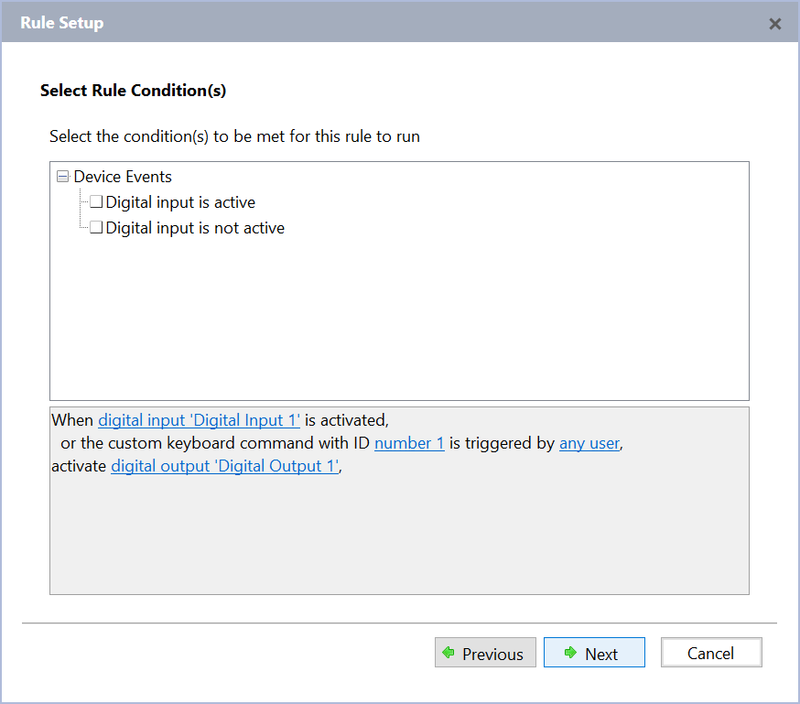
The third step is to specify if a condition has to be met for the rule to be active.
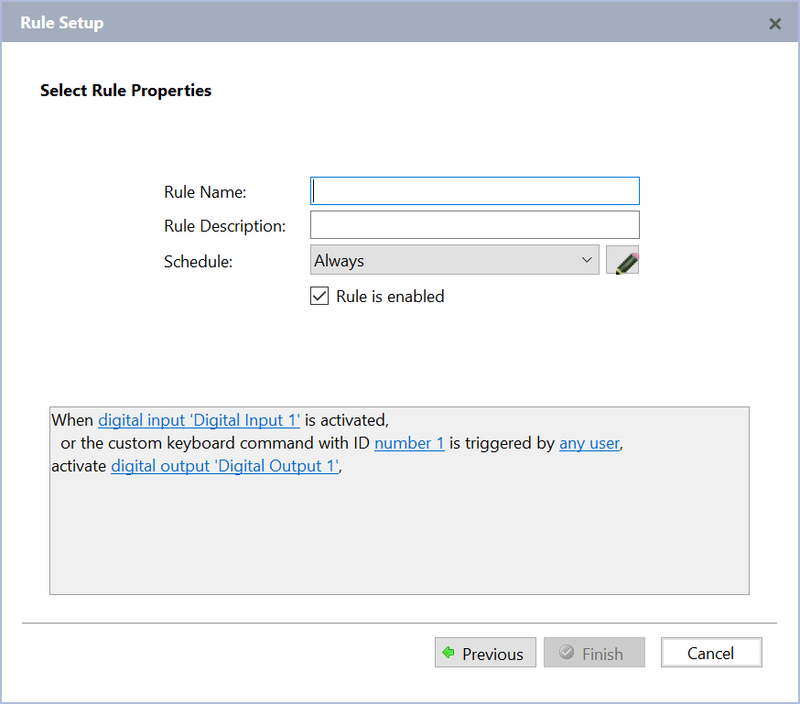
And the last step is to specify a name, description and a schedule for the rule to be active.


