Difference between revisions of "Configuration guide for School IP Intercom - AlphaCom mode"
From Zenitel Wiki
(→Emergency Button) |
(→Emergency Button) |
||
| Line 32: | Line 32: | ||
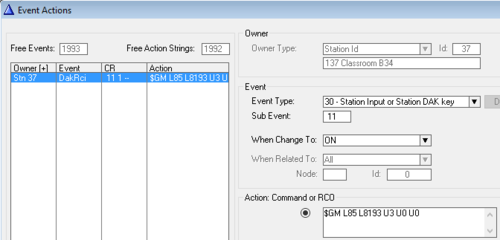
Optionally the emergency button can be configured in the Event Handler, then you leave the DAK table blank. The button press is reported as event 30, subevent 11. | Optionally the emergency button can be configured in the Event Handler, then you leave the DAK table blank. The button press is reported as event 30, subevent 11. | ||
| − | [[File:School IC DAK11 event.png|thumb|left|500px|The emergency button | + | [[File:School IC DAK11 event.png|thumb|left|500px|The emergency button activates alarm message 3 (8193) to group 85, repeated 3 times]] |
<br style="clear:both;" /> | <br style="clear:both;" /> | ||
Revision as of 15:50, 20 March 2017
This article is applicable for School IP Intercom used in AlphaCom mode.
Contents
Keyboard configuration
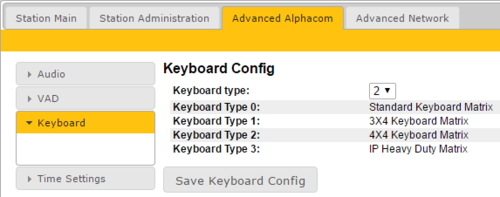
The correct keyboard configuration needs to be set. This is done via the web interface of the station. Log on the the web interface of the station:
- Navigate to Advanced AlphaCom > Keyboard
- Select Keyboard Type = 2
- Press “Save Keyboard Config”
Special Function Keys
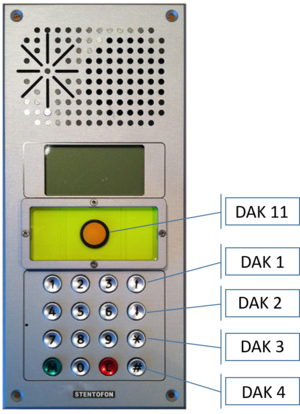
The School Intercom station has some special function keys:
- Emergency Button: DAK Key 11
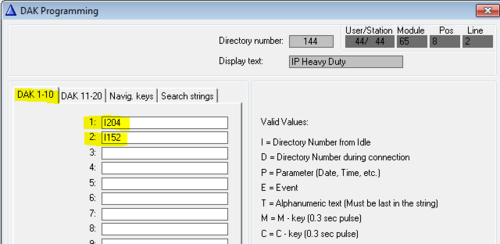
- Volume UP: DAK Key 1
- Volume DOWN: DAK Key 2
- Star key (*): DAK Key 3
- Hash key (#): DAK Key 4
These keys have no function by default, and need to be configured.
Emergency Button
The emergency button is connected to Input 1 on the station PCB, which is reported as DAK key 11.
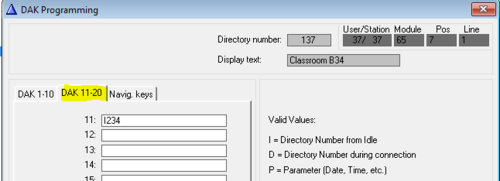
The emergency button is configured from AlphaPro. In Users & Stations window, select the School Intercom from the list box and select the button DAK. Enter the call destination on DAK 11.
Optionally the emergency button can be configured in the Event Handler, then you leave the DAK table blank. The button press is reported as event 30, subevent 11.
Volume UP
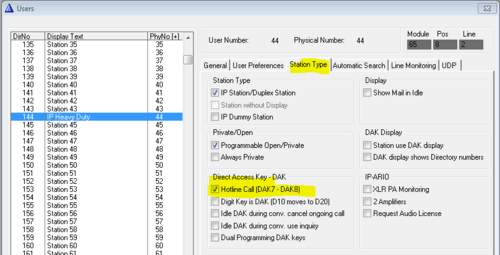
Enable the hotline function by selecting the hotline station in the listbox in Users & Stations, select the Station Type tab, and check the Hotline flagg:
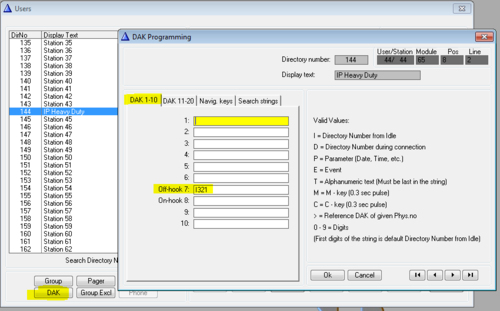
In Users & Stations, select the DAK button, and enter the call destination on DAK 7:
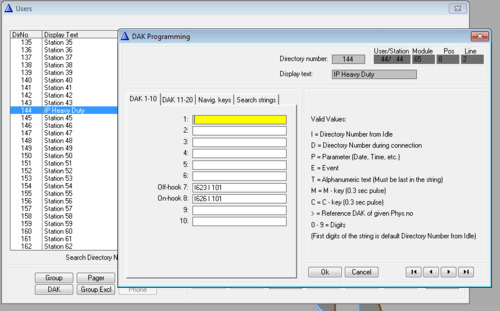
If the hotline call should generate a Call Request instead, enter "I 623 I xxx" on DAK 7, where xxx is the target station. If the Call Request should be cleared when replacing the handset, enter "I626 I xxx" on DAK 8, else leave DAK 8 blank.
Volume DOWN
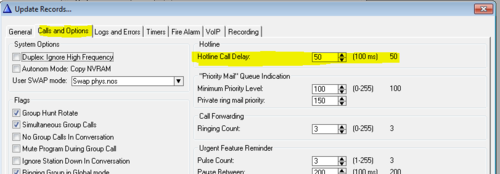
By default there is a 5.0 second delay from the handset is lifted until the call is placed. Often you want the call to be placed immediately. To change the delay time, select Exchange & System, System, Calls and Options.
Star (*) and Hash (#) keys
The Full Keypad models have three Direct Access Keys, D1 to D3, which will trigger DAK key 1 to DAK key 3 in the AlphaCom.
However, the hook switch connected to input 3 will also trigger DAK Key 3. Due to this conflict, button D3 cannot normally not be used.

