Difference between revisions of "ICX-Alphacom Core tcpdump"
From Zenitel Wiki
ZenitelAus (talk | contribs) |
ZenitelAus (talk | contribs) (Tag: Visual edit) |
||
| Line 1: | Line 1: | ||
| − | {{I}}This article describes how to | + | {{I}}This article describes how to use TCPdump to take a packet trace from the ICX-AlphaCom Core Ubuntu environment |
==Prerequisites== | ==Prerequisites== | ||
| − | * File transfer software: WinSCP (version 5.15.3 used in this guide): WinSCP https://winscp.net/eng/index.php | + | *SSH Console software: PuTTY https://www.putty.org/ |
| + | *File transfer software: WinSCP (version 5.15.3 used in this guide): WinSCP https://winscp.net/eng/index.php | ||
| + | *Wireshark: https://www.wireshark.org/ | ||
| − | + | ==Login to the ICX-AlphaCom Core Ubuntu environment== | |
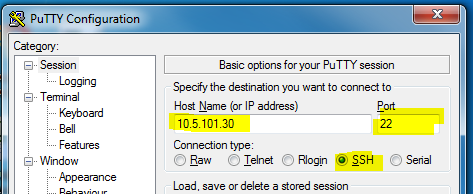
| − | + | Using PuTTY, enter the IP Address of the ICX-AlphaCom Core Ubuntu environment | |
| − | ==ICX-Core== | + | [[File:Putty Linux.PNG|thumb|473x473px]] |
| − | |||
| − | [[File: | ||
<br style="clear:both;" /> | <br style="clear:both;" /> | ||
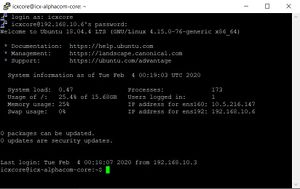
| − | + | Login to the Ubuntu console using the login details created during Ubuntu installation. | |
| − | [[File:ICX | + | [[File:ICX-AlphaCom Core Ubuntu login.jpg|thumb]] |
<br style="clear:both;" /> | <br style="clear:both;" /> | ||
Revision as of 01:18, 4 February 2020
This article describes how to use TCPdump to take a packet trace from the ICX-AlphaCom Core Ubuntu environment
Prerequisites
- SSH Console software: PuTTY https://www.putty.org/
- File transfer software: WinSCP (version 5.15.3 used in this guide): WinSCP https://winscp.net/eng/index.php
- Wireshark: https://www.wireshark.org/
Login to the ICX-AlphaCom Core Ubuntu environment
Using PuTTY, enter the IP Address of the ICX-AlphaCom Core Ubuntu environment
Login to the Ubuntu console using the login details created during Ubuntu installation.
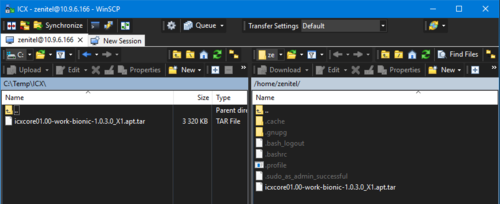
... and copy the ICX-Core installation file from your computer to the virtual machine:
Close WinSCP.


