Difference between revisions of "IP Desktop Station with Video Display - 1408001635"
From Zenitel Wiki
(→Camera settings) |
(→Network settings) |
||
| Line 99: | Line 99: | ||
[[File:IPVideoDesk 8.PNG|thumb|left|500px]] | [[File:IPVideoDesk 8.PNG|thumb|left|500px]] | ||
<br style="clear:both;" /> | <br style="clear:both;" /> | ||
| + | |||
| + | ==System== | ||
| + | * | ||
| + | [[File:IPVideoDesk 9.PNG]] | ||
Revision as of 09:51, 9 May 2014
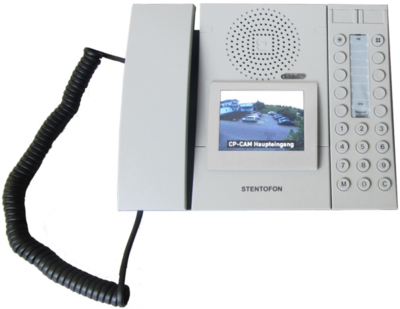
This article provides a detailed step-by step guide to the configuration and programming of the STENTOFON IP Desktop Station with Video Display. Only the Video Display part is handled by this article. for ordinary IP Station configuration please see IP Station Configuration.
Contents
Login
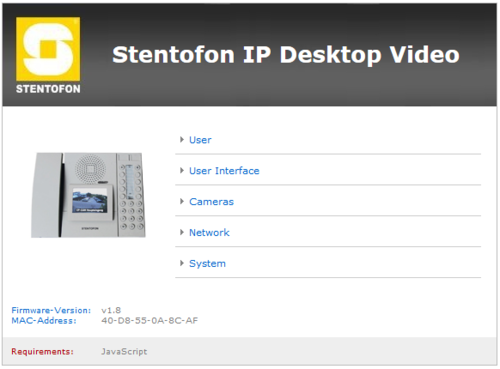
The IP Video Display has an integrated web server which allows users to log in via a standard web browser. In order to login on the IP Video Display for the first time with its default settings, proceed as follows:
- Connect your PC with the switch.
- Connect the LAN connector of the IP Desktop Station to the PoE-switch port.
- Make sure your PC is set in the same address range as the IP camera. Otherwise, there is no access to it.
The default setting has the address range 169.254.1.xxx. Assign your network connection an additional IP address (e.g. 169.254.1.90, net mask 255.255.255.0).
The IP Video Display default IP address is 169.254.1.101.
- Open a web browser
- Enter the default IP 169.254.1.101 in the address bar.
- Enter the user name (default: admin)
- Enter the password (default: alphaadmin)
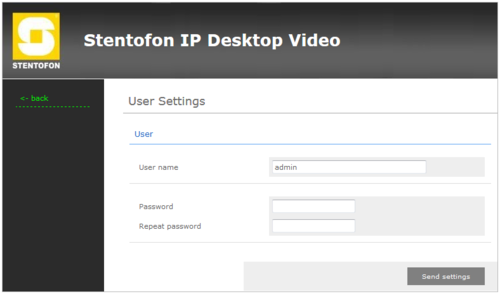
User
Here you can change the user name and password for the access to the web interface.
- User name: Type in a user name to access the WebInterface
- Password: Type in a password
- Click on Send settings
User Interface
Here you can change the behaviour of the user interface on the LCD screen.
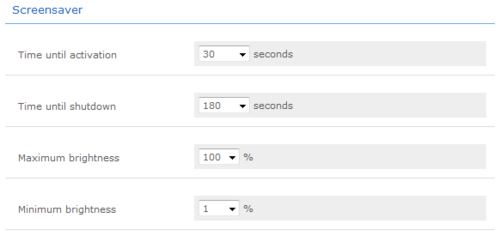
Screensaver
- Time until activation: Time until the display backlight is dimmed down
- Time until shutdown: Time between the display backlight is dimmed down and the display is switched off
- Maximum brightness: Value of the maximum brightness of the display backlight in normal Operation (before the backlightis dimmed down)
- Minimum brightness: Value of the minimum brightness of the display backlight after it is dimmed down
Text overlay during video
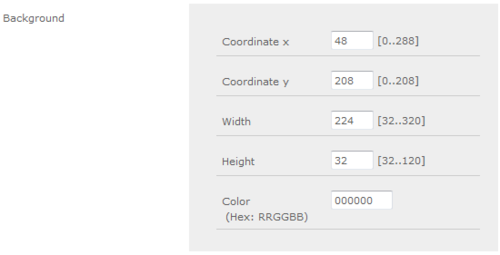
- Background
- - Coordinate x: Starting position on the x axis forthe Backgroundimage
- - Coordinate y: Starting position on the y axis forthe Backgroundimage
- - Width: Width of the background image
- - Height: Height of the background image
- - Color: background color
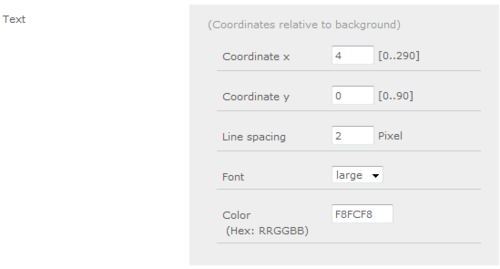
- Text
- - Coordinate x: Startposition on the x axis for thetext overlay (relative to the Backgroundimage)
- - Coordinate y: Startposition on the y axis for thetext overlay (relative to the Backgroundimage)
- - Line spacing: The vertical distance between two lines.
- - Font: Size of the font
- - Color: Color of the text
- Hide after: Time until the text overlay fades out
- Text on incoming call: This text is displayed forincoming calls
- Text on connected call: This text is displayed for connected calls
- Submit Settings: Click on Submit settings to apply the settings. The IP Video Display restarts and is available again after about 15 seconds.
Camera settings
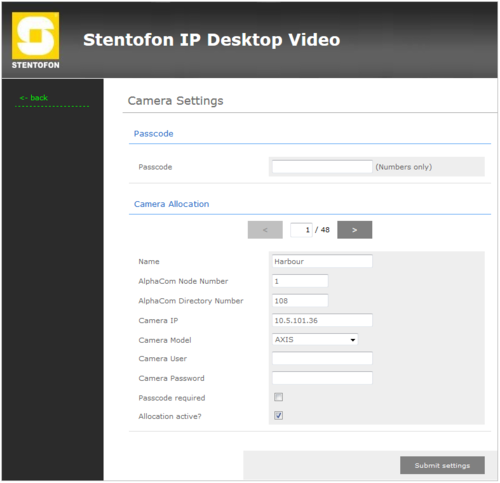
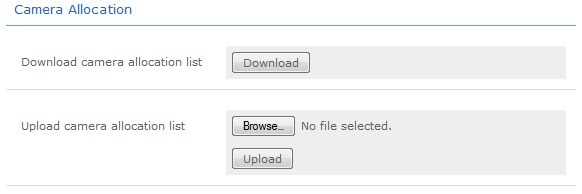
Here you can configure the camera settings for up to 48 cameras.
- Passcode
- - Passcode:
- Camera Allocation
- - Name: Type in any name for the allocated camera (optional). This camera name is displayed in the text overlay
- - AlphaCom Node Number: Type in the Node Number of the Alphacom Server on which the IP Desktop Station is registered
- - AlphaCom Directory Numer: Type in the Directory Number of the intercom unit which the camera is assigned
- - Camera IP: Type in the IP adress of the camera allocated to the intercom unit which is defined above
- - Camera Model: Choose the manufacturer of the camera
- - Camera User: Type in the username to access the camera stream (optional)
- - Camera Password: Type in the password to access the camera stream (optional)
- - Passcode required:
- - Allocation active?: Enables or Disables the entry
Network settings
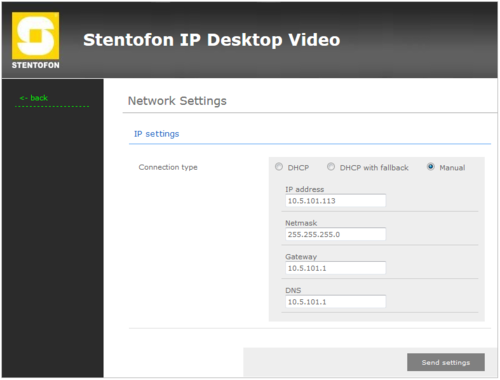
Here you can configure the network settings.
- IP settings
- Connection type: Choose between:
- - DHCP: The IP Video Display automatically obtains its IP settings from a DHCP server
- - DHCP with fallback: The IP Video Display automatically obtains its IP settings from a DHCP server. If no DHCP server is available the IP Video Display falls back to the selected IP address
- - Manual: Here the static IP address settings can be made
- IP address: IP address of the IP Video Display
- Netmask: Subnet mask of the IP Video Display
- Gateway: IP address of the router
- DNS: IP address of the DNS Nameserver

