Difference between revisions of "Upload Certificate"
From Zenitel Wiki
| (One intermediate revision by the same user not shown) | |||
| Line 4: | Line 4: | ||
*Select '''''SIP Configuration''''' tab and from the left hand menu select '''''Certificates'''''. The Turbine certificates are listed. Click on '''''Choose file''''' and browse to the location of the root certificate .pem file. When selected click on the Upload button | *Select '''''SIP Configuration''''' tab and from the left hand menu select '''''Certificates'''''. The Turbine certificates are listed. Click on '''''Choose file''''' and browse to the location of the root certificate .pem file. When selected click on the Upload button | ||
*The root certificate is uploaded and is shown in the list (default.pem). | *The root certificate is uploaded and is shown in the list (default.pem). | ||
| − | [[File: | + | [[File:Certificate SIP Turbine.png|thumb|left|500px]] |
| + | <br style="clear:both;" /> | ||
| + | |||
*Reboot Turbine station ( '''''Station Administration''''' → '''''Reboot''''' → '''''Reboot''''' ) | *Reboot Turbine station ( '''''Station Administration''''' → '''''Reboot''''' → '''''Reboot''''' ) | ||
[[Category: SIP intercom - Configuration]] | [[Category: SIP intercom - Configuration]] | ||
Latest revision as of 14:33, 23 November 2020
This article describes how to upload a certificate to the Turbine station for use with SIP TLS.
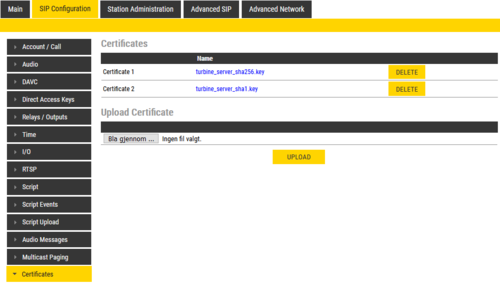
- Select SIP Configuration tab and from the left hand menu select Certificates. The Turbine certificates are listed. Click on Choose file and browse to the location of the root certificate .pem file. When selected click on the Upload button
- The root certificate is uploaded and is shown in the list (default.pem).
- Reboot Turbine station ( Station Administration → Reboot → Reboot )

