VMWare (Zenitel Connect Pro): Difference between revisions
From Zenitel Wiki
No edit summary |
|||
| (6 intermediate revisions by one other user not shown) | |||
| Line 3: | Line 3: | ||
==Prerequisites== | ==Prerequisites== | ||
* VMware installed. VMware Workstation 16 player is used in this guide. | * VMware already installed. VMware Workstation 16 player is used in this guide. | ||
* [[Downloads# | * [[Downloads#Zenitel_Connect_Pro_.28ZCP.29|Download]] and unzip Zenitel Connect Pro software for VMware (“Zenitel_Connect_'''VMware'''_xxxx.zip”). | ||
* License requirement: “ZCC_x64” - Item number 1002700000. License to install Zenitel Connect Pro on a virtual machine. | * License requirement: “ZCC_x64” - Item number 1002700000. License to install Zenitel Connect Pro on a virtual machine. | ||
<br> | <br> | ||
== | ==Virtual Machine requirements== | ||
Recommendation for the VM: | |||
* | *6 processor cores [@2.1GHz] | ||
*4 GB RAM | |||
* | *20 GB harddisk | ||
** | *1 network port | ||
This will allow for: | |||
*Registered devices: 1000. | |||
*Number of simultaneously audio calls: 300 | |||
{{note|If a '''second network port''' is added to an already configured system, the port which was the original first port then becomes the second port and that the physical connection to the network must be moved to maintain system connectivity.}} | |||
{{note|If a '''second network port''' is added to an already configured system, the second port inherits all firewall settings which were made for the first port. Reconfigure this port as required.}} | |||
<br> | <br> | ||
| Line 127: | Line 134: | ||
Here is a link to a [[Homepage (Zenitel Connect Pro)|detailed description of each tile]]. | Here is a link to a [[Homepage (Zenitel Connect Pro)|detailed description of each tile]]. | ||
<br> | <br> | ||
Latest revision as of 10:16, 10 November 2025
This article describes how to install Zenitel Connect in a VMware environment.
Prerequisites
- VMware already installed. VMware Workstation 16 player is used in this guide.
- Download and unzip Zenitel Connect Pro software for VMware (“Zenitel_Connect_VMware_xxxx.zip”).
- License requirement: “ZCC_x64” - Item number 1002700000. License to install Zenitel Connect Pro on a virtual machine.
Virtual Machine requirements
Recommendation for the VM:
- 6 processor cores [@2.1GHz]
- 4 GB RAM
- 20 GB harddisk
- 1 network port
This will allow for:
- Registered devices: 1000.
- Number of simultaneously audio calls: 300

|
If a second network port is added to an already configured system, the second port inherits all firewall settings which were made for the first port. Reconfigure this port as required. |
VMware - Import the Zenitel Connect disk image
- Start VMware Workstation and select "Open a Virtual Machine"
- Browse to the unzipped file (file extension .ova), give the machine a new name, and select Import.
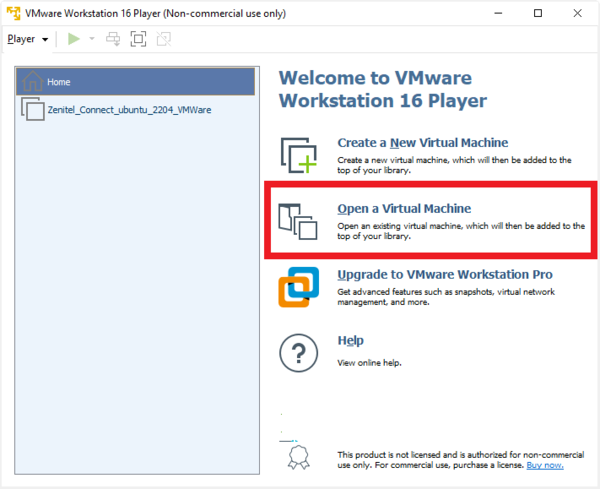 |
| Opening the Virtual machine |
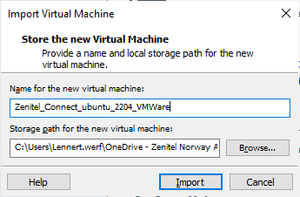 |
| The import pop-up |
- Wait for the installation process to finish:
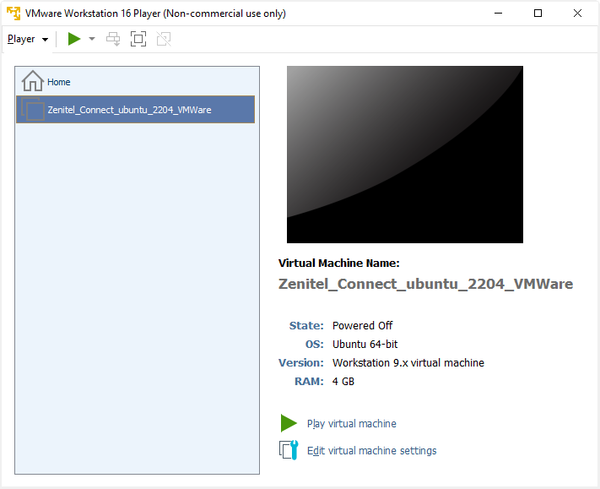 |
| Installation process finished |
Modify network settings:
- Make sure the machine is Powered off
- Select Edit virtual machine settings
- Select Network Adapter
- Choose Bridged
- Click the Configure Adapters button
- From the list of host adapters select the one to bridge to, this might be different on your machine.
- Repeat for the second adapter if needed
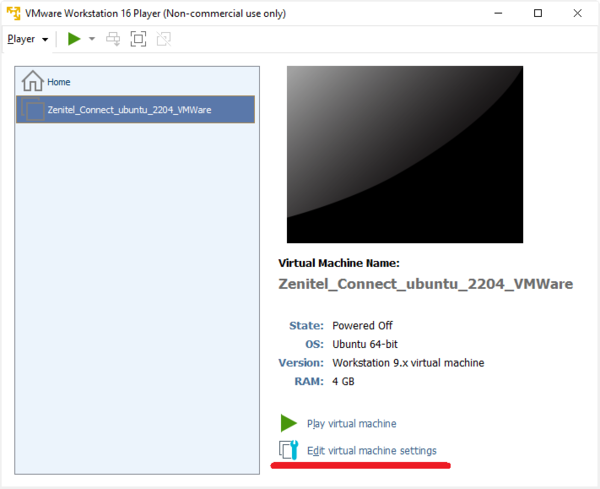 |
| Edit settings |
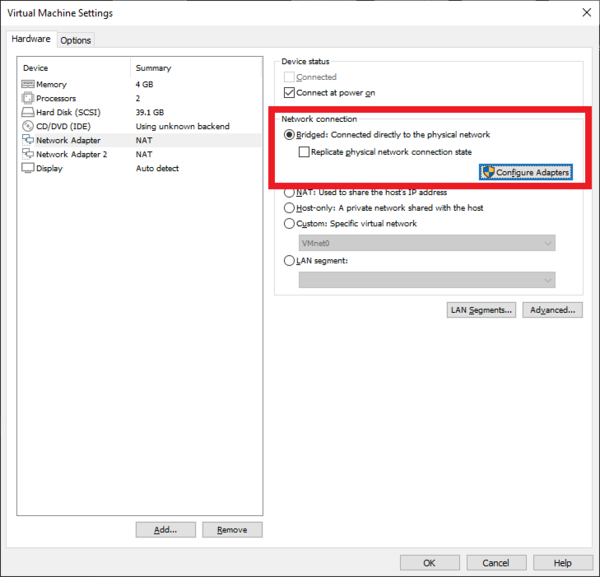 |
| Network adapter bridged |
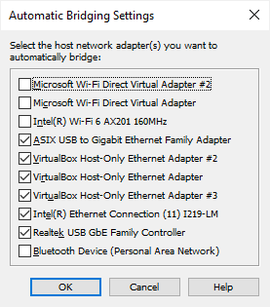 |
| List of host adapters for bridging, this list might be different on your machine |
Now Start the machine:
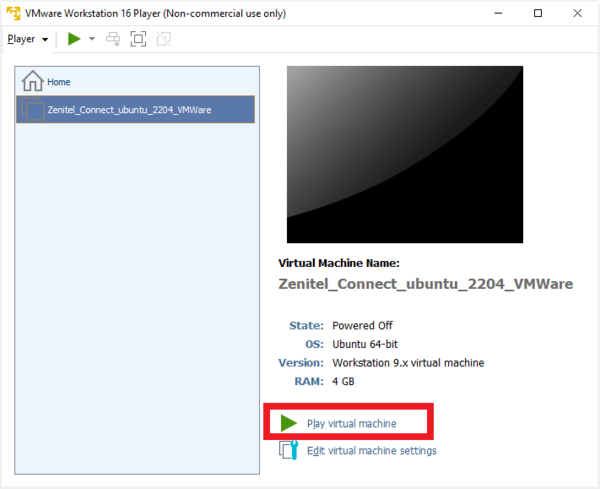 |
| Starting the Zenitel Connect Pro machine |
After approx. 30 seconds the terminal window will show the IP address assigned to the virtual machine running Zenitel Connect Pro. The IP address is need for logging into the Zenitel Connect Pro web interface and will be displayed for 120 seconds:
 |
| Displaying the IP address needed for logging into the Zenitel Connect Pro web interface |
Zenitel Connect Pro Web Interface
Accessing the web interface
The configuration of the Zenitel Connect is done from its web interface. Use a standard web browser (e.g. Firefox or Chrome), and enter the IP address of the virtual machine in the address bar.
Default username and password is admin/admin.
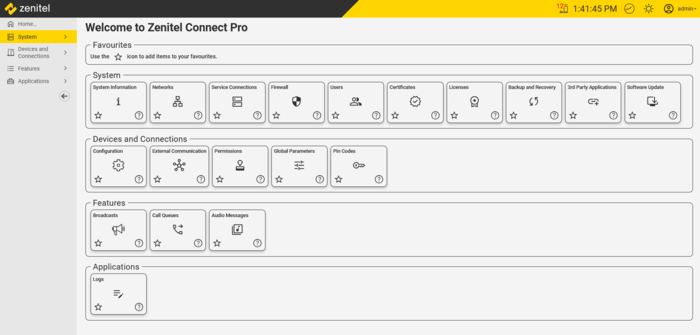 |
| The Zenitel Connect web interface |
Here is a link to a detailed description of each tile.
System Setup and Configuration
For further configuration, see the Getting Started article
