Cisco Call Manager 8 configuration: Difference between revisions
From Zenitel Wiki
(Created page with "{{S}}Software requirement: The SIP intercom must have firmware 02.02.3.1 or later. == Configuring the Cisco Call Manager == === Add New Phone === :User Management -> End User...") |
No edit summary |
||
| Line 79: | Line 79: | ||
[[Category: SIP intercom - iPBX integrations]] | [[Category: SIP intercom - iPBX integrations]] | ||
[[Category: SIP intercom - Configuration]] | |||
Latest revision as of 14:31, 13 March 2018
Software requirement: The SIP intercom must have firmware 02.02.3.1 or later.
Configuring the Cisco Call Manager
Add New Phone
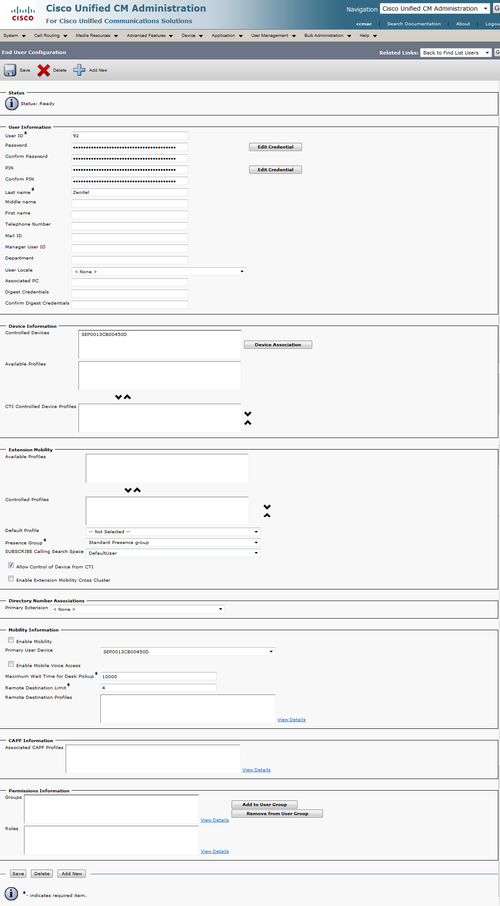
- User Management -> End User -> Add New
- User ID: 92
- Password: ******
- Last Name: Zenitel
- Press Save
- Device Association and select your Device
- Press Save
Add New Phone
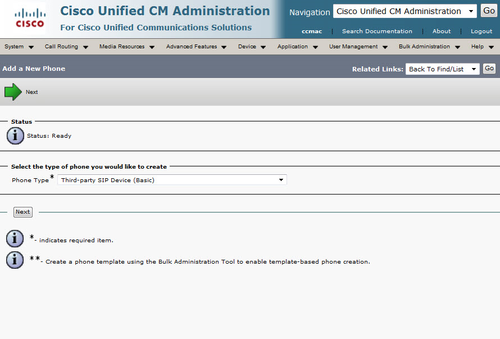
- Device -> Phone -> Add New
- Phone Type: Third-party SIP Device (Basic)
- Press Next
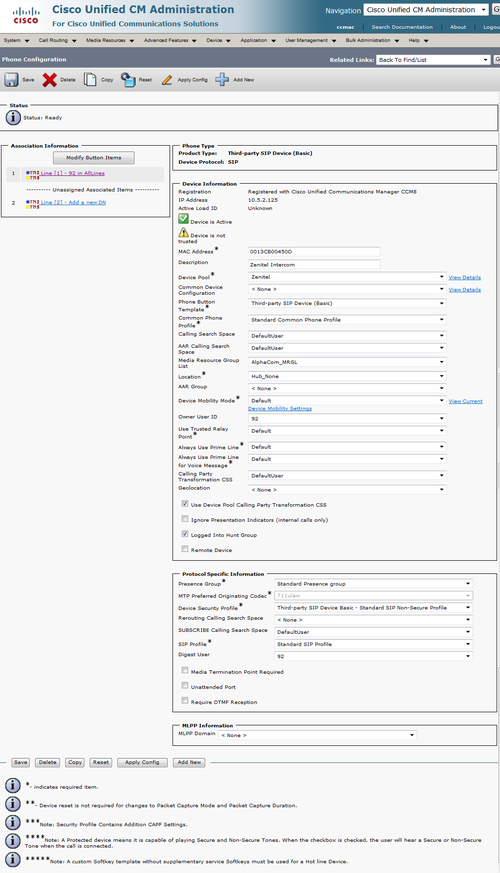
- MAC Address: Enter your SIP Intercoms MAC address
- Description: Zenitel Intercom
- Device Pool: Zenitel
- Phone button Template: Third-party SIP Device (Basic)
- Calling Search Space: DefaultUser
- Media Resource Group List: AlphaCom_MRGL
- Owner User ID: 92
- Device Security Profile: Third-party SIP Device (Basic) - Standard SIP - Non-secure
- SIP Profile: Standard SIP Profile
- Digest User: 92
- Press Save
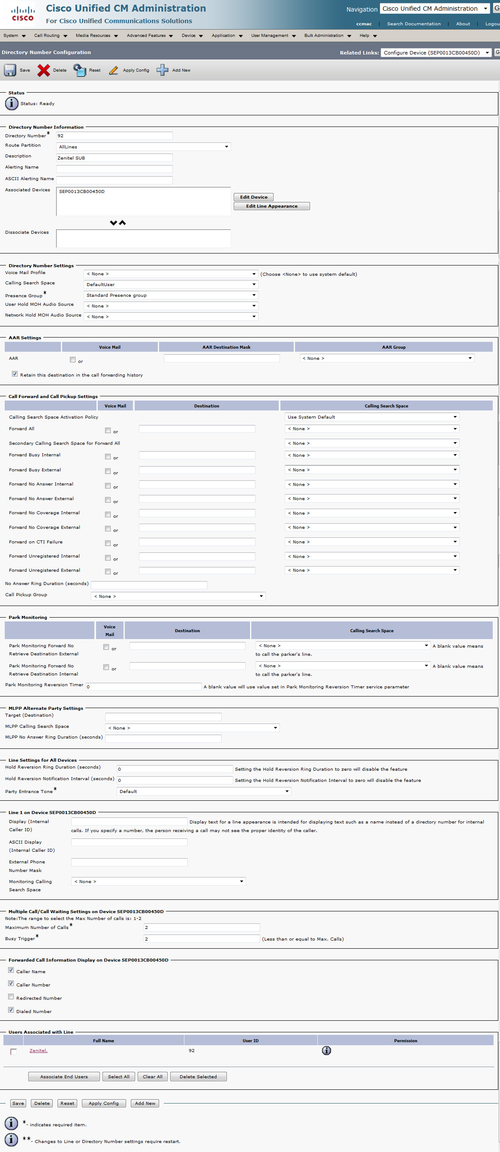
- In the upper left corner press ”Line [1] – Add a new DN]
- Enter wanted directory number (here 92)
- Route Partition: AllLines
- Calling Search Space: defaultUser
- Press Save
- Press Reset/Restart
Configuring the Stentofon SIP Intercom
Log on to your SIP Intercom by entering the IP address of the station in your web browser.
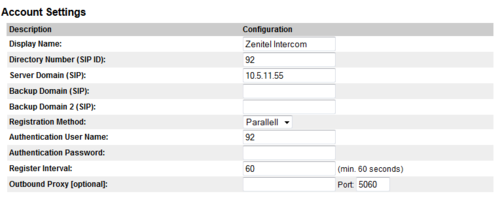
SIP Account Settings
- Station Configuration -> SIP Settings
- SIP Display Name: Zenitel Intercom
- SIP ID: 92
- SIP Domain: Your Ciscos IP Address
- Registration Method: Parallell is normally used, but if you have additional subscribers in your CUCM cluster you must use serial.
- Authenitcaion User Name: 92
- Press Save
- Press Reboot, and OK.
Call Settings
- Station Configuration -> SIP Settings
Here you define how incoming calls to the SIP Intercom is treated. Microphone and Speaker levels are adjustable from here.
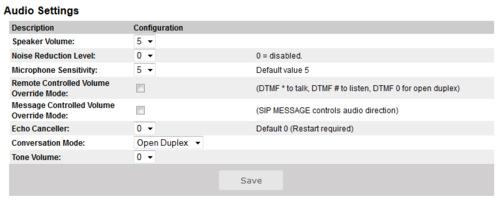
Audio Settings
- SIP Configuration -> Audio Settings
Microphone and Speaker levels are adjustable from here.
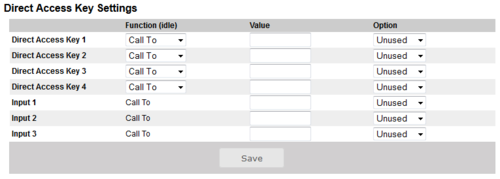
Speed Dial Settings
- SIP Configuration -> Direct Access Key Settings
Here you define the call pattern of your SIP Intercom.

