Yealink VP530
From Zenitel Wiki
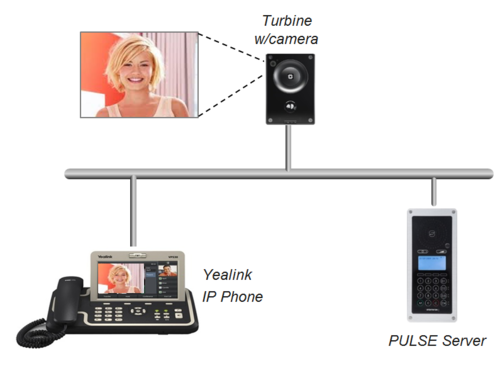
This article describes how to set up the IP Video Phone Yealink VP530 to operate in a PULSE system. The Yealink phone can be used for audio only, or it can also be used to show the video image from a Turbine Video Station TCIV.
Video from the following stations are supported:
Note that video from these stations is not supported:
Pulse Server configuration
A SIP phone license is required on the Pulse Server, and a SIP User account must be defined in the Pulse Server in order for the SIP phone to register.
Configuration of the Yealink phone via the web user interface
The phone can be configured via the web user interface or via the phone user interface. This article describes configuration via the web user interface.
Network settings
- Press the OK key when the phone is idle to get the IP address of the phone
- Open the web browser of your computer, enter the IP address into the addres bar (e.g. "http://192.168.0.10" or "192.168.0.10") and click Enter.
- Enter the user name (default: admin) and password (default: admin) in the pop-up dialogue box and click OK
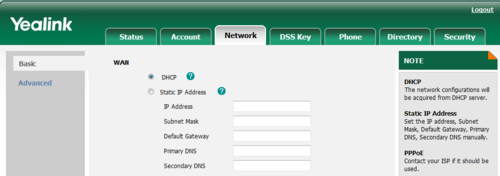
- Click on Network. Configure the phone to use DHCP (obtain an IP address automatically) or Static IP address.
SIP account
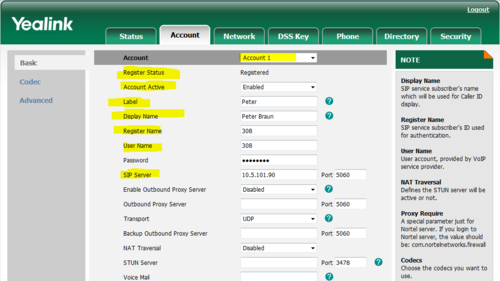
- Click on Account
- Account: Select "Account 1"
- Register Status: Shows if the phone is registered to the Pulse server on this account
- Account active: Enable
- Label: Is shown in the LCD screen to identify the account
- Display Name: Is shown as Caller ID when placing a call
- Register Name: Authentication ID. Must match with the directory number entered in the Pulse server
- User Name: Must match with the directory number entered in the Pulse server
- SIP Server: The Pulse server IP address
Door Opening feature (optional)
During conversation with the Turbine Video Station TCIV the integrated relay of the station can be operated by pressing a digit (default: digit 6) on the phone. As the phone by default is using DTMF signaling by RFC 2833, and this is supported by the Turbine range of stations, no further settings are required in the phone.
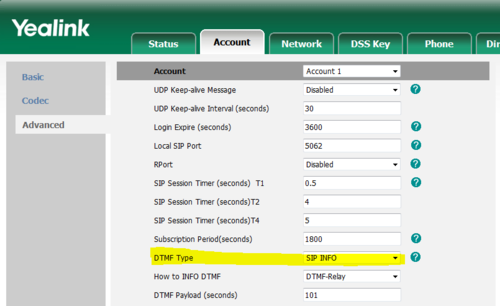
If the phone should operate the relay in other types of IP Substations (non-Turbine), the phone must be set to signal DTMF by SIP INFO.
- Click on Account > Advanced, and set DTMF Type to "SIP INFO":
Configuration for Video
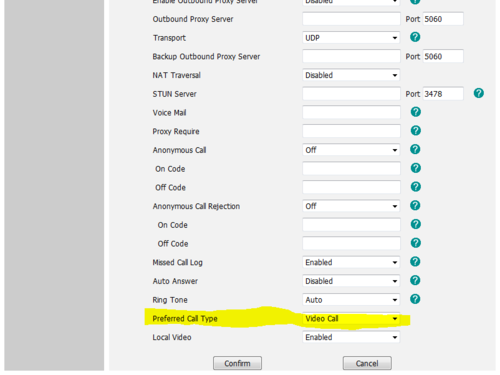
To enable reception of video from the Turbine Video Station TCIV, go to Account settings, and set Preferred Call Type = "Video Call". This will enable video image in the phone when a call is placed between the TCIV and the Yealink phone.
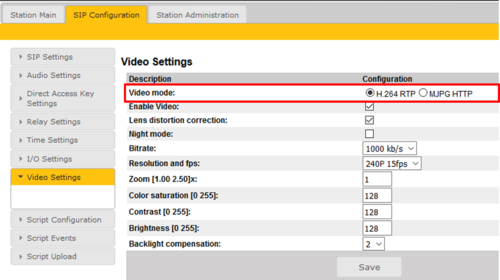
Turbine Station TCIV - Video Settings
- Log on to the TCIV station (default username: admin, password: alphaadmin)
- Select SIP Configuration > Video Settings, and set:
- Video mode: H.264

