Configuration guide for School IP Intercom (Pulse)
From Zenitel Wiki

This article describes additional configuration that is required for the School IP Intercom. For general configuration and setup of IP stations, see:
Note: The off-line display menu is not available for the School IP Intercom, as the navigation buttons are not present on this station.
Keyboard configuration
The correct keyboard configuration needs to be set. This is done via the web interface of the station. Log on the the web interface and:
- Navigate to Advanced SIP > Keyboard
- Select Keyboard Type = 2
- Press “Save Keyboard Config”

Note that in Pulse mode the Keyboard configuration is not available in the web page. In order to set the "Keyboard Type", the station must temporarily be set to "SIP mode":
- In System Main > Main Settings, set Station Mode = Use SIP, then Save. There is no need to Apply.
- Select Advanced SIP > Keyboard, and set Keyboard Type = 2
- In System Main > Main Settings, set Station Mode = Use Pulse, then Save and Apply.
Special Function Keys

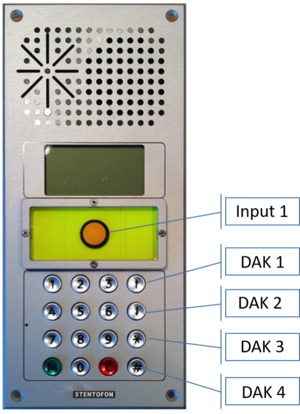
The School Intercom station has some special function keys:
- Emergency Button: Input 1
- Arrow UP: DAK Key 1
- Arrow DOWN: DAK Key 2
- Star key (*): DAK Key 3
- Hash key (#): DAK Key 4
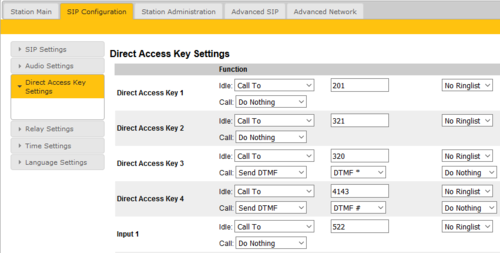
These keys have no function by default, and need to be configured.
Log on the the web interface of the station, and select SIP Configuration > Direct Access Key Settings. Enter call destinations and optional functions as required.

