IP Flush Master and Headset
From Zenitel Wiki
This article describes how to connect headset to the:
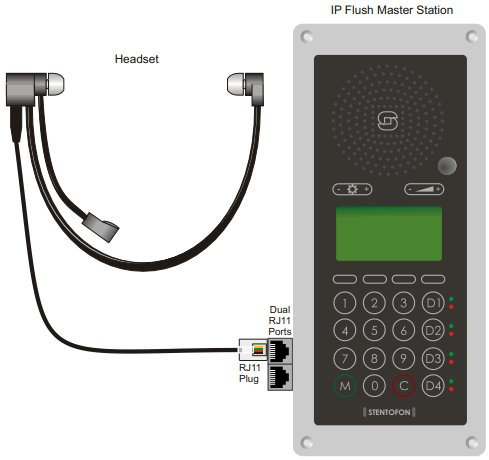
The IP Flush Master, IP OR Station and the IP Master Kit has an RJ11 port for a Headset accessory. A regular PC style headset can be used. If the headset is not equipped with an RJ11 connector, an adapter must be made locally.
The headset will automatically be detected when connected, and a headset icon will appear in the top right corner of the display. The microphone and loudspeaker on the IP Flush Master panel will be disabled, and the audio routed to the headset.
Connect the headset
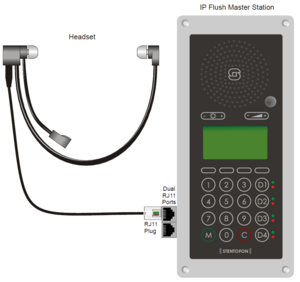
- Insert the RJ11 plug of the headset into the upper port of the dual RJ11 ports on the lower left of the station.
See Related Article:
Headset specifications
Connections
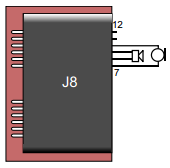
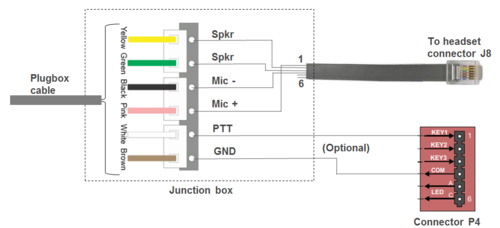
- Pin 7 Mic+
- Pin 8 Spk+
- Pin 9 Spk-
- Pin 10 Mic-
- Pin 11 PTT Ground
- Pin 12 PTT (Not currently supported by SW)
Microphone
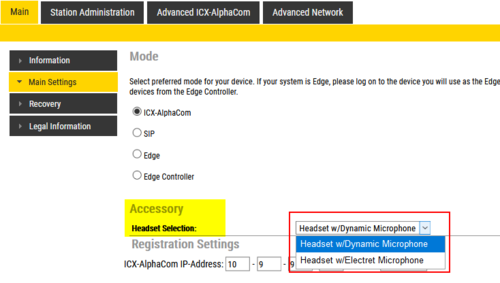
For IP Flush Master v2 the default setting is headset with dynamic microphone. This can be changed to headset with electret microphone in Main Settings:
Impedance
Recommended impedance is:
- Electret microphone: 1-2 kohm
- Loudspeaker: 120–1000 ohm
PTT
Dry contact, normally open (NO)

|
The PTT input on pin 11 and 12 is currently not supported. If PTT function is required, the PTT signal must be wired to one of the three inputs on connector P4 of the IP Flush Master |
Microphone sensitivity
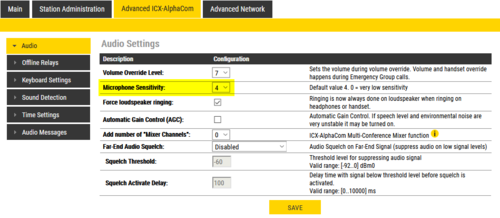
The sensitivity of the headset microphone can be adjusted from the station web page.

|
The sensitivity adjustment is a common setting for both the headset microphone and the microphone on the IP Flush Master panel |
Headset solution CRM-VH
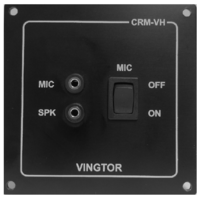
The headset solution CRM-VH (Item number 2213100000) consists of a flush mounted Headset Connection Box and a headset. It is designed for the IP Flush Master station, and includes ON/OFF switch and a light, comfortable, single-sided mono headset with noise cancelling microphone.
The ON/OFF switch makes it possible to combine it with the handset (1008097100) for the IP Flush Master, and use it in loudspeaker mode.
The Headset Connection Box comes with a 50 cm patch cable for connection to the headset outlet in the IP Flush Master station. The dimension (HxWxD) is 96 x 96 x 80 mm.
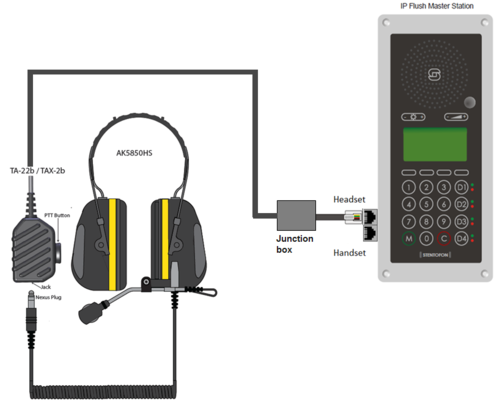
Headset AK5850HS
- The headset AK5850HS (item 2330040026) comes with a boom microphone, curled cord and plug.
- The Plugbox TA-22b (item 1008140225) comes with a PTT button and 10-meter long cable.
Configuring the PTT function
If the PTT function is to be used, the input "Key 1" of the IP Flush Master must be configured to activate M-key ON and OFF.
The input "Key 1" is normally reported as DAK 11. But if "Station Type" = CRM in AlphaPro (Users & Stations), the "Key 1" is reported as DAK 251.
Create an event from AlphaPro: In Users & Stations window, select the IP Flush Master from the list box, and press the button Events. Insert an event with the following properties:
Action string:
$%chg(M,MREL) L%1.dir
Auto-detection of the headset
If the auto-detection of the AK5850HS headset does not work when it is plugged in, it could be that the threshold for the detection of the microphone is too high.
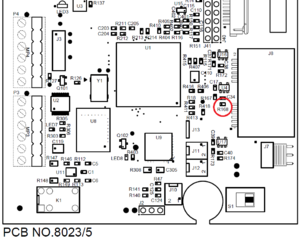
Check the resistance of R168 (see drawing) with an ohm-meter. If it is 3.9kΩ you can change it to 2.2kΩ, or you can solder a 4.7kΩ resistor on top of it.
As from medio 2016 this change is included from factory (R168 = 2.2 kΩ).

