Difference between revisions of "INCA Station Restore Factory Defaults"
From Zenitel Wiki
(→Restore to Factory Default for IP Stations without Display) |
|||
| Line 3: | Line 3: | ||
* IP Substations - [[Weather and Vandal Resistant IP Substation - 1008041100|1008041100]]/[[Weather and Vandal Resistant IP Substation for 3 gang Back Box - 1008051000|1008051000]] | * IP Substations - [[Weather and Vandal Resistant IP Substation - 1008041100|1008041100]]/[[Weather and Vandal Resistant IP Substation for 3 gang Back Box - 1008051000|1008051000]] | ||
* IP Video Door Stations - [[IP Video Door Station - 1401110100|1401110100]]/[[IP Video Door Station - 1401110200|1401110200]] | * IP Video Door Stations - [[IP Video Door Station - 1401110100|1401110100]]/[[IP Video Door Station - 1401110200|1401110200]] | ||
| + | [[File:Load Defaults without Display - 1.PNG|right|300px]] | ||
This procedure is also applicable for the kits. This requires that a push button is connected between pin 1 and pin 4 on connector P4. | This procedure is also applicable for the kits. This requires that a push button is connected between pin 1 and pin 4 on connector P4. | ||
| Line 8: | Line 9: | ||
* The [[IP Substation Kit - 1008090200]] | * The [[IP Substation Kit - 1008090200]] | ||
[[File:Load Defaults without KEY.PNG|left|thumb|300px|Kits require a push button to be connected between pins 1 and 4]] | [[File:Load Defaults without KEY.PNG|left|thumb|300px|Kits require a push button to be connected between pins 1 and 4]] | ||
| − | + | [[File:Load Defaults without Display - 2.PNG|right|300px]] | |
The unit can be set to use either '''Static IP''' or '''DHCP'''. Pay attention to the call LED during the restore procedure: | The unit can be set to use either '''Static IP''' or '''DHCP'''. Pay attention to the call LED during the restore procedure: | ||
# While pressing the call button, power up the station and keep the button pressed. | # While pressing the call button, power up the station and keep the button pressed. | ||
| Line 21: | Line 22: | ||
*Username: '''admin''' | *Username: '''admin''' | ||
*Password: '''alphaadmin''' | *Password: '''alphaadmin''' | ||
| − | |||
| − | |||
| − | |||
| − | |||
| − | |||
| − | |||
| − | |||
| − | |||
| − | |||
| − | |||
| − | |||
| − | |||
| − | |||
Revision as of 17:47, 17 March 2017
This procedure is applicable for the stations:
- IP Substations - 1008041100/1008051000
- IP Video Door Stations - 1401110100/1401110200
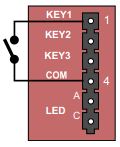
This procedure is also applicable for the kits. This requires that a push button is connected between pin 1 and pin 4 on connector P4.
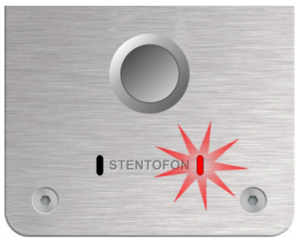
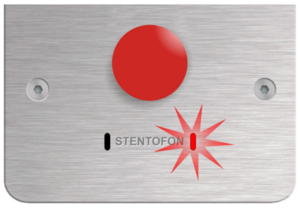
The unit can be set to use either Static IP or DHCP. Pay attention to the call LED during the restore procedure:
- While pressing the call button, power up the station and keep the button pressed.
- Release the button after exactly 2 flashes of the LED.
- Let the LED flash for exactly 2 more times (Static IP) or exactly 4 more times (DHCP), then press the button again.
- Keep the button pressed until the LED flashes fast 2 times (Static IP) or flashes fast 4 times (DHCP) indicating a successful reset.
- Release the button and the station will restart with the factory default settings.
Factory default values:
- Station Mode: Pulse
- Station IP address: 169.254.1.100 or DHCP
- Username: admin
- Password: alphaadmin
* Software 01.06 and earlier: ADMIN/alphacom)


