1-1c. AlphaPro - Getting started (solution)
From Zenitel Wiki
(Redirected from AlphaPro - Getting started (solution))
AlphaPro
- Install AlphaPro on a computer by running the setup.exe file and follow the instructions on the screen
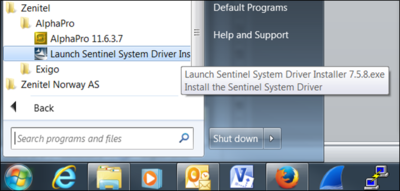
- After the AlphaPro installation has finished, install the driver for the Hardware Key:
3. Start AlphaPro by doubleclicking the AlphaPro icon on your desktop
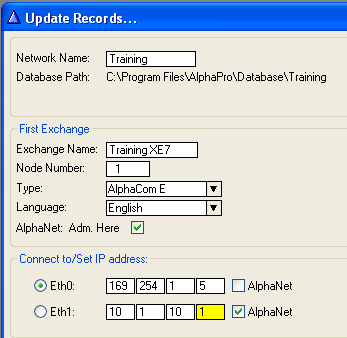
4. You will be prompted to create a new Network and a new Exchange
- Write in a suitable Network and Exchange name
- Click OK
Configure Names & Numbers
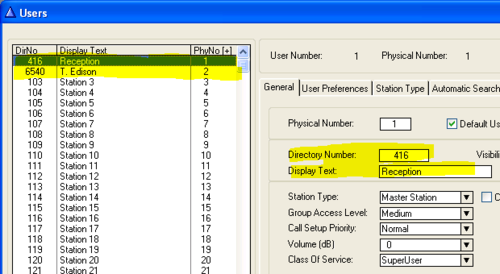
- In AlphaPro go to Users & Stations in the main menu
- Select physical number 1; 101 SystemStat.
- Use the section on the right and change the directory number to 416
- You will be prompted that this number already exist, and if you want to replace it. Click Yes
- Change the name to Reception, click Ok
- Select physical number 2; 102 Station 2
- Use the section on the right and change the directory number to 6540
- Change the name to T. Edison, click Ok
Send the changes
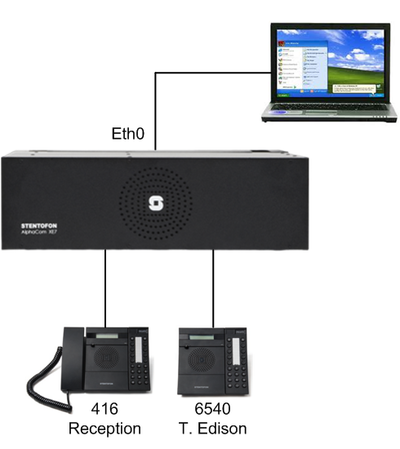
- Connect the PC to ethernet port 0 of the AlphaCom
- In AlphaPro click on SendAll
- You will be prompted to log in
- Default username: admin
- Default password: alphaadmin
- The whole database will now be sent to the exchange. When it is finished, click Close
Test
- Check that the displays on the two master stations show 416 Reception and 6540 T. Edison
- On the reception station dial 6540 and observe that the call is connected. Test both incoming and outgoing audio
- On the T. Edison station dial 416 and observe that the call is connected. Test both incoming and outgoing audio


