Image recovery - Zenitel Devices based on iMX8
From Zenitel Wiki
This article describes how to flash a new image on Zenitel Devices based on iMX8 processor.
Requirements
- Download and install VS-Tools.msi. The PC application VS-ProductUpgrade is a part of this package. This software runs both a TFTP server, and USB boot of target.
- Access to the physical circuit board.
- Software Image
- A USB Micro plug cable.
- PoE ethernet cable or local power.

Setup and connections

Optional connection
The process can optionally be monitored via the serial port of the board. This is not required, but could be useful for troubleshooting if issues appear during the process. You would need:
- A terminal emulator program. PuTTY is recommended
- A USB to Serial cable for serial connection from the PC to the circuit board
- See Preparation of the optional USB to Serial converter cable if you want to use this option
Prepare the "VS-ProductUpgrade" application
- Launch VS-ProductUpgrade application from Windows start menu (Start > Vingtor-Stentofon > VS-ProductUpgrade).
- Download the software image for Zenitel Devices based on iMX8. Image: vsff8-prod-8.2.3.3.zip
- Load the software image using the Open Software Image Archive button.
- Activate tab Production Programming
- Insert input fields Operator Name, Programming Device.
- Verify USB Operation is set to "Write all images (Recovery)
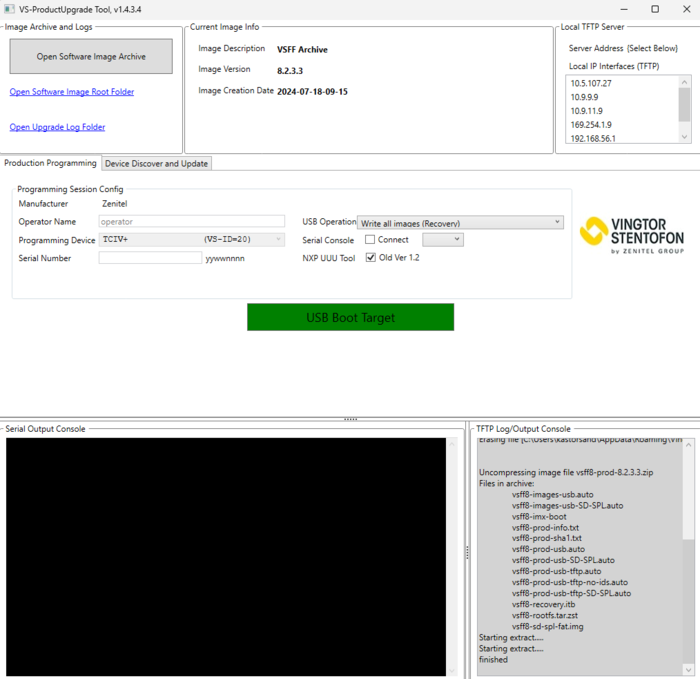
Your application should look something like below programming a TCIV+ Station:

- On HW version 100831xxxx.0102 and later the device cannot be powered from the USB connector. The procedure is then:
- Connect the the Micro-USB cable
- Hold down the USB Boot button while powering up the device (by connecting the PoE ethernet cable or local power) and wait for the PC to detect the new USB hardware
- In the PC application press the "USB Boot Target" button
- Watch the Pop-up window for the progress. When the window disappears, the process is complete. Be aware, it sits at 99% for several minutes.
- On HW version 100831xxxx.0101 and earlier the device can be powered from the USB connector. The procedure is then:
- Hold down the USB Boot button while connecting the Micro-USB cable and wait for the PC to detect the new hardware
- In the PC application press the "USB Boot Target" button
- Watch the Pop-up window for the progress. When the window disappears, the process is complete. Be aware, it sits at 99% for several minutes.

- Disconnect power and USB. Reconnect Power and verify that it starts normally.
Preparation of the optional USB to Serial converter cable
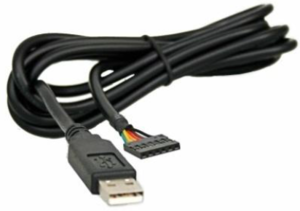
The Turbine station has a TTL level serial interface to which we can connect during the upgrade process. For this purpose a USB to Serial converter cable can be used. Recommended cable is TTL-232R-3V3, available from Farnell.
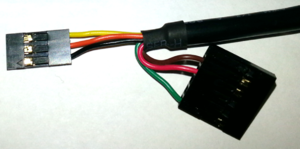
This cable needs to be slightly modified as per photo below:
- Pin 1 = Black (GND)
- Pin 2 = Orange (Turbine RX)
- Pin 3 = Yellow (Turbine TX)


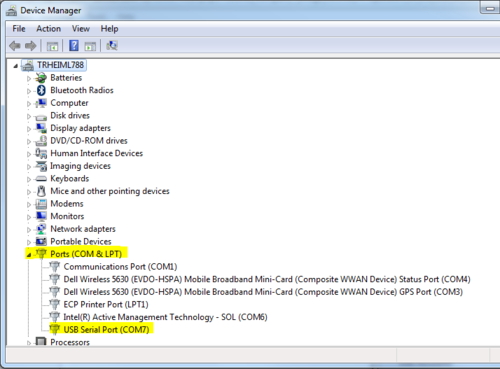
Insert the USB connector in the PC. The unit will now install itself. Make a note of which COM port number it is assigned to. You will also find it in the Device Manager. Baud rate: 115200.


