Pin Codes (Zenitel Connect Pro)
From Zenitel Wiki


Introduction
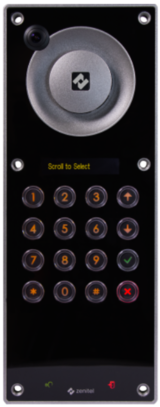
The TEIV-1+ door intercom supports the use of Pin Codes. The station can be used as an access control unit, and will trigger the built-in relay when a valid pin code is entered. Multiple pin codes can be defined, enabling users to have their own personal pin code. The same pin code can be assigned to multiple stations.
Operation:
- Press the # key, followed by a sequence of digits
- A successful entry is indicated by a connection tone, the red door open icon will be lit as long a the relay is active (3 sec), then a cancel tone.
- An unsuccessful entry is indicated by a failure tone (dut-dut-dut-dut..).
Configuration of pin codes is done in two steps:
- Define the Pin Codes. This will be a common pool of codes
- Assign pin code to the TEIV-1+ station(s)
Defining Pin Codes
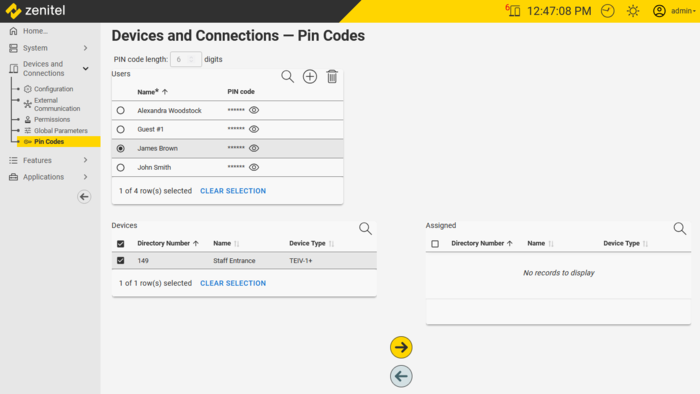
To define Pin Codes navigate to Devices and Connections > Pin Codes
- First choose the pin code length. The pin code length must be done prior to defining any pin codes. As soon as the first pin code is defined, the pin code length is locked.
- Press the
icon to add a new Pin Code. Fill in a descriptive name for the code, and press save
 |
| Defining Pin Codes |
Assign a pin code to a station
- To assign a pin code to a station, first select the desired pin code by checking the radio button to the left of the pin code.
 |
| Assigning a Pin Code to a station |
- Now you will see a list of devices to the left to which a pin code can be assigned. Currently only TEIV-1+ door intercoms support pin codes and will be displayed.
- Use the Arrow key
to assign a pin code to the station.
- The same pin code can be assigned to multiple stations.
- The relay of the station will automatically be configured for Door Opening as soon as a station is assigned to a pin code.

