Actions

Schneider Access Expert - ICX-AlphaCom integration

From Zenitel Wiki

AI.png

Introduction

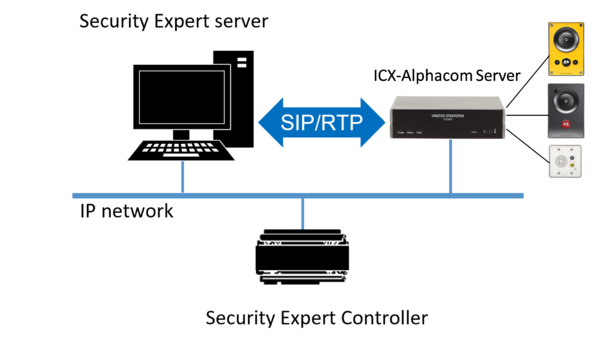
Schneider Access Expert integration with ICX-AlphaCom is a licensed feature which connects Schneider Access Expert with a locally deployed Zenitel system. Multiple ICX-AlphaCom exchanges can be combined and incorporated into Schneider Access Expert, providing an endless number of stations that can be centrally managed, thus removing the operator complexity associated with traditional large deployments.

Through the use of Event Definitions and Alarm Actions, the integration can also be expanded to enable custom alarm and alert notifications which are generated from within the Schneider Access Expert system, allowing for immediate notification if a station becomes disconnected or the network is disrupted. Through linking, operators are able to interact with stations, doors, and cameras all from a single screen via the hardware tree or the Schneider Access Expert dynamic floor plans.

The Zenitel integration to Schneider Access Expert provides the ability to add ICX-AlphaCom controllers and IP stations to your Schneider Access Expert Instance for the purposes of integrating intercom stations with doors, cameras and floor plans. In the Schneider Access Expert Windows Client, ICX-AlphaCom Exchanges are accessible from the Intercom tab within the Hardware Provisioning section provided your instance has been licensed appropriately. The associated list of stations will automatically import once the ICX-AlphaCom is added to the instance via its MAC address.


Compatibility

The integration with Schneider Access Expert is compatible with the following Zenitel system versions:

  • ICX-AlphaCom: Ver. 1.1.3.2 or newer


Licensing

Schneider Access Expert

Licensing of the Zenitel integration is based on the number of stations. Instances may be licensed for any number of specified Stations and thus, the system will not allow Stations within the instance to exceed the amount in which it’s licensed. If the instance is not licensed for any stations, the “Intercom” section in the Hardware Provisioning tab will not be visible.

ICX-AlphaCom

ICX-AlphaCom requires the presence of the appropriate API license.

  • 1002602306 - ILI-API64 - API License Supporting 64 Stations
  • 1002602309 - ILI-API512 - API License Supporting 512 Stations

With ICX-AlphaCom it is possible to purchase a single Product Key which covers all stations connected to all ICX-AlphaCom servers in a network. ICX-AlphaCom licenses can be stacked, i.e. 1x 1002602306 + 2x 1002602309 gives 1088 API licenses which can be used on 2 or more ICX-AlphaCom servers.


Configuration

Prerequisites

  • ICX-AlphaCom system with API licenses and connected IP stations
  • Schneider Access Expert subscription and intercom licenses
  • ICX-AlphaCom is running of firmware ver. 1.1.3.2 or newer
  • Putty application to be used to set core system settings

It is important to note that the configuration of ICX-AlphaCom should be done first to enable connection to Schneider Access Expert prior to starting the Schneider Access Expert configurations.


ICX-AlphaCom configuration

This section will cover the configurations needed in the ICX-AlphaCom that are specific to integration with Schneider Access Expert.

Special Considerations

ICX-AlphaCom can run on an ICX-500 embedded controller and on a VM. The ICX-500 has (2) Ethernet ports. It is recommended that Eth0 remain used for service and technical configuration settings and Eth1 be used for connection to the customers’ network. Within the ICX-AlphaCom, a specific port will be added to the Zenitel configuration to allow connection within the ICX-AlphaCom and the communications services used to connect to Schneider Access Expert.

Other areas to note

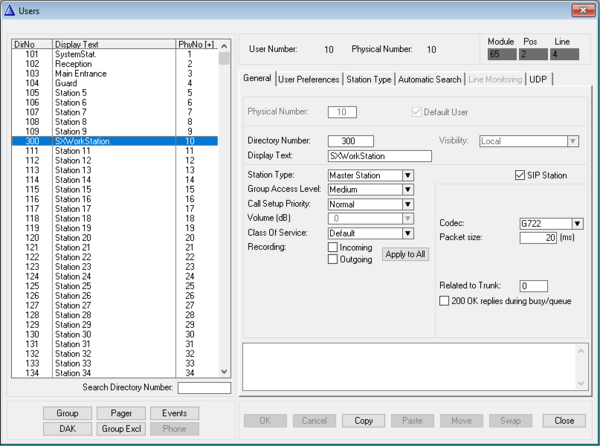
1. The MAC address used in Schneider Access Expert is found in the ICX-AlphaCom Web application under System Configuration then Licensing.

Keep mac.png


2. The Schneider Access Expert import process will start with the first station by Directory Number. This means you should start with first Directory Number you have configured then proceed to configure additional stations chronologically.

3. If your ICX-AlphaCom has more licenses than are being integrated into Schneider Access Expert, the stations that are applicable should be configured first in the Zenitel system. For those stations not being brought into Schneider Access Expert, you will need to uncheck CCoIP for each one as this helps to not expose it to the import process.

Keep ccoip.png


Alternatively, it is possible to disable reporting by checking the box 'Disable reporting to OPC server'. When there are other IP-stations in the system which should not be reported to Schneider Access Expert, then this is the preferred method.

Disable reporting to OPC server


Failure to complete this task will result in a fail import message in Schneider Access Expert ever ~30 seconds as the system executes health checks.

This setting is found in the AlphaPro software when looking at Users & Stations.

Stunnel Settings

The ICX-AlphaCom will utilize a stunnel application which will come loaded on the ICX-AlphaCom in its normal configuration. Stunnel is used to enable the ICX-AlphaCom to leverage the security benefits of a TLS1.2 connection to your Schneider Access Expert instance. Information about stunnel can be found at www.stunnel.org.

In order to access the stunnel settings, the Putty application will be used to connect to the core application in the ICX-AlphaCom via an SSH connection. For this connection, you will connect directly to the ICX-AlphaCom controller via Eth0 through the default IP address of 169.254.1.5. The default Zenitel user accounts (admin/alphaadmin) will also be used.

Once your laptop is connected to Eth0, Launch the Putty application to connect to the ICX-AlphaCom via SSH. In this example, we are connecting to the default IP address associated with Eth0. If your default has been changed then use that address.

Keep putty.png


When the Putty service connects, you will log into the core application using your admin username and password.

Keep login.png


This will prompt a second login which allows access to the root application: Command Prompt:

Keep login2.png


Once enter is pressed, a home prompt will be displayed. Type: nano stunnel.conf

At this point, you will be presented with a configuration screen where you will press the Cntrl and “\” keys to enable you to edit the settings. Here you need to enter the connection and port information needed to connect to the Schneider Access Expert instance and communication services. It is important to follow the settings shown below as these will be confirmed in the ICX-AlphaCom Web application Filter section. Below is an example of a configuration file that accepts the ACDP link connection that has been configured via AlphaPro to reach out through port 55100 via the internal IP address of 127.0.0.1 and re-routes it to the Zenitel service at zenitel.feenics.com:443.

Keep config.png


Once the settings are confirmed, you will need to exit the command application by clicking the Cntrl and “X” keys.

Configuring the ICX-AlphaCom ACDP Link

The Alphapro software from Zenitel will be used for the next few steps. In this step, we will configure the ACDP link to support the internal communications over 127.0.0.1.
1. Launch the AlphaPro software.

2. Click the Exchange & System Icon on the tool bar.

3. Select Serial Ports

Keep serial.png


4. Once you select the Serial Ports, the Data Links page will open.

  a. Select ACDP Link 1
  b. Click Change
  c. Enter the following settings into the appropriate fields. 
  d. Click OK.
  e. Click Close at the Data Links page. 
Keep datalink.png


The ACDP DataLink 1 will need to be set as an Operator. For this step:

1. Click the Exchange & Systems Icon again.

2. Select Devices

Keep devices.png


3. Once the External Devices screen is opened, click the Change button:

  a. Set the Device Type to Operator (passive)
  b. Ensure the data (ACDP Link) is set to Stunnel     (1)
  c. Click OK then Click Close at the External Devices screen. 
  d. Click Close at the Exchange Information Screen. 

4. The configuration steps just completed need to be sent to the ICX-AlphaCom. For this,

  a. Click “Send Change” in the upper right corner of the AlphaPro screen.  
  b. Once the update screen shows complete
  c. Click the Reset button in the upper right corner of the AlphaPro screen.


ICX-AlphaCom Port Settings

Using the ICX-AlphaCom-Web portal via Eth0, we will need to set the appropriate ports for internal and external communications.

Launch a browser and connect to:
1. http://169.254.1.5/

2. Click HTTP:

3. Login with the default user credentials (admin / alphaadmin)

4. Click System Configuration

5. Click Interfaces

6. Enter the IP address information for Eth1 that will be used to connect to the customers’ network.

7. Take note that the 2 MAC addresses shown are not the ones used in Feenics Keep.

8. Click Save/Validate.

Keep system.png


9. Click DNS to set the DNS Server address. For this example we are using the default Google addresses.

10. Once the DNS is entered, click Save/ Validate

Keep dns.png


The last step before doing a reset is to account for the various ports used for internal and external communications. Though this will vary by deployment, the ones below are the common settings which should be used: The settings configured int eh Web interface need to be saved to the ICX-AlphaCom. This is done my navigating to System Maintenance and selecting Reboot. The reboot process will take roughly 60 seconds. If your stations go red when eth0 is being used or during the reboot process, it is normal operations.

Schneider Access Expert configuration

Adding an ICX-AlphaCom Exchange to Schneider Access Expert

Exchanges are used with the Zenitel system to group intercom stations together into an overall high-quality audio system. Each can support a total of 552 stations and multiple Exchanges can be added to a single Schneider Access Expert system.

To add an Exchange:

1. Navigate to the Hardware Configuration Menu

2. Select Exchanges

3. Click Add Zenitel Exchange

1Accessconfig.png


4. Enter a Display Name

5. Enter the MAC address for the ICX-AlphaCom. Note the ICX-AlphaCom platform has multiple NIC connections and 3 MAC addresses. The address to be used here will be the MAC address associated with the Zenitel License. We will include information about where to find this when we cover the Zenitel setup. The MAC address cannot be edited once saved.

6. Click Save.

2Accessexchange.png


Once saved, the Exchange Configuration page will appear. Typically, within 60 seconds, the stations defined in the Zenitel system will automatically start to populate in the Connected Stations section. The stations will import based upon the Display Name and Directory Number. Stations are brought in starting at the first configured and then chronologically. The import will only bring in the number of stations the instance is licensed for.

3Accessexchangeconfig.png


Once the importing is completed, the stations will be visible in the hardware tree where they should appear as green and online. Once the status has been confirmed, the import process is complete and you can complete the various other configurations based upon your project’s needs.

4Accesshardwaretree.png


Associating Doors and Cameras with Stations

The integration supports various types of collaborations between various systems connected to Schneider Access Expert. One enables the assigning of a Connected Reader which will be associated with the intercom station. This association can be completed for both Master and Sub Stations. The purpose of assigning the stations is to establish the default door the various door commands/action will interact with. From the Intercom Station, an operator can choose to Pulse, Lock Down, Unlock, Put Online and Reset the specific door.

To assign a Reader:
1. Open the Intercom Station.
2. Click the down arrow in the Connected Reader field.
3. Choose the desired reader.
4. Click Save or Save & Close.

5Accessreader.png


To assign a Camera or Camera View:
1. Click the Cameras tab.
2. Click the Assign Camera and/or Assign View.
3. Choose the desired Camera(s) and/or View(s).

6Accessconfigassigncamera.png


Note that multiple cameras and camera views can be selected and used at the same time. The selection of the camera or view will be done from the Live Monitoring or Event History pages.

The cameras included in the Intercom Stations can be linked back into Schneider Access Expert. These cameras must first be brought into the Video Management System being used as a part of the project then they would be imported no different than any other camera.

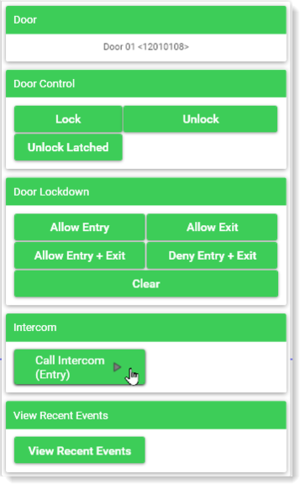
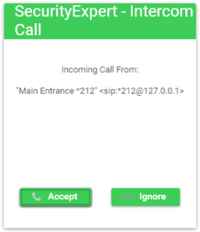
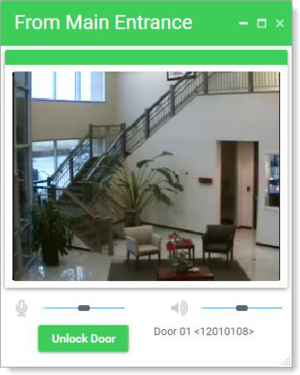
Additional controls are available from the intercom stations themselves located in the Hardware Tree or from a Floor Plan. Right clicking the device will present a familiar display box that is normally associated with a Reader. This means that the chosen intercom station has a Connected Reader assigned to it so the Command dialog box will have the same traits as the Reader.

7Accessconfigadditional.png


Within Schneider Access Expert, the stations will have other areas of usage. This includes:
1. Once the stations are configured, they can be added to floor plans no differently than other system devices. From a floor plan, the operator will be able to see/monitor the status of the station(s) and visually see if the station is currently in an active call.

8Accessother.png


2. Event History & Live Monitoring. Events and Alarms can be associated with the Intercom Stations. This enables Events or Alarms associated with the Intercom System to interact with other devices such as inputs and outputs as well as other Readers. Special configurations can be used by Overriding the default Event Definitions associated with the Stations. For this:
a. Click General Configuration
b. Click View Applications
c. Select Zenitel Commands or Zenitel Service
d. Choose the desired event then Right Click and Choose Override Event Definition.
e. From here, the special configuration steps follow the same process as other Schneider Access Expert connected devices.

9Accessconfigevents.png


This Override Event Definitions will create a unique/customer Alarm Action which will enable the system to execute other commands either locally within a single controller or across all controllers.

At this point, the base configuration of the ICX-AlphaCom and related stations is complete.