Software House CCURE 9000 - ICX-AlphaCom integration
From Zenitel Wiki

Introduction
The Software House CCURE 9000 can be integrated with the ICX-AlphaCom system or the AlphaCom XE system.
The interface is based on a special integration module which is available from Software House. This article assumes that the reader is familiar with setup and operation of C-Cure 9000. Only points which are specific to ICX/AlphaCom and to its connected intercom stations are described.
As from integration module versions 2.80.009 (for connection to CCure9000 v2.8) and 2.90.006 (for connection to CCure9000 v2.9), a number of new features have been added to the integration:
- Integration with VS-Recorder (only 2.90.006 for integration with CCure9000 v2.9)
- Possibility to open a door from an intercom by pressing digit 6 during a conversation - A datastring is sent from ICX-AlphaCom or AlphaCom XE to CCure9000 instead of operating a relay directly
Where appropriate, the programming of these features is clearly indicated in this article.
Licensing
The integration is licensed.
Software House
The Software House license is available from Software House under product code CC9000-AlphaCom
ICX
ICX requires the presence of the appropriate API/OPC license.
- 1002602306 - ILI-API64 - API License Supporting 64 Stations
- 1002602309 - ILI-API512 - API License Supporting 512 Stations
With ICX it is possible to purchase a single Product Key which covers all stations connected to all ICX's in a network. ICX licenses can be stacked, i.e. 1x 1002602306 + 2x 1002602309 gives 1088 API licenses which can be used on 2 or more ICXs.
AlphaCom
The AlphaCom requires the presence of the appropriate API/OPC license. Note that every AlphaCom in an AlphaNet requires such a license.
- 1009649901 - STENTOFON API License Supporting 40 Stations
- 1009649902 - STENTOFON API License Supporting 80 Stations
- 1009649903 - STENTOFON API License Supporting 160 Stations
- 1009649904 - STENTOFON API License Supporting 240 Stations
- 1009649905 - STENTOFON API License Supporting 320 Stations
- 1009649906 - STENTOFON API License Supporting 400 Stations
- 1009649907 - STENTOFON API License Supporting 552 Stations
Installation
This description assumes that C-Cure 9000 has been installed and is running. It is also assumed that C-Cure 9000 has been licensed appropriately.
Prerequisite
The interface module uses .NET 4.8. Please make certain that this version of the .NET framework is installed prior to installing the interface module itself.
Server
- Stop all CrossFire services. To do this, start 'Server Configuration' (Run as administrator), which is available under 'Start menu/Tyco'. Click on the 'Stop'-button at the top (for the CrossFire Framework Service). This will stop all running services.
- Once all services have been stopped, exit 'Server Configuration'
- Install the C-Cure 9000-AlphaCom integration module by running CCURE9000_VS-AlphaCom_Integration.msi and follow the instructions which appear on screen
- Start all CrossFire services. To do this, start 'Server Configuration' (Run as administrator), which is available under 'Start menu/Tyco'.
- There will be a new service available: 'AlphaCom Driver Service'. As this is the first time this service is used, it needs to be enabled before it can be started. Check the checkbox 'Enabled'.
- Click on the 'Start'-button at the top (for the CrossFire Framework Service). This will start all services.
- Once all services for which a license is present have been started, exit 'Server Configuration'
Client
For all PC's which have a CCure 9000 client running there is a separate 'Client only' installation file.
- Install the C-Cure 9000-AlphaCom client integration module by running CCURE9000_VS-AlphaCom_Integration_ClientOnly.msi and follow the instructions which appear on screen
SQL permissions
The AlphaCom integration module creates 3 tables in the database 'ACVSCore'. These tables are:
- AlphaCom.AlphaComConnection
- AlphaCom.Intercom
- AlphaCom.Node
To be able to create these tables, the account which is used by the 'AlphaCom Driver Service' needs to have the appropriate permissions. To check which account is used by the 'AlphaCom Driver Service'
- Open the 'Services' window
- Either via 'Computer Management/Services'
- Or by clicking the 'Start' menu and typing 'Services.msc'
- Select the line listing 'AlphaCom Driver Service'.
- The column 'Log On As' lists the account which is used by the service.
- If wanted, it is possible to change the account; right click the line, select 'Properties' and enter the details of the required account in the TAB 'Log On'
Use 'Microsoft SQL Server Management Studio' to assign the appropriate permissions to the account. The 'AlphaCom Driver Service' must either have 'sysadmin' permissions to the database instance or 'db_owner' permissions to the 'ACVSCore' database.
- Open SQL Server Management Studio
- Connect to the appropriate database instance
- Expand 'Security', then expand 'Logins'
- Right-click the account which is used by 'AlphaCom Driver Service' then select 'Properties'; make certain that at least one of the two bullet points below are met
- Select the 'Server Roles' page and verify whether the 'sysadmin' role is set
- If the 'sysadmin' role is not set, consider whether to set it; note that this gives all permissions on the database instance; if the 'sysadmin' role is not appropriate use the option in the bullet point below
- Select the 'User Mapping' page; select the 'AVCSCore' database and ensure a checkmark is placed in the column 'Map' then checkmark the 'db_owner' role
- No 'Default Schema' should be required but if needed select 'dbo'
Setup ICX or AlphaCom
Communication with CCure9000
The communication with ICX or AlphaCom is through TCP port 61112 or 61113. Make certain that one of these ports has been opened in the 'Filter page' in the Web interface. In an AlphaNet system all ICX/AlphaCom servers must have this same port opened.
There are several configuration possibilities, depending on the type and size of C-Cure 9000 system
- With a single C-Cure 9000 standalone server, all communication between C-Cure 9000 and an AlphaNet is via a single ICX/AlphaCom
- With multiple C-Cure 9000 standalone servers, each C-Cure 9000 server has its own communication link to an ICX/AlphaCom in an AlphaNet
- In an C-Cure 9000 Enterprise system each so-called SAS-server has its own communication link to an ICX/AlphaCom in an AlphaNet
AlphaCom with software prior to version 11.5.3.5 only offers the possibility to connect to 2 standalone or SAS servers. As from the software version 11.5.3.5 AlphaCom in an AlphaNet supports the possibility to connect to 10 standalone or SAS servers, as the ports 61112/61113 on each server are now independent of each other. As from ICX-AlphaCom version 1.1.3.5 ports 61112/61113 support multiple connections. A total of 120 stand-alone or SAS-servers can be connected.
Door opening
As from integration module versions 2.80.009 and 2.90.006, it is possible to open doors during a conversation by pressing digit 6 on an operator intercom. Instead of operating a relay on the door station, a datastring is sent to CCure9000. To configure this, setup an event 'Door opening - during connection' and enter the following action string:
- @*d1 M7F01 %1.ref %2.ref W1 W1 W0 W0 W0

Setup C-Cure 9000
Setup of the ICX/AlphaCom connection in C-Cure 9000 is done in the C-Cure 9000 Administration Workstation. Note that some of the descriptions in the text below are dependent on choices which are made during setup, it may therefore be that the actual system being used operates slightly differently.
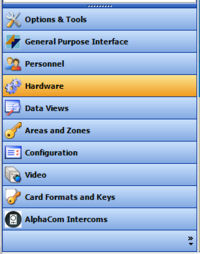
- Click on 'Hardware' to view the hardware tree
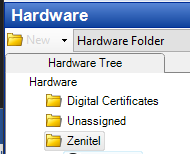
Hardware - If no appropriate hardware folder exists yet, right click on the top of the tree structure 'Hardware' and create a new hardware folder. Rename it, for instance 'Zenitel'. If an appropriate hardware folder already exists, skip this step
Hardware folder - Right click on the Hardware folder and select 'AlphaCom connection/New'.
- In the new dialog, enter the IP-address and port number of the ICX/AlphaCom to which C-Cure 9000 should connect.
- When 'Automatically Populate Devices' is enabled, C-Cure 9000 will connect to the ICX/AlphaCom/AlphaNet and populate the tree with all nodes and intercom stations.
- Click 'Save and Close'


Note that in a partitioned system it is possible to select to which partition and hardware folder within that partition the ICX/AlphaCom connection shall be assigned to. It is possible to at a later stage move the ICX/AlphaCom connection to another partition and hardware folder by simply selecting the appropriate settings from the drop down lists under the TAB 'Partition and Folder'.

When 'Automatically Populate Devices' is disabled, neither nodes nor intercom stations will be discovered. It is also possible to only disable auto-discovery for intercom stations connected to a specific node. Right click on the node and select 'Edit' to access the node information.

C-Cure 9000 Enterprise
A C-Cure 9000 Enterprise system consists of a MAS (Master Application Server) and 1 or more SAS's (Satellite Application Server). Each SAS must have its own connection to the AlphaNet (max 10 such connections are possible). The MAS will collect all device information from all to it connected SAS's. In such an Enterprise system it may be advisable to:
- Enable auto-population
- Disable auto-population once all devices have been discovered and delete those devices which are not relevant for the particular SAS
This will prevent the MAS from showing the same device multiple times.
Intercom properties
Assign an operator to an intercom
An operator intercom is an intercom which
- is associated with a CCure9000 operator (an operator using a CCure9000 client application)
OR
- an intercom not associated with a CCure9000 client application, but from which it should still be possible to open a door by pressing digit 6 during a conversation
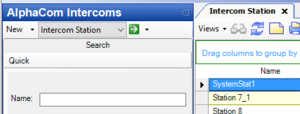
- Click on AlphaCom Intercoms

AlphaCom Intercoms - Click on the right arrow next to 'Intercom Station' - A new TAB listing all discovered intercom stations will be opened.
Select intercom - Click and then right click on an intercom, select Edit


Intercom associated with a CCure9000 client application
As from integration module versions 2.80.009 and 2.90.006 there are 2 fields that need to be entered in the TAB 'Intercom Settings':
- Workstation: from the dropdown list, select the workstation to be associated with the operator intercom; this is normally the PC which is physically next to the operator intercom
- Operator: From the dropdown list, select the user which will log in into the PC to operate the CCure9000 client application

In earlier versions of the integration module, the field 'Workstation' was not present. Only the field 'Operator' needed to be entered to associate an intercom with a CCure9000 client application.
Intercom not associated with a CCure9000 client application
In this scenario, the intercom is used to handle calls and open doors. The command to open the door is sent to CCure9000, which in turn opens the door. In the TAB 'Intercom Settings' there are 2 fields that need be to considered:
- Workstation: Leave this field empty
- Operator: From the dropdown list, select 'Guard'

This scenario is not possible to achieve with integration modules prior to 2.80.009 and 2.90.006.
Association of a door with a door intercom
By associating a door to an intercom station, it is possible to open that door by pressing digit 6 when an operator is in conversion with that door station (also see the paragraphs above). This functionality is available as from integration modules 2.80.009 and 2.90.006. In the 'Associations' TAB of the intercom station property editor it is possible to select the appropriate door from a drop down box. Note that the door needs to be configured in CCure9000 before it will appear in this drop down list.

Triggers
In the 'Triggers' TAB of the intercom station property editor it is possible to assign actions on intercom station state changes:
- Intercom Online/Idle
- Call Request
- Station in a call
- Fault
Note that Offline is not a state which can occur (although it is listed), as this will be reported and shown as Fault.
It is possible to attach one or multiple actions to a state, for example showing a camera viewer when there is a call or call request.

State images
The intercom icon has default images for each state. In the TAB 'State images' it is possible to assign a new image to a state. Simply double click on an existing image and browse to the new image file.
Maps
Intercom icons can be placed in a map.
- Follow the normal procedure to define a map and place an icon on a map
- Select Type: Intercom Station
- Select Object: Select the actual intercom to be placed on the map
Events and actions
Just as it is possible to link an intercom state change to an action in another to C-Cure 9000 connected subsystem, is it also possible to trigger an action in ICX/AlphaCom.
Defining an action in ICX or AlphaCom
- Define an event in a connected subsystem to which an ICX or AlphaCom action must be linked.
- In the trigger TAB of the connected subsystem select 'Activate Event'
- Underneath the table with defined events and actions a entry box 'Event' will appear.
- Click on the down arrow to the right of the entry box and select 'New'
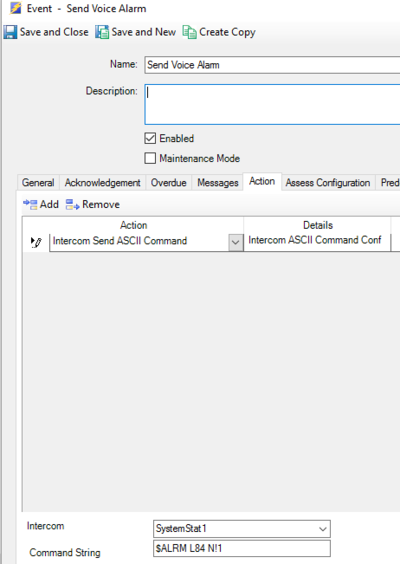
- A new dialog to define the action will appear', Select the TAB 'Action'
- Click 'Add'
- From the drop down list under 'Action' select 'Intercom Send ASCII Command'; 2 new fields will appear at the bottom of the dialog
- Select an Intercom from the dropdown list labeled 'Intercom'. This selection is not used at all, so the selected intercom is not relevant; the C-Cure 9000 software makes this selection necessary.
- Enter a command in Simple Link Layer format in the field 'Command String'; Example: $ALRM L84 N!1
Action in ICX /AlphaCom

- Enter all fields as appropriate in all other TABs
Dynamic view
To be able to show a list of intercom stations in the Monitoring Workstation application it is necessary to define a 'Dynamic View'.
- Select 'Data Views'
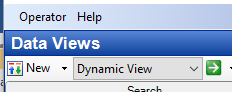
Data View - Select 'Dynamic View' and click 'New'
Dynamic View - In the new dialog enter details as shown in the picture below. There are several checkboxes and other fields that can be changed/edited, use these as appropriate for your system setup
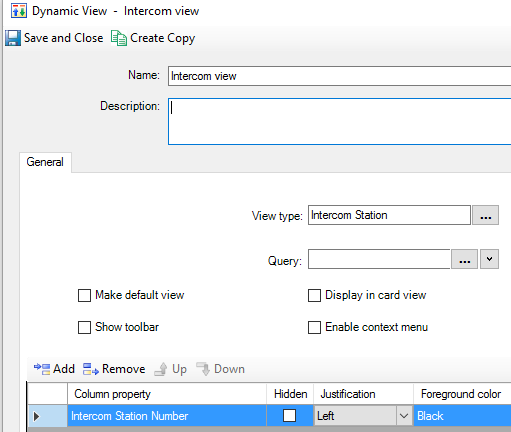
Intercom View


Operation
Operation is normally done from the Monitoring Workstation application.
All intercom station status changes are shown in the 'Activity viewer'.

To show a map, select Maps in the Explorer Bar. This will bring up a Status List, containing all defined maps. Select and right click a map, select 'Popup view' to show the map including all in it defined icons in a new window.
Working with intercom stations
To show the list of defined intercom stations, select 'Dynamic Views' in the Explorer Bar. In the new dialog select 'Intercom View' (assuming that this view has been defined, see above), right click it and select 'Popup view'.
In this list it is now possible to double click on an entry after which a popup view will open. It is possible to open multiple popup views.
The popup view for the intercom station which is associated with the Monitoring Workstation contains a 'Pending Call Queue'. Call requests can be selected in this view and answered by clicking the 'Accept Call' button.

Popup views of other intercom stations only show general information and the status of the station. When the Monitoring Workstation is associated with an operator intercom there is in addition a button 'Place Call', which changes to 'End Call' in case there is an established connection.

Maps
To show a map, select Maps in the Explorer Bar. This will bring up a Status List, containing all defined maps.
Select and right click a map, select 'Popup view' to show the map including all in it defined icons in a new window.

The appearance of the intercom icon is status dependent. Click on the icon to bring up the intercom popup view.
LIMITATION: There is a bug in C-Cure 9000, v2.60. Statuses of intercoms other than 'Idle' are not displayed correctly in the map. This will be rectified in C-Cure 9000, v2.60 SP1. Please refer to Software House for a release date of this service pack.
Versions
Each C-Cure 9000 version requires its own version of the driver, although there are no functional differences in the integration between C-Cure 9000 and AlphaCom
- C-Cure 9000, v2.5 - Current driver version 2.53.004
- C-Cure 9000, v2.6 - Current driver version 2.60.004
- C-Cure 9000, v2.7 - Current driver version 2.70.004
- C-Cure 9000, v2.8 - Current driver version 2.80.007
- C-Cure 9000, v2.9 - Current driver version 2.90.006
Installation issues
A few issues have been identified which can cause the integration not to work as expected, or to display an error message on trying to define the connection to ICX or AlphaCom. The following points can be checked and tried to rectify the problem.
- Check whether the CCure9000 server has the correct permissions to create tables in the database ACVSCore, see paragraph SQL permissions above.
- Check whether the 'Connection String' for ICX/AlphaCom is defined correctly.
- Start 'Server Configuration Application' and select the TAB 'Database'.
- Select the entry 'Stentofon.NextGenConnectedProgram.AlphaCom.Objects' and check whether the entry in the column 'Connection String' points to a valid SQL instance and database.
- Check whether AlphaCom integration module uses the same service account as the CCure Crossfire services
- In 'Computer management/Services' look for the account which is used by 'AlphaCom Driver Service'
- Check whether it matches the service account for the different 'SoftwareHouse Crossfire' services; if there is no match, change the service account for the 'AlphaCom Driver Service'
- Possibly the CrossFire services were not stopped correctly when the integration module was installed, see paragraph Server above
- Start the ‘Server Configuration Application’ (Run as administrator)
- In the TAB ‘Services’ stop all services, from the bottom up
- Close the configuration application
- Uninstall the AlphaCom integration module
- Install the AlphaCom integration module
- Start the ‘Server Configuration Application’ (Run as administrator)
- In the TAB ‘Services’, start all services, from the top down
Integration with VS-Recorder
As from integration module 2.90.006 it is possible to integrate the VS-Recorder in a system which already has the ICX-AlphaCom or AlphaCom XE integrated with CCure9000. The integration with VS-Recorder allows playback of audio of conversations and playback of video recordings which are related to those audio recordings. Playback is controlled from the CCure9000 client application.
Required licenses for recorder integration
The Software House license is available from Software House under product code 'Zenitel – VS2 NAVR - Integration'
In additiona to the licenses for the VS-Recorder to enable it to record conversations and video streams, it also requires the presense of license 1190110160, 'VS Recorder – API'.
Installation - Server
- Stop all CrossFire services. To do this, start 'Server Configuration' (Run as administrator), which is available under 'Start menu/Tyco'. Click on the 'Stop'-button at the top (for the CrossFire Framework Service). This will stop all running services.
- Once all services have been stopped, exit 'Server Configuration'
- Install the CCure 9000-ZenitelRecorder integration module by running ZenitelRecorder-CCURE9000vx.xServerIntegration_x.xx.xxx.msi and follow the instructions which appear on screen
- Start all CrossFire services. To do this, start 'Server Configuration' (Run as administrator), which is available under 'Start menu/Tyco'.
- There will be a new service available: 'VS2VideoServerService'. As this is the first time this service is used, it needs to be enabled before it can be started. Check the checkbox 'Enabled'.
- Click on the 'Start'-button at the top (for the CrossFire Framework Service). This will start all services.
- Once all services for which a license is present have been started, exit 'Server Configuration'
Installation - Clients
For all PC's which have a CCure9000 client running there is a separate 'Client only' installation file.
- Install the C-Cure 9000-AlphaCom client integration module by running ZenitelRecorder-CCURE9000vx.xClientIntegration_x.xx.xxx.msi and follow the instructions which appear on screen.
Configuration
Setup of the Recorder connection is done in the CCure 9000 Administration Workstation.
- Create a new video folder

- Create a new VS2 Audio/Video Server

- In the new dialog, enter the following details:
- Name
- User Name and Password - these are the credentials as defined in the recorder with which the CCure9000 client can retrieve recordings
- IP Address - this is the IP-address of the recorder

- Click 'Save and Close'
- Once closed, right click the just defined recorder connection and select 'Edit' to reopen the same dialog
- Click 'Connect'
- Click 'Import Cameras' - for the recorder and its interface to CCure9000 all devices are handled and classed as cameras, even if they are audio only intercoms without camera
Association
ICX-AlphaCom (or AlphaCom XE) and the recorder are 2 separate entities for CCure9000. Although intercom stations will normally be imported with the same name in the AlphaCom and the recorder integration, they are not automatically the same device. They need to be associated.
- In the AlphaCom device list, select an intercom station, right click it and select 'Edit'
- Select the 'Associations'-TAB
- In the drop down list 'Video Server' select the recorder just defined VS-Recorder
- In the drop down list 'Video Camera' select the same INTERCOM-station - it will normally have the same name

Operation
Playback of recorded audio and video is done using the ICX-AlphaCom integration module.
- Select the ICX-AlphaCom intercom station for which audio and associated video needs to be played, right click it and *Select ‘Pop-up view’.
- Select the ‘Media TAB’

- Select the start and end dates for which to search for audio recordings and click ‘Search’
- Select the required recording from the list and click ‘Load Selected Rec’.
The audio recording will start playing, and if a camera has been associated with the intercom device (in the recorder configuration), the relevant video recording will also play.