Redundancy
From Zenitel Wiki
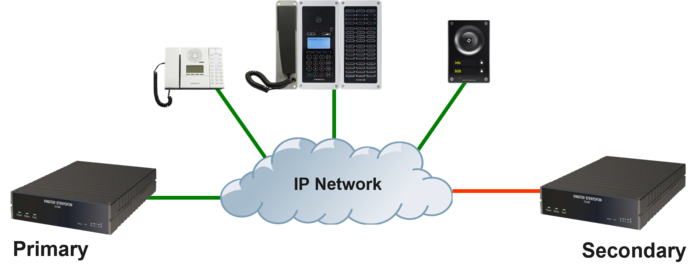
This articles shows possible solutions for redundancy with the ICX-AlphaCom server.
ICX-AlphaCom redundancy
For redundancy between ICX-AlphaCom servers, see Redundant Servers (High Availability).
- High availability and fault tolerant solution maximizing uptime during
- System level failures
- Environment-level failures (power outage, fire, earthquake, etc.)
- Planned outage for system maintenance and upgrades
- Maximum downtime at switch-over (552 stations) is 35 seconds
Power Supply
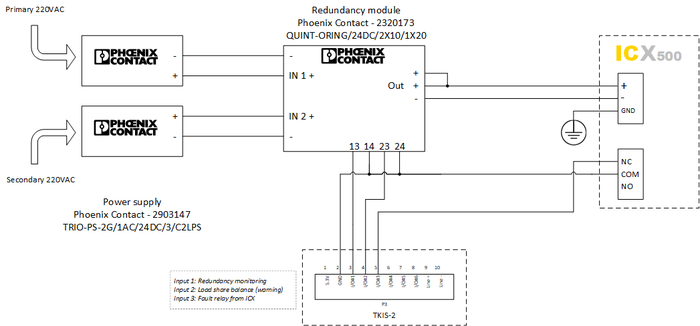
The ICX-AlphaCom normally has one power supply, and it only supports one power input. Using third party products it is possible to Increase durability by adding a solution for redundant power.
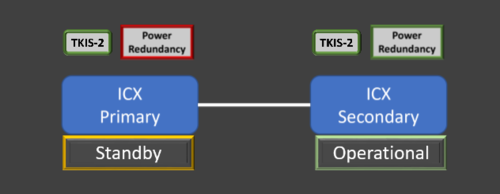
The optional TKIS-2 is used in case it is a full redundancy system, with redundant ICX-AlphaCom servers.
The TKIS-2 will then always be registered and can be used to monitor the power supplies as well as the ICX-AlphaCom. Such a full redundant system might look like this:
RCO or RCI
Any physical inputs and/or outputs needs to communicate with the server via an IP device such as the TKIS-2 or an IP-LCM. These devices, as any other IP device in a redundant system must register and communicate with the operational IP address, and thus always be online with the active server.
Serial Port
The ICX-AlphaCom does not have a serial port and must use an Ethernet-to-serial converter. Since the ICX-AlphaCom redundancy system is using a singular IP address as the operational IP address the solution is to have the converter pointed at the operational IP address, and will work fine, independent on which server is the active one.
Monitoring in VS Operator
The VS Operator can be used together with a redundant system, and it must then communicate with the Operational IP address.
Redundant Servers
Here is a description on how to set up monitoring so the ICX-AlphaCom statuses can be viewed in VSOP.
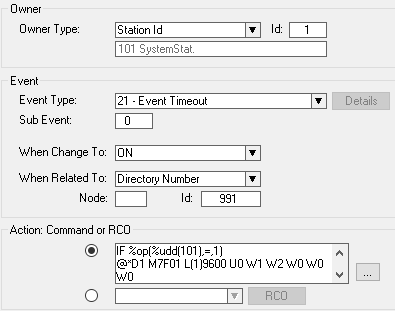
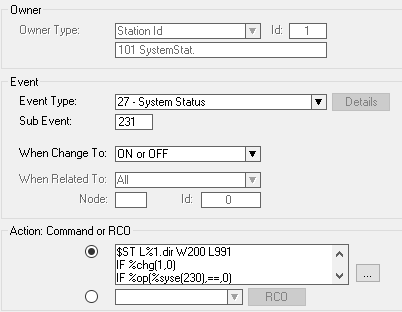
AlphaPro Events
In AlphaPro configure these two events:
Action commands:
$ST L%1.dir W200 L991
IF %chg(1,0)
IF %op(%syse(230),==,0)
IF %syse(232)
WUDD 101 1
STOP
ENDIF
WUDD 101 2
STOP
ENDIF
ENDIF
IF %syse(232)
WUDD 101 3
STOP
ENDIF
WUDD 101 4
Action commands:
IF %op(%udd(101),=,1)
@*D1 M7F01 L(1)9600 U0 W1 W2 W0 W0 W0
ENDIF
IF %op(%udd(101),=,2)
@*D1 M7F01 L(1)9600 U0 W2 W1 W0 W0 W0
ENDIF
IF %op(%udd(101),=,3)
@*D1 M7F01 L(1)9600 U0 W1 W3 W0 W0 W0
ENDIF
IF %op(%udd(101),=,4)
@*D1 M7F01 L(1)9600 U0 W3 W1 W0 W0 W0
ENDIF
VSOP Icons
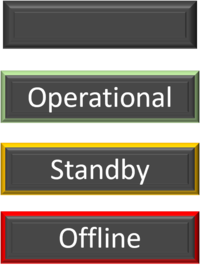
Create two icon sets (the icons used in this example is created in PowerPoint):
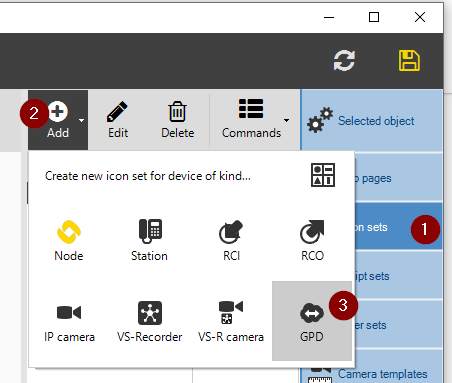
1 - The GPD Icons used for the ICX statuses:
Navigate to the Iconsets menu and click Add, then choose GPD:
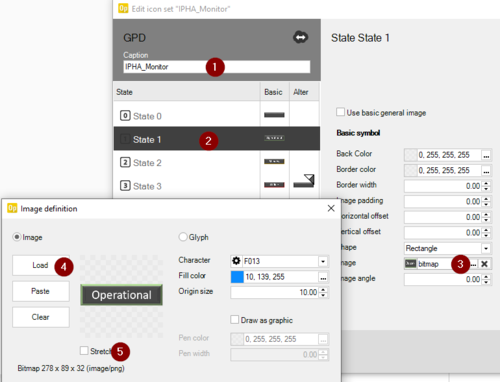
Add your four custom icons as GPD state 0-3:
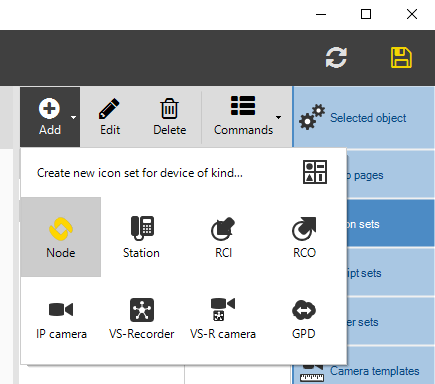
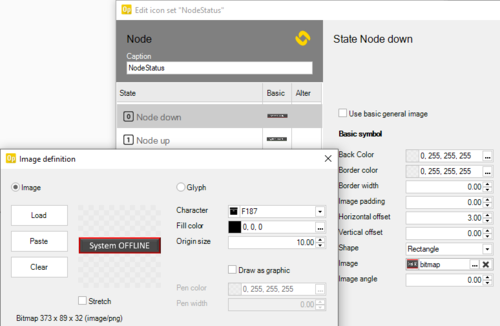
2 - The Node Icon used to show if the Operator is online with the Operational IP address or not:
Navigate to the Iconsets menu and click Add, then choose Node:
Add your two custom icons as Node state 0-1:
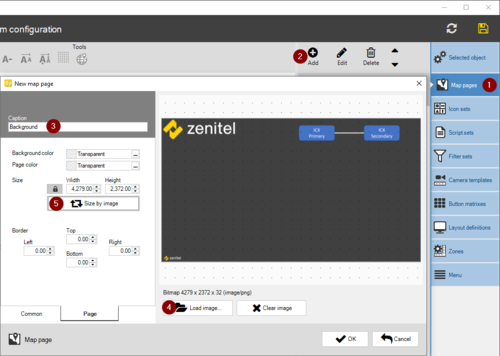
VSOP Map
Navgigate to the Map pages menu and add a custom background:
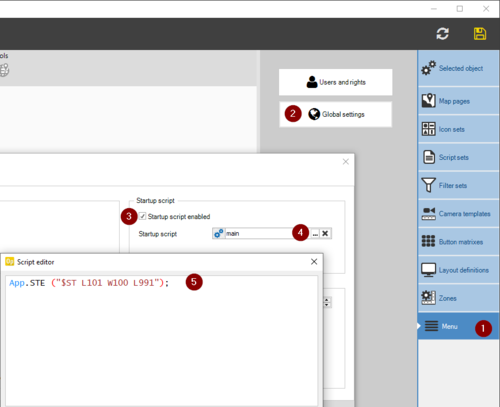
VSOP Startup script
If the VSOP is started after the IPHA monitor scripts have already run in the ICX-AlphaCom Event Handler, the status is unknown for the VSOP, so a startup script is needed the force the Event Handler to resend the status:
App.STE ("$ST L101 W100 L991");
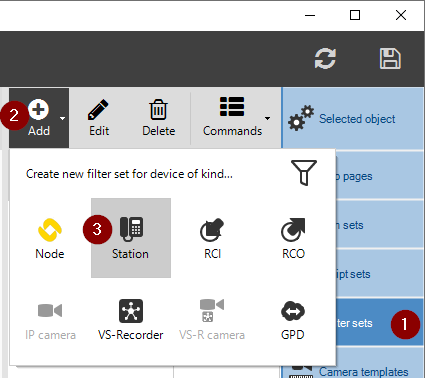
VSOP Filter
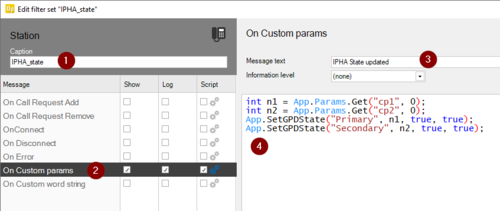
In order to catch the custom parameters sent from the Event Handler we need a filter, and this filter must be tied to an Intercom station.
Create a custom filter:
int n1 = App.Params.Get("cp1", 0);
int n2 = App.Params.Get("cp2", 0);
App.SetGPDState("Primary", n1, true, true);
App.SetGPDState("Secondary", n2, true, true);
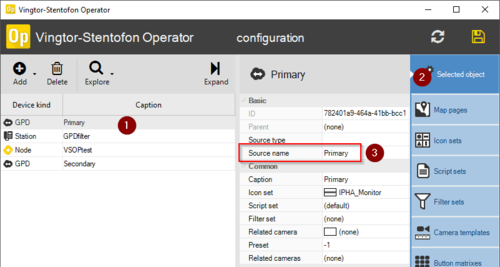
Primary and Secondary refers to the name of the GPD's as set here:
Adding devices to VSOP
Add two GPD devices, one Node device and one Station device.
- Right click the Node device and select the custom NodeStatus Icon Set.
- Right click the GPD devices and select the GPD custom Icon Set.
- Right click the station (dir no 9600) and select the custom station filter made for redundant server monitoring.
Place the icons on the map by drag and drop.
Monitoring Redundant Power supplies
The Power Supplies can be monitored, and faults and warnings can be logged.
Here is a description on how to set up monitoring so the redundant power supply statuses can be viewed in VSOP.
AlphaPro Event
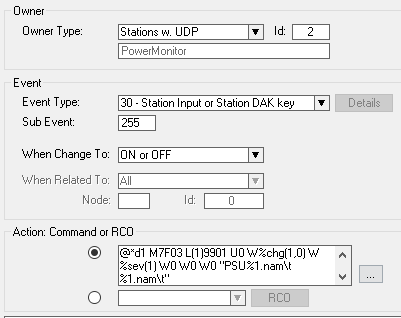
In AlphaPro configure the two TKIS-2 kits which receive the inputs from the Redundancy module as 9901 Primary and 9902 Secondary. Put them both in a UDP group (UDP2 is used in this example), and create this event:
Action commands:
@*d1 M7F03 L(1)9901 U0 W%chg(1,0) W%sev(1) W0 W0 W0 "PSU%1.nam\t %1.nam\t"
IF %chg(1,0)
IF %op(%sev(1),=,1)
LOG "Power redundancy DOWN for %1.nam server"
STOP
ENDIF
IF %op(%sev(1),=,2)
LOG "Power redundancy WARNING for %1.nam server"
STOP
ENDIF
ENDIF
LOG "Power redundancy OK for %1.nam server"
VSOP Icons
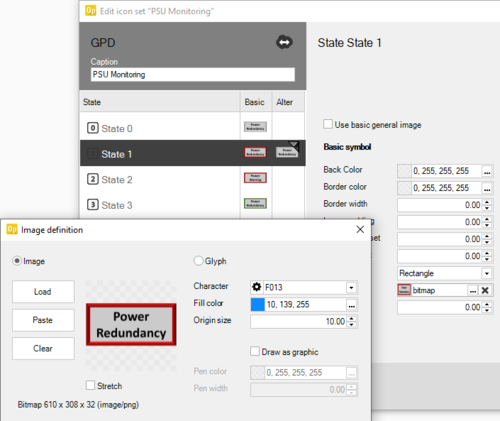
Create a icon set (the icons used in this example is created in PowerPoint): The GPD Icons used for the Redundant Power Supply statuses:
Navigate to the Iconsets menu and click Add, then choose GPD:
Add your four custom icons as GPD state 0-3:
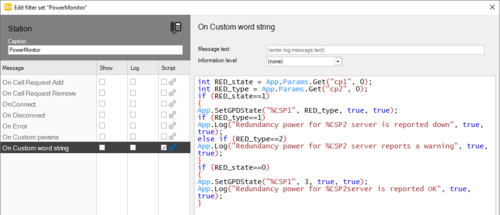
Filter
In order to catch the custom parameters sent from the Event Handler we need a filter, and this filter must be tied to an Intercom station.
Create a custom filter:
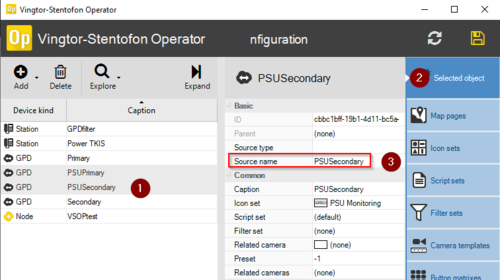
Primary and Secondary refers to the name of the GPD's as set here:
Adding devices
Add two GPD devices and one Station device.
- Right click the GPD devices and select the GPD custom Icon Set made for Redundant Power Supply monitoring
- Right click the TKIS-2 station (dir no 9901) and select the station custom filter for Redundant Power Supply monitoring
Place the icons on the map by drag and drop.

