Apartment Building Entry Point
From Zenitel Wiki
This article describes an example of using the IP Flush Master station as an entry Intercom point for Office Blocks and Upmarket Apartment Buildings.
Main features
- Use a standard Zenitel display station as an Entry Unit (or custom made, based on a IP Master Kit)
- For each station (entry unit) be able to define (from AlphaPro) which users (apartments) should be available in this stations "Address list"
- Four function codes/buttons: Call, Step, Top and End
- When stepping, the display shows the number and name as programmed in AlphaPro, Users & Stations.
- The users (apartments) belonging to one entry point is grouped making it possible to have several entrance points only "responsible" for their relevant users. This also prevents unnecessary disturbance to non-relevant users from visitors
Limitations
- The users (apartments) will not be shown in alphabetical order. They will be listed by increasing physical numbering.
- Stepping can only be performed in one direction
Example description
The setup in the following example is:
- Apartment entry 1:
- Physical station 1, 2 and 4 equals apartment 1, 2 and 4. These can be analogue or IP stations.
- Physical 13 is the entry station. An IP Flush Master station is preferred.
- Apartment entry 2:
- Physical station 9, 11 and 12 equals apartment 9, 11 and 12.
- Physical 14 is the entry station.
- Each entry point has its own group referred to in the programming in the entry station exp field.
- Group 1 contains the apartments belonging to entry 1, and Group 2 has the apartments for entry 2.
- 6 events take care of the function and these six same events are used even if more entries and apartments are added.
Usage
On the entry stations there are four buttons beneath the display. These are “CALL”, “STEP”, “TOP” and “END”. (These are DAK keys 21-24.)
- STEP – When this button is pressed the first station in the corresponding group is shown in the display. Pressing it again, steps to the next, and so on. When it reaches the end it will automatically jump to the top and continue. If left untouched for 10 seconds the station will exit the list and return to standby.
- CALL – Pressing this button simply calls the selected apartment from the list
- TOP – Jumps to the top of the list
- END – Exits the list, or ends an ongoing call.
PS: CALL and TOP have no functionality without STEP being used first.
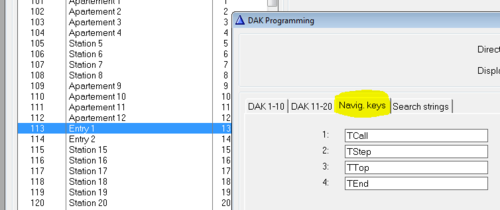
Configure the Navigation keys with the "T"-command to show the button functions permanently in the display:
Event Handler programming
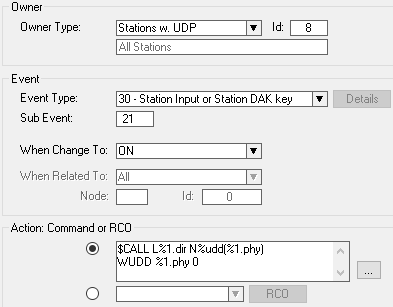
Event 1 - CALL event
Action commands:
$CALL L%1.dir N%udd(%1.phy)
WUDD %1.phy 0
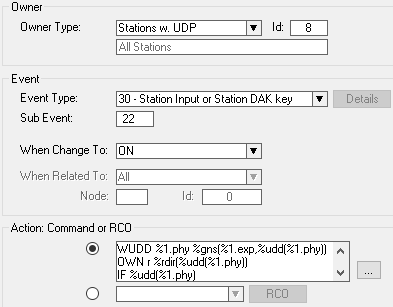
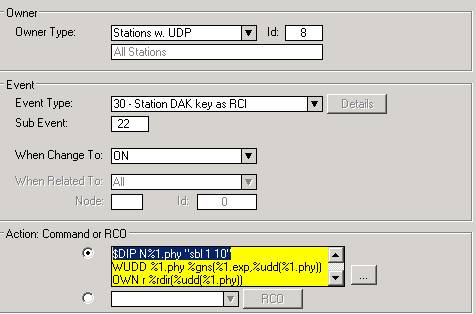
Event 2 - STEP event
Action commands:
WUDD %1.phy %gns(%1.exp,%udd(%1.phy))
OWN r %rdir(%udd(%1.phy))
IF %udd(%1.phy)
$DSPL L%1.dir U18 0311 'SELECT:'
$DSPL L%1.dir U18 0312 '%2.nam'
$ST L%1.dir W 100
STOP
ENDIF
$DIAL_DAK L%1.dir U22
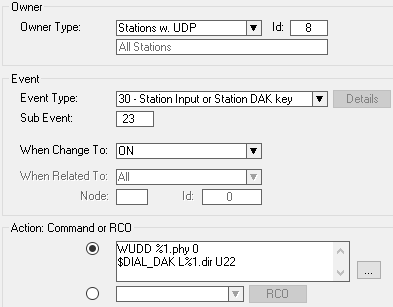
Event 3 - TOP event
Action commands:
WUDD %1.phy 0
$DIAL_DAK L%1.dir U22
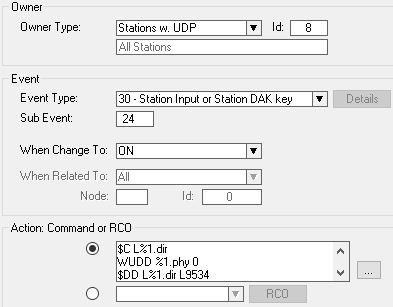
Event 4 - END event
Action commands:
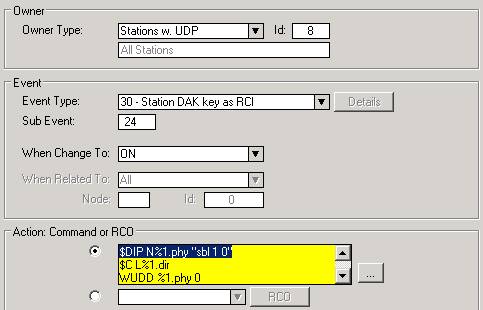
$C L%1.dir
WUDD %1.phy 0
$DD L%1.dir L9534
$ST L%1.dir
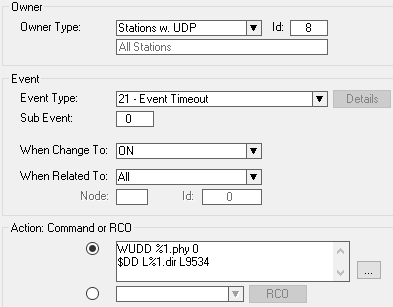
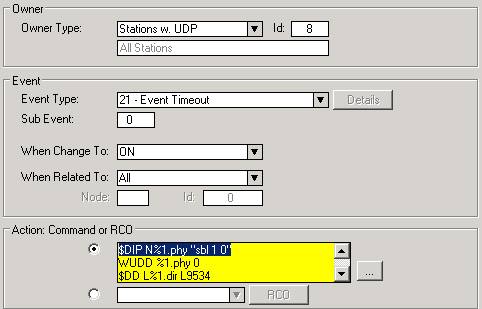
Event 5 - Timeout event: TIMEOUT: reset UDD and display text.
Action commands:
WUDD %1.phy 0
$DD L%1.dir L9534
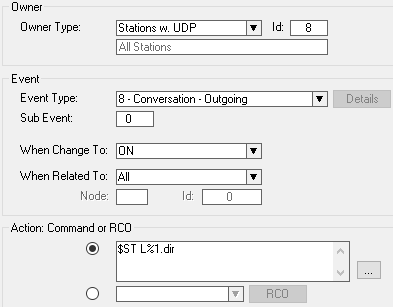
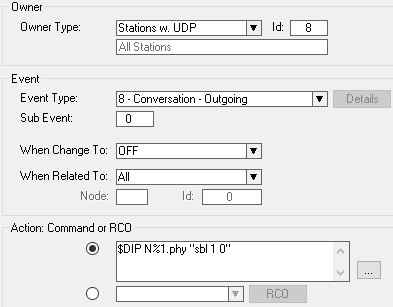
Event 6 - Conversation Outgoing: STOP TIMER started in the STEP event.
Action commands:
$ST L%1.dir
Backlight Control
When using an IP Flush Master station as the Entrance point station it is possible to control the display backlight. Below is shown to different options for this:
Option 1
Backlight is lit when someone starts pressing the STEP button, Backlight is automatically switched of by either conversation end, timeout or the END button being pressed:
- Add the following action string to the STEP event:
- $DIP N%1.phy "sbl 1 10"
- Add this line to the END event and the TIMEOUT event:
- $DIP N%1.phy "sbl 1 0"
- Add this event:
Event 7 - Conversation Outgoing: FORCE BACKLIGHT OFF when the conversation is ended.
Action:
| $DIP N%1.phy "sbl 1 0" |
Option 2
Backlight is constantly on:
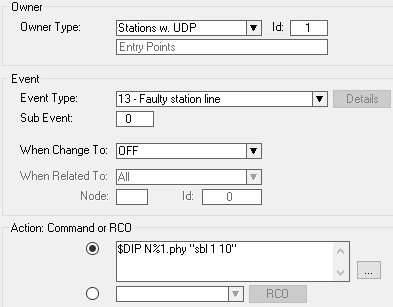
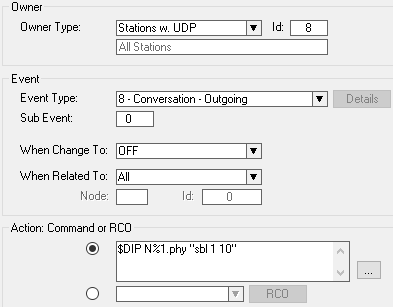
- Put all Entry Point stations in UDP group 1 and add these events:
Event 7 - Station Reset: TURN BACKLIGHT ON when station starts after power cycle, or communication restart.
Action:
| $DIP N%1.phy "sbl 1 10" |
Event 8 - Conversation Outgoing: KEEP BACKLIGHT ON when conversation is ended.
Action:
| $DIP N%1.phy "sbl 1 10" |


