Turbine Test and Demo Application
From Zenitel Wiki
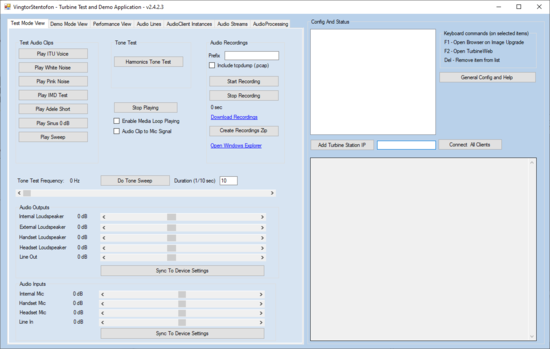
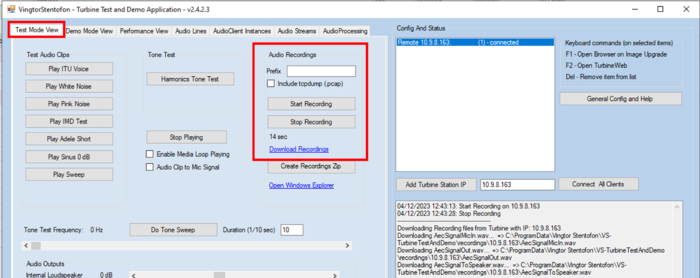
The Turbine Test and Demo Application is a PC application that allows you play audio files directly from the Turbine station without connection to any server. It also allows you to do audio recordings to be used for trouble shooting if there are issues related to audio in the Turbine station.
The application has seven options:
- Test Mode View
- Demo Mode View
- Performance View
- Audio Lines
- AudioClient Instances
- Audio Streams
- AudioProcessing
Demo Mode requires that an additional audio file package (vsf-demo-media package) is uploaded to the station. Test Mode will work without this package.
Installation of the software
Install the "Turbine Test and Demo Application" on your PC
- Download the file VS-Tools-1.04.0011.msi from the download page. This installation package includes the Turbine Test and Demo Application as well as a PC-tool for image upgrade of the AMC-IP board.
- Install the software on the PC
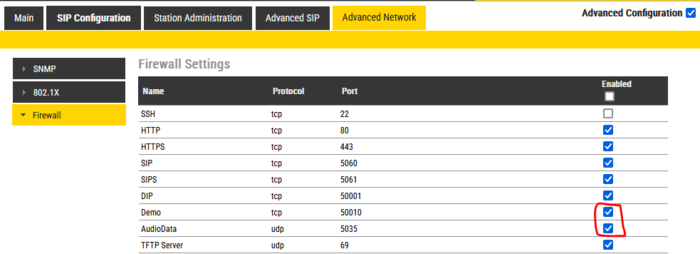
Open the port for "Demo" and "AudioData" in Turbine IP device
- Logon to the web interface of the Turbine IP device
- Check the firewall settings in Advanced Network.
- Enable the Demo (TCP port 55010) and "AudioData" (UDP port 5035). A reboot is required for the changes to take effect. Make sure these ports are open in your laptop as well.
Add stations or devices
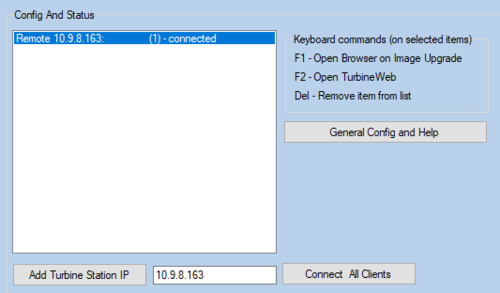
- In the "Turbine Test and Demo Application" you can add stations via the list on the right hand side by typing the IP Address of the Turbine station you want to control, then press Add Turbine Station IP
- When the station is added to the list, press the button Connect All Clients. It is possible to add and manage several stations.
- When successfully connected to a Turbine station this is indicated by the text "- connected" next to the station
- A station can be deleted from the list by highlighting it in the list, then press the "Delete" button on your laptop
- Select from the list which station you want to control. Multiple stations can be selected by "Ctrl + click"
Test Mode View - applications
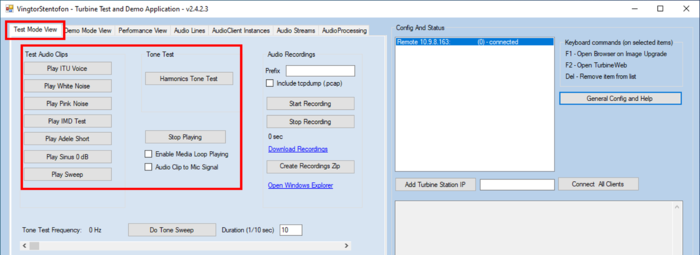
Start the "Turbine Test and Demo Application" on your laptop, and select the tab Test Mode View.
Audio Clip to Loudspeaker
Start playing an audio clip by clicking on the wanted audio clip. Stop Playing will terminate the play.
Audio Clip to Mic
When Audio Clip to Mic Signal is enabled the audio file will be played to the microphone input instead of speaker output.
This means that during an active call one can send an audio clip from the Turbine under control to the other conversation partner.
Tone Frequency Slider
Slide to play tones with 100 HZ steps 100-8000 Hz.
Audio Recordings
On the Turbine devices it is possible for debugging purposes to record the audio, and store the audio files on the device it self.
This could be helpful when experiencing audio quality issues. The device will record what it is playing, picking up and what it is sending to the other participant of the conversation after echo- and noise cancellation have been applied.
- Start Recording: New recording starts and timer counter shows time of running recording
- Stop Recording: Stop recording and writeout wav headers to .wav files.
- Download Recordings: Click on link and all three recoding files are downloaded to PC. Check Status window for destination
The recorded files:
- AecSignalMicIn.wav: Recorded signal direct from mic (HW Codec ADC). This signal is only processed by HW Codec by Gain blocks and Filter blocks.
- AecSignalOut.wav: Signal out from AEC filter and software gain blocks. This is the real signal sent to far-end station in conversation.
- AecSignalToSpeaker.wav: Signal from far-end station in conversation after decoding audio codec. Played directly to speaker and used as AEC reference signal.
Prefix: Add a filename prefix for all recordings for easy doing a series of recordings and label the files.
Demo Mode View
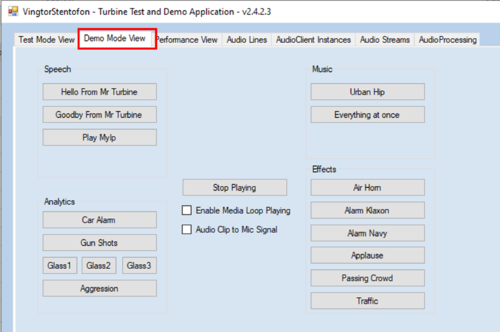
From the Demo Mode View tab you can play audio clips of prerecorded speech, music and alarm signals. In order to use the Demo Mode View, a Demo Media Package must be installed in the Turbine device.
Load media files onto Turbine device
- From the downloads page download the file vsf-demo-media_2.0.3.0.ipk to your computer
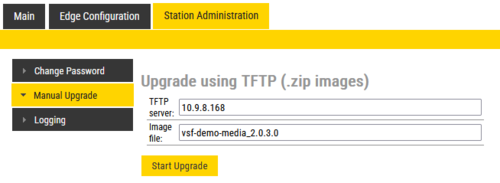
- Use a TFTP server on your PC, and upload the file from to the Turbine station by selecting Station Administration > Manual Upgrade in the web interface. Note: Enter the filename without the .ipk extension
- Select Start Upgrade. The file will now be uploaded. This process takes approximately 2 minutes
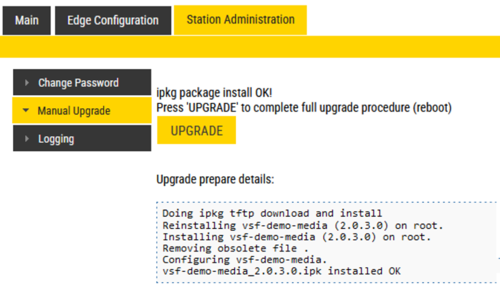
- When the upload is finished, select Upgrade. The media files will now be installed and the Turbine station will reboot.
Play audio clips
When the device is up and running, the audio clips in Demo Mode View tab are ready to be used:
Performance View
Highlights
- Real-time data stream of Audio Data from Turbine device
- Signal levels: Microphone (Near-End), Microphone after AEC and ANC (Near-End-Processed) and Loudspeaker (Far-End)
- AVC Gain adjustment data
- Refresh interval 100 ms
Make sure the station IP you want to trace is selected and connected in listbox to the right. Use Start/Stop buttons for the data you are interested in. For more details see chapters for each function below: Note! After using these functions and leaving site you should restart the Tubine device under test to make sure not streaming is continuing forever..

