Difference between revisions of "IP Master Station Kit - 1008093000"
From Zenitel Wiki
(→Station Board Connectors) |
(→Dimensions) |
||
| Line 209: | Line 209: | ||
==Dimensions== | ==Dimensions== | ||
| − | + | See article: [[IP_Stations_Dimensions_%26_Mounting_Instructions#IP_Master_Station_Kit|IP Stations Dimensions and Mounting Instructions]] | |
| − | |||
| − | [[ | ||
| − | |||
| − | |||
==Related Articles== | ==Related Articles== | ||
Revision as of 15:16, 20 February 2012
Contents
Features
- Made for STENTOFON Critical Communication over IP (CCoIP)
- Supports full keyboard including direct access keys (DAK) and dynamic keys
- Supports handset and headset
- Superb audio quality
- 0dB (600 Ohm) output to Public Address
- Relay output for e.g. door lock control and tamper alarm input
- Dual Ethernet ports for connection of other IP devices
- Remote software upgrade, configuration and monitoring
Station Board Description
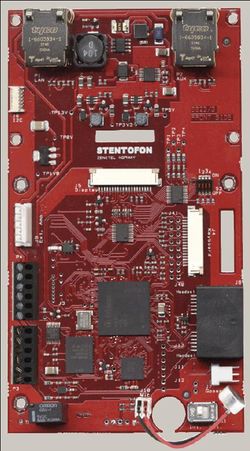
The IP Master Station Kit 100 8093 000 is delivered as a kit including board 8023, microphone and 2 x 6-pin plug-on screw terminals for local manufacturing of IP-CCoIP stations. The board is also used in STENTOFON standard IP flush mount master stations.
Connections
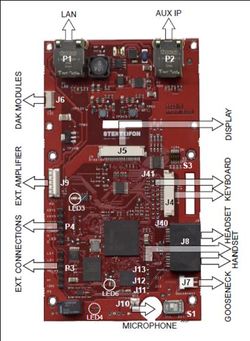
Station Board Connectors
Please see main article: IP Station Board Connections and Indications
IP Station Configuration
IP intercom station web interface
An IP intercom station features an embedded web server, which allows users to log in via a standard web browser.
At commissioning, the IP station needs to be configured to make it possible for the IP station to register in an AlphaCom E Exchange.
Use the following procedure to connect to the IP station:
- Connect the LAN port P1 (Eth0) on the IP intercom station to the PC Ethernet port.
- Use a cross-over Ethernet cable if the PC Ethernet port does not cross, or connect both the PC and the IP intercom station to an Ethernet switch. Power the station with 24 VDC on P3 5/6 if PoE is not available.
- Open a web-browser and enter the IP address for the IP station in the address field.
- Default IP address: 169.254.1.100
- Click on Administrator login and enter:
User name (default: admin) and password (default: alphaadmin). (For software 01.06 and earlier the username is ADMIN and password is alphacom).
The Station Info page will now be visible, showing IP station configuration including the MAC-address of the station, which needs to be entered into AlphaPro exchange tool.
Use the menu bar at the top of each page to browse through the different pages.
CCoIP configuration
- Click on the menu item CCoIP configuration to access the web page used for configuration of IP parameters.
Registration Settings:
- Enter the AlphaCom E node IP address where the IP station shall be a subscriber.
CCoIP Station – IP Settings:
- DHCP – Use this option if the IP station shall receive IP Settings from a DHCP server.
- Static IP – Use this option if the IP station shall use a static IP address. Enter the IP-address, subnet mask and gateway address.
- Click Save configuration followed by Apply to apply the new configuration settings.
When the IP station is not connected to an AlphaCom exchange, a local menu is available in the station display. This menu can be used to configure the IP Station. The structure of the menu is listed below:
Station info
| MAC adr: | 0013cb000000 |
| St IP: | 169.254.1.100 |
| AMC IP: | 169.254.1.5 |
| SW ver: | 01.07 (per. 2009) |
IP settings
| < > | DHCP | (input) |
| <*> | STATIC | (input) |
| IPaddr | 169.254.1.100 | (input) |
| IPmask: | 255.255.0.0 | (input) |
| IPgw: | 169.254.1.1 | (input) |
AlphaCom IP
| AMC IP: | 169.254.1.5 | (input) |
Load defaults
| Press to set. (Station will restart.) | (input) |
Restart
| Press to restart | (input) |
- To enter the menu, press Setup and use code 1851 for sw v.1.07 (code 1234 for sw v.105).
- When editing IP-addresses, use the M-key to insert ”.” (dot).
- Restart the station to apply new settings.
AlphaWeb and AlphaPro
IP intercom stations communicate with the AlphaCom E exchange via TCP port 50001. This port needs to be configured and enabled in System Configuration > Filters in AlphaWeb.
In AlphaPro, tick the IP Station box and enter the IP Station MAC-address. Also, from the station type drop-down menu, choose the correct Station Type (CRM IV, Dual Display Station, OR Station).
Indication LEDs
Station LED
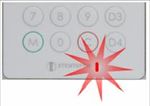
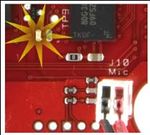
LED4 - Red 5mm on board rear side, also seen through front plate
Blinking 1 sec. interval
Station does not have connection to the AlphaCom exchange.
Possible reasons:
- No connection to Ethernet
- Wrong AlphaCom IP address configured
- Invalid IP address
- No or wrong gateway to the AlphaCom exchange
Blinking 5 sec. interval
Station has connection to the AlphaCom exchange, but has not been registered.
Reason:
- Station has not been programmed in AlphaPro––
- Missing IP Station license in AlphaCom exchange ––
No blinking
Possible reasons:
- Station connected and registered to the AlphaCom exchange - All OK
- Station not powered up (if no other LEDs are active)
Status LED
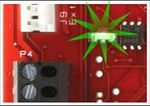
LED3 – Bicolor SMD LED on board component side
Blinking 2 red + 1 green
Station does not have connection to the AlphaCom exchange
Blinking 1 red + 2 green
Station has connection to AlphaCom exchange, but has not been registered
Blinking 3 green
Station connected and registered in the AlphaCom exchange
Power LED
LED6 – Yellow SMD LED on board component side
Light: 13 V board power OK.
No light: 13 V board power fault if no other LED’s are lit.
Possible reasons:
- 24 VDC or PoE not connected
- Faulty board
LAN LEDs
on LAN and AUX RJ45-jacks P1 and P2
Left LED(1):
- Steady light: Ethernet connection OK
- Blinking: Ethernet traffic
- No light: No Ethernet connection
Right LED(1):
- Light: 100 Mbit Ethernet connection
- No light: 10 Mbit Ethernet connection
- (1) Seen from connector side
Reset to factory settings
It may be desired to reset an IP Station to its original settings if, for instance, the password for the web-server is forgotten.
- Connect 24 VDC to P3 5/6 to power the station.
Stations with display
- Make sure the IP Station does not have Ethernet connection to AlphaCom E
- Choose Setup from the display menu and navigate to Load defaults menu
- Press Ok.
The station will restart with factory settings
Reset to factory settings can also be done from the local menu on master stations.
Stations without display
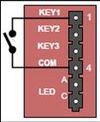
- Connect a button between pin 1 (KEY1) and 4 on P4
- Keep the button pressed while powering up the station
- Alt. 1 - Static IP address: When the station LED starts blinking, release the button for exactly two blinks, then press the button again
- Alt. 2 - Dynamic IP address: When the station LED starts blinking, release the button for exactly four blinks, then press the button again
- Release the button
The station will come up with the factory settings.
Dimensions
See article: IP Stations Dimensions and Mounting Instructions

