IMT - Basic Intercom System Setup
From Zenitel Wiki
Overview
The procedure for deploying IP-intercom stations is
- Planning your system
- Discovery of intercom devices
- Identification of intercom devices and assigning a directory number
- Software upgrade
- Configuration
- Verifying configuration
A Wizard will guide you through the procedure.
Planning the installation
Plan your installation by collecting configuration data you would need to setup your system.
Planning an IC-Edge Installation
IC-Edge systems should be configured from the IC-Edge Controller, Use IMT only for firmware upgrade.
Planning an ICX-AlphaCom Installation
The table below is an example of data you would need for a typical AlphaCom IP intercom installation.
ICX-AlphaCom system parameters
| Parameter | Value |
| Station mode | ICX-AlphaCom |
| ICX-AlphaCom Site 1 | 10.4.2.2 |
| IP gateway Site 1 | 10.4.2.1 |
| IP address range Site 1 | 10.4.2.x |
| IP network mask Site 1 | 255.255.255.0 |
| ICX-AlphaCom Site 2 | 10.7.2.2 |
| IP gateway Site 2 | 10.7.2.1 |
| IP address range Site 2 | 10.7.2.x |
| IP network mask Site 2 | 255.255.255.0 |
ICX-AlphaCom system intercom information
| Dir. No. | Name | Location (Site) | IP configuration | MAC-address* | Host name | Other |
| 101 | Hans | B1, F1, R1 | 10.4.2.7 | 00:13:CB:01:5F:27 | Zenitel-101 | |
| 102 | Thomas | B1, F1, R2 | 10.4.2.8 | 00:13:CB:06:01:4C | Zenitel-102 | |
| 103 | Front Door | B1, Main Entrance | 10.4.2.9 | 00:13:CB:00:AA:38 | Zenitel-103 | Noisy environment |
| 104 | Back Door | B1, Back Door | 10.4.2.10 | 00:13:CB:00:1B:CA | Zenitel-104 | |
| 201 | Emil | B2, F3, R6 | DHCP | 00:13:CB:01:5F:28 | ||
| 202 | Frano | B2, F3, R8 | DHCP | 00:13:CB:06:01:45 | ||
| 203 | Lab | B2, Lab Entrance | DHCP | 00:13:CB:00:AA:39 | ||
| 204 | Datacenter | B2, Datacenter | DHCP | 00:13:CB:00:1B:CE |

|
* IT is not needed to obtain all the MAC addresses upfront. The ICX-AlphaCom directory report from the Discovery Wizard Finish step has the MAC addresses in the directory list.'' |
Planning a Pulse Installation
The tables below are examples of data you would require for a typical Pulse system installation.
| Parameter | Value |
| Station mode | Pulse |
| Server Site | 192.16.8.29 |
| IP gateway Site | 192.16.8.1 |
| IP address range Site | 192.16.8.x |
| IP network mask Site | 255.255.255.0 |
Pulse system intercom information
| Dir. No. | Name | Location (Site) | IP configuration | MAC-address* | Host name | Other |
| 101 | Reception | Reception | 192.16.8.29 | 00:13:CB:01:5F:27 | Flush Master | IP Master Station |
| 102 | John Smith | Head Office | DHCP | 00:13:CB:06:01:4C | Desk Master | IP Desktop Station |
| 103 | Peter Brink | Head Office | DHCP | 00:13:CB:00:AA:38 | Desk Master | IP Desktop Station |
| 201 | Entrance | Main Entrance | DHCP | 00:13:CB:01:5F:28 | TCIV-3 | IP Substation |
| 202 | Elevator | Main Hall | DHCP | 00:13:CB:06:01:45 | TMIS-1 | IP Substation |
| 301 | Office 1 | 1st floor | DHCP | 00:13:CB:00:AA:39 | TCIS-5 | IP Substation |
| 302 | Office 2 | 2nd floor | DHCP | 00:13:CB:00:1B:CE | TCIS-4 | IP Substation |
| 303 | Office 3 | 3rd floor | DHCP | 00:13:CB:00:1B:54 | TCIS-6 | IP Substation |
Planning a SIP Installation
The tables below are examples of data you would require for a typical SIP IP intercom installation.
SIP system parameters
| Parameter | Value |
| Station mode | SIP |
| Server Site | 192.16.8.100 |
| IP gateway Site | 192.16.8.1 |
| IP address range Site | 192.16.8.x |
| IP network mask Site | 255.255.255.0 |
SIP system intercom information
| Dir. No. | Name | Location (Site) | IP configuration | MAC-address* | Host name | Other |
| 101 | Reception | Reception | 192.16.8.29 | 00:13:CB:01:5F:27 | Flush Master | IP Master Station |
| 102 | John Smith | Head Office | 192.16.8.18 | 00:13:CB:06:01:4C | Desk Master | IP Desktop Station |
| 103 | Peter Brink | Head Office | 192.16.8.19 | 00:13:CB:00:AA:38 | Desk Master | IP Desktop Station |
| 201 | Entrance | Main Entrance | 192.16.8.32 | 00:13:CB:01:5F:28 | TCIV-3 | IP Substation |
| 202 | Elevator | Main Hall | 192.16.8.34 | 00:13:CB:06:01:45 | TMIS-1 | IP Substation |
| 301 | Office 1 | 1st floor | 192.16.8.35 | 00:13:CB:00:AA:39 | TCIS-5 | IP Substation |
| 302 | Office 2 | 2nd floor | 192.16.8.36 | 00:13:CB:00:1B:CE | TCIS-4 | IP Substation |
| 303 | Office 3 | 3rd floor | 192.16.8.39 | 00:13:CB:00:1B:54 | TCIS-6 | IP Substation |
Station Discovery and Upgrade Wizard
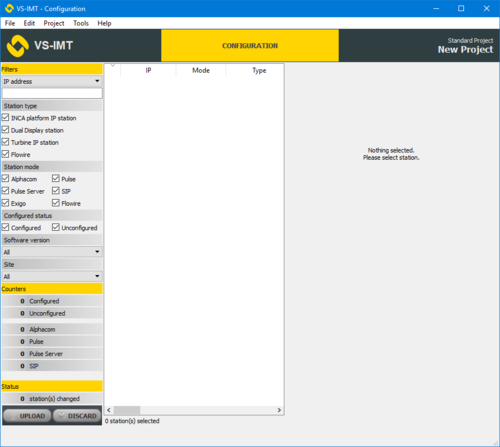
Once the system has been planned it is time to start IMT and run the Wizard.


