Schneider Security Expert - IC-EDGE integration
From Zenitel Wiki
Introduction
This article describes how you integrate Security Expert and an IC-EDGE system to incorporate audio communication into Security Expert’s integrated access control and intruder detection system.
The information presented in this article describes how to prepare an IC-EDGE system to communicate with Security Expert and how to program Security Expert to integrate Zenitel intercom devices via SIP communication.
Prerequisites
The following prerequisites are required:
- An operational Security Expert 4.3.285.21 or later system.
- An SX-SIP-10 license for Security Expert.
- A Zenitel device configured as EDGE controller with one IC-EDGE Server-SIP-Client Extension license per connected Security Expert SIP client.
Integration Overview
Communication between IC-EDGE and Security Expert is through SIP. Video from the Zenitel devices or an external IP camera is supported using RTP communication.
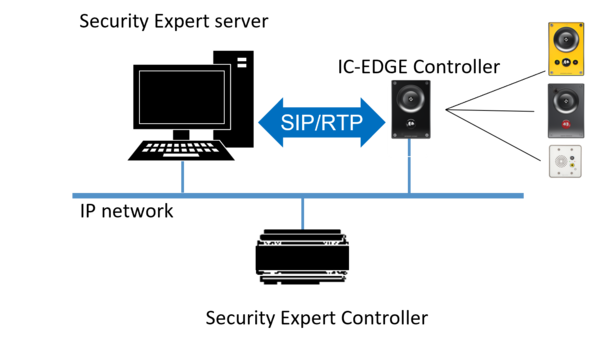 |
| System overview |
The following instructions outline the steps required to configure the integration:
- Configure the Zenitel IC-EDGE controller
- Programming the Camera
- Programming the Workstation
- Associating Zenitel devices with doors
- Creating a Floor Plan
- Testing the Integration
Configure the Zenitel IC-EDGE controller
Before proceeding with the integration, you will first need to gather information as described below.
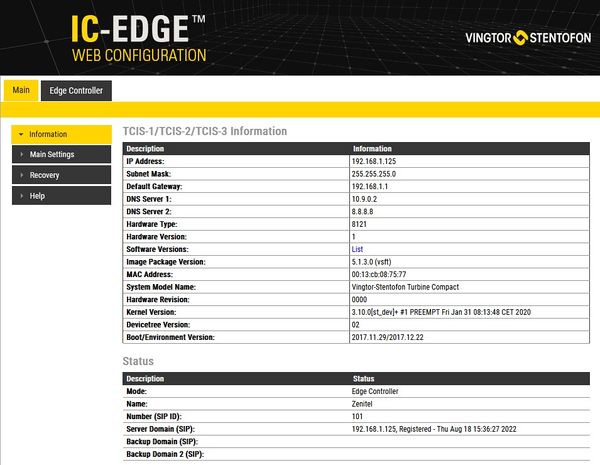
1. Using a web browser, connect to the IC-EDGE controller to open the configuration page and log into the system.
2. Click the Edge Controller tab. Take note of the following information associated with the:
- Number
- Name
- IP Address
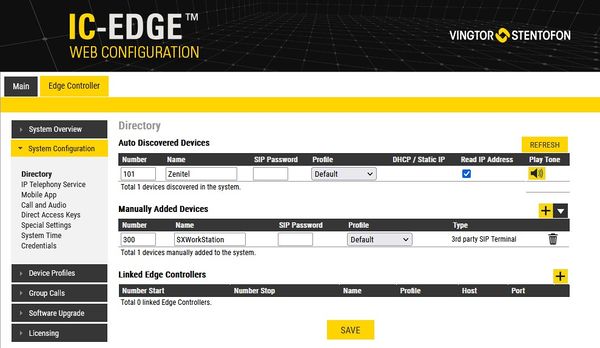
3. Click on System Configuration.
4. In the Manually Added Devices section, hover the mouse cursor on the + symbol and click 3rd Party SIP.
5. Make the following configuration settings:
- Number: Define a number for connecting to the Security Expert SIP client.
- Name: Define a name for the Security Expert SIP client.
- SIP Password: If desired, set a password.
- Profile: Set the profile to “Default”.
- Click Save
When finished the configuration should look something like this:
Configure Schneider Electric Security Expert
Programming the camera
If the Zenitel intercom device is a video device, or if you’d like to use an external IP camera, create a camera for the intercom in Security Expert as follows:
1. In Security Expert, navigate to Monitoring | Setup | Cameras.
2. Click Add to create a new camera.
3. Define a Name for the camera.
4. Set the Type to “H.264 & Motion JPEG Stream Camera”.
5. Set the URL to the address of the camera stream. You may need to refer to the device’s documentation to determine the proper URL.
6. Click Save.
Programming Zenitel intercom devices in Security Expert
1. Navigate to Monitoring | Setup | Intercoms.
2. Click Add to create a new intercom.
3. Define a Name for the intercom. Consider matching the Name you took note of in step 2 of "Preparing the Integration".
4. In the URI field, enter the address necessary to establish a connection to the Zenitel intercom device. This address should be in the form of Number@IP_Address. For example, if the intercom’s number is 101 and its IP address is 192.168.1.125, define the URI as 101@192.168.1.125.
5. If you created a Camera for this intercom device, use the drop down to select the camera you created in step 3 of “Programming the Camera”.
6. Click Save.
Programming the Security Expert Workstation
1. Navigate to Events | Workstations.
2. Click Add to create a new Workstation.
3. Set the Name for the workstation to match the name you defined in step 5 of "Preparing the Integration".
4. Set the Computer Name to the hostname of this PC.
5. Set the Server Address to the IP address of the IC-EDGE controller.
6. Set the Account Name of the of the IP user being used for this integration. This will be the "SIP username" you set in step 5 of "Preparing the Integration".
7. Enter the Account Password for the IP user being used for this integration. This will be the "SIP password" you took note of in step 5 of "Preparing the Integration".
8. Set the SIP Port to match the port used by the Zenitel intercom device (typically 5060).
9. Choose the Microphone from the drop-down list of available microphones on this PC.
10. Choose the Speakers from the drop-down list of available speakers on this PC.
11. Click Save.
Associating Zenitel intercom devices with a Door
1. Navigate to Programming | Doors.
2. Select a door.
3. Set Intercom (Entry) to the name of the Zenitel intercom device you programmed.
4. Click Save.
Creating a Floor Plan
1. Navigate to Monitoring | Setup | Floor Plan Editor.
2. Click Add to create a new floor plan.
3. Define a Name for the floor plan.
4. Click OK.
5. Expand the Devices section in the right-hand panel of the floor plan.
6. Click the Add button to add a device.
7. In the resulting Door list, highlight the door you associated with the intercom and drag-and-drop this door into the floor plan.
8. Click Close to close the Door list.
9. Click Save
Testing the Integration
1. Verify the new SIP client has successfully been registered with the SIP server by clicking on the telephone icon in the lower left corner of the Security Expert client. You should see a “Registered with Server” message such as the one shown below.
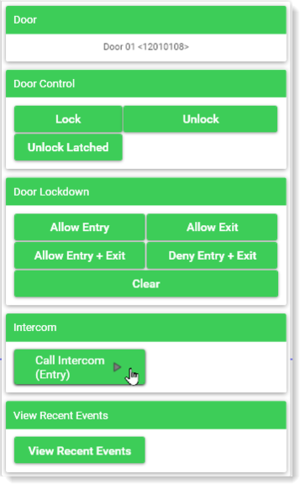
2. In the floor plan, right-click on the door you associated with the intercom device and then click the Call Intercom button from the resulting dialog.
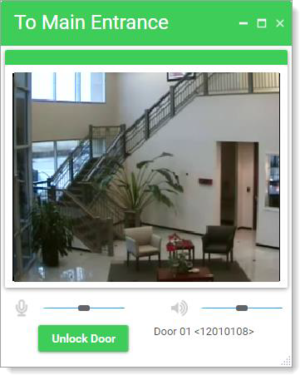
3. Verify you can successfully communicate with the intercom device. Also, if you have associated a camera, verify you can successfully view its live video.
4. Click the Unlock Door button and verify the door associated with the intercom device unlocks.
5. Close the intercom dialog.
6. On the Zenitel intercom device, press the Call button to initiate a call to Security Expert
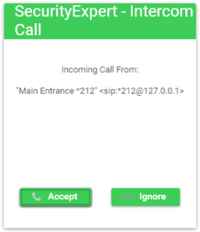
7. In Security Expert, verify an Intercom Call dialog appears on the screen.
8. Click the Accept button.
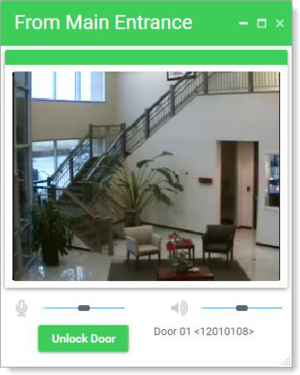
9. Verify you can successfully communicate with the intercom device. Also, if you have associated a camera, verify you can successfully view its live video.
10. Click the Unlock Door button and verify the door associated with the intercom unlocks

