Door Opening - Configuration example
From Zenitel Wiki
This article explains how to configure the Door Opening feature.
Door opening is a standard feature in the ICX-AlphaCom and AlphaCom XE. The way it works is that when an operator is in a conversation with a door station, the operator can press digit 6 to activate a relay. The relay will pulse for 3.5 seconds (configurable).
Event Handler
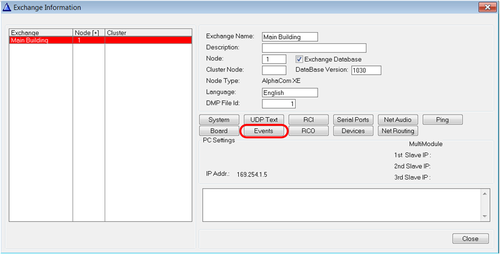
We need to define who this event is for, and which output to activate. This is done using the Event Handler. Go to Exchange & System menu from the top menu in AlphaPro:
From the Exchange & System window choose the Events button:
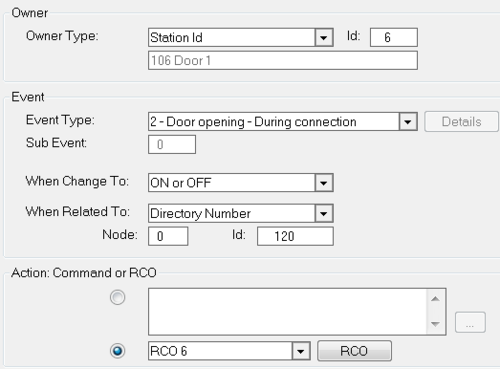
In the Event Actions window click the Insert button and create an event like this:
This event is triggered when the operator dials digit 6 while in conversation with the door. Note that the Door Station is the owner of the event (here physical number 6). When Related To can be set to "All", meaning whoever in conversation with the door is allowed to dial digit 6 to open the door. In this example we have chosen to limit this access by selecting a single station; Operator with Directory number 120.
In the example above RCO 6 will be triggered when the Door Opening feature (digit 6) is pressed.
Mapping of RCO
The physical relay must be mapped to a "Logical RCO". The mapping is done from AlphaPro, Exchange & System -> RCO window where the logical RCO is assigned to a physical address.
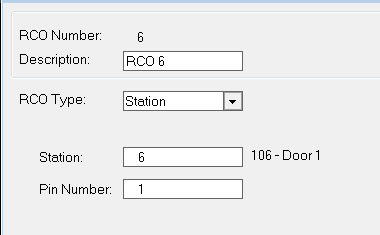
The physical address is given as Station + Pin Number.
For an overview of which devices that are supporting RCOs, see the article: RCO - Remote Control Output
IP Stations
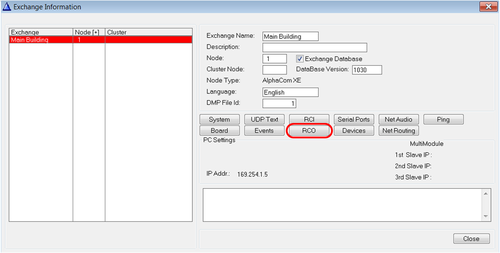
All Zenitel IP stations have an inbuilt relay which can be controlled by the RCO command. In the RCO table the RCO can be mapped to relay of the station. From Exchange & System menu choose the RCO button:
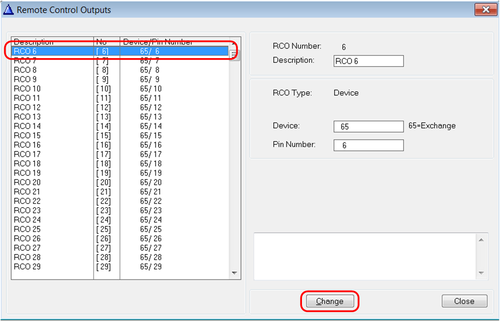
Select the RCO from the list on the left and click the Change button:
Choose RCO Type = Station, and enter the physical number of the door station (where the relay is physically located) in the Station field:
Which Pin Number to use depends on the station type:
- INCA Stations: Use Pin Number = 1
- Turbine Stations: Use Pin Number = 7
Analogue stations
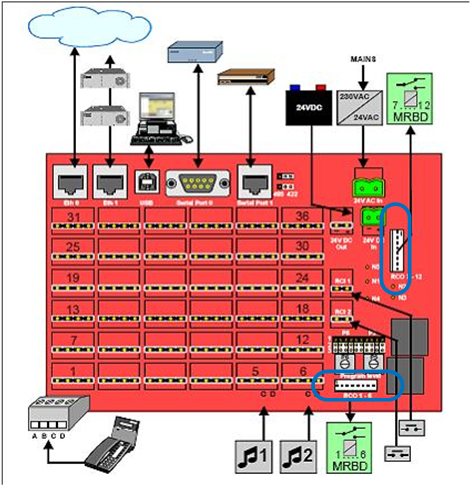
If the door station is analogue the RCO comes from the server its self. On an [XE7]] there are two connectors for RCO1-6 and 7-12 located on the back:
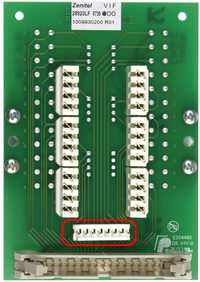
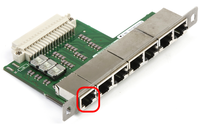
On XE20/XE26 there is an RCO output per ASLT connection. These can be fetched either from
The RCO, which is a logical signal must be connected to a relay. Use the Multi Relay Board for this. See MRBD article for further details.
Finalization
Close all windows in AlphaPro and upload the database using the Send All or Send Change button. Apply changes by restarting the server.


