Configuration guide for IP Hotline Station (ICX-AlphaCom)
From Zenitel Wiki
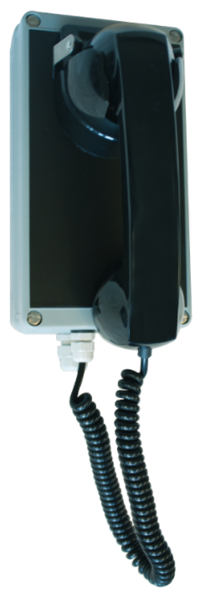
This article is applicable for the INCA based and the Turbine based IP Hotline station, used in ICX-AlphaCom mode.
Hotline function
Hookswitch status
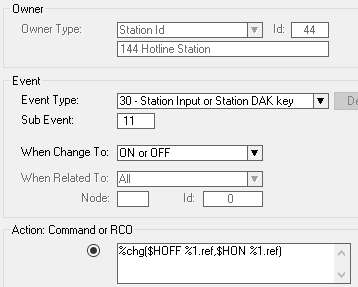
The handset hook-switch is connected to input 1 on the IP Station Board. An event must be created that reports correct handset status to the ICX-AlphaCom.
In AlphaPro, Users & Stations window, select the Events button, press Insert and enter an event with the following properties:
The action string is: %chg($HOFF %1.ref,$HON %1.ref)
Hotline Call
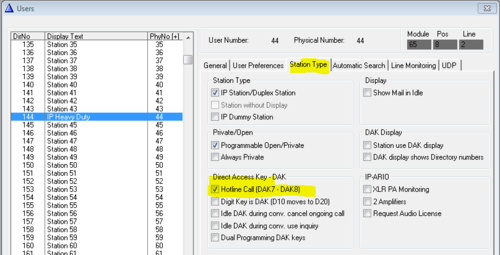
Enable the hotline function by selecting the hotline station in the listbox in Users & Stations, select the Station Type tab, and check the Hotline flag:
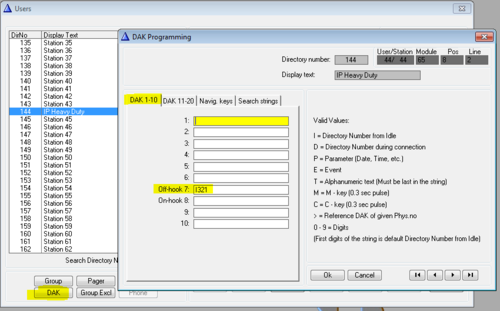
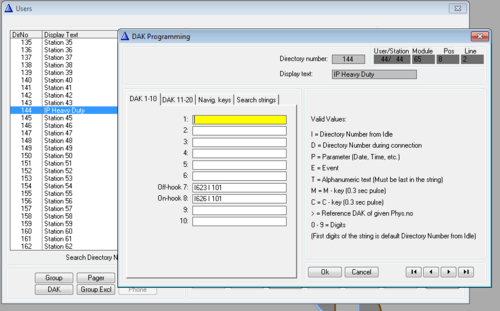
In Users & Stations, select the DAK button, and enter the call destination on DAK 7 (= Off-hook):
- If the hotline call should generate a Call Request instead, enter "I 623 I xxx" on DAK 7, where xxx is the target station.
- If the Call Request should be cleared when replacing the handset, enter "I626 I xxx" on DAK 8, else leave DAK 8 blank.
Hotline Call Delay
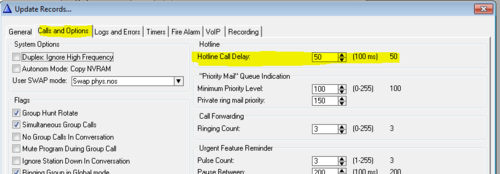
By default there is a 5.0 second delay from the handset is lifted until the call is placed. Often you want the call to be placed immediately. To change the delay time, select Exchange & System > System > Calls and Options.
Additional Call Indication (optional)
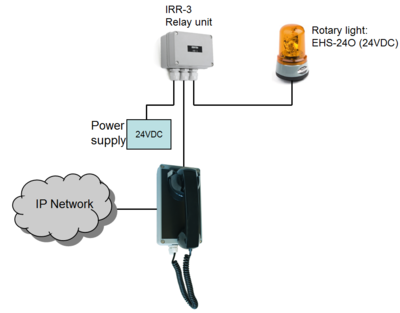
The built-in relay in the IP Hotline Station can be used to operate an additional call indication device, such as a rotary light.
Additional equipment required:
- Rotary light 24VDC (Item 300 6102 041)
- IRR-3 relay box (Item 102 0600 992)
- 24VDC power supply (Minimum 3A)
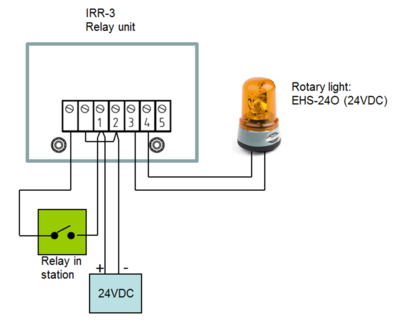
Connection diagram:
Configuration
The built-in relay in the IP Hotline Station is controlled by the RCO command in the event handler.
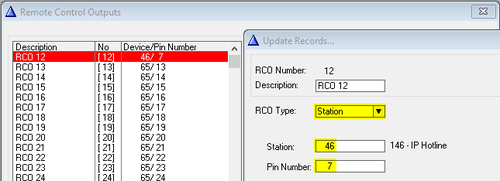
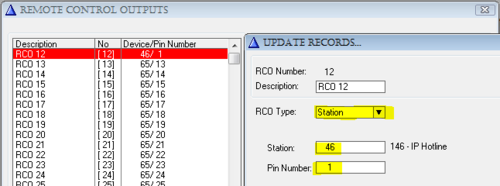
To map the relay of the IP Station to a logical RCO, select Exchange & System -> RCO. Pick a free RCO, select Change and set the RCO Type = Station, enter the physical number of the IP Station, and set pin number = 1.
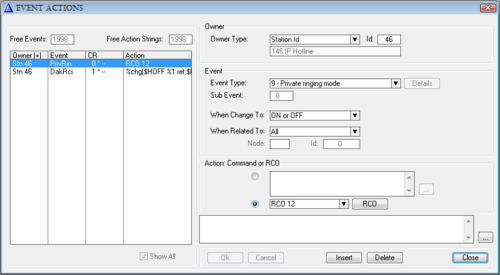
In Users & Stations, select the IP Hotline station from the list box, then press Events, and Insert a new event with the following properties. This will cause the relay to operate during the ringing of an incoming call.


