ONVIF Integration for ASL PAVA
From Zenitel Wiki
By using a Zenitel VoIP kit as an ONVIF Interface, it is possible to integrate an ONVIF compliant VMS system with Vipedia PAVA.
 |
| Principle of operation |
From the VMS (Video Management System) it will be possible to:
- Do live announcements to fixed zone(s) in the PAVA system
- Start prerecorded messages to fixed zone(s) in the PAVA system
This article uses the IP-LCM VoIP kit, but other kits may also be used.
The ONVIF part of this article is generic, information on the specifics for the different software packages is not included.
Contents
Hardware
For the ONVIF integration we need a Zenitel kit, in this example we use the IP-LCM. And we wire this kit into the Vipedia of the PAVA system. No other hardware is required.
Wiring the hardware
The kits can be wired for two functions. One is triggering DVA messages and the other is for live speech into the PAVA system.
The COM side of the relays on the IP-LCM is connected to the system 0V. The NO side of the relays is wired to the GPIO inputs of the Vipedia. If you want the loop to be failsafe you can use the NC side, but keep in mind that you probably have to configure this change also in the ONVIF system. There are 4 inputs per patch cable, so if you need all 8 relays you need a second cable wired in the same manner to the next 4 relays.
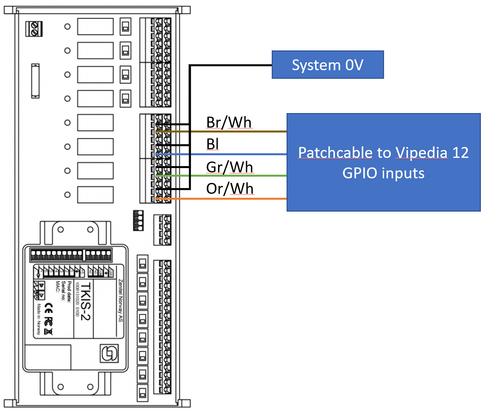 |
| Patch cable to the Vipedia GPIO inputs |
The line out from the IP-LCM is connected directly to an audio input of the Vipedia.
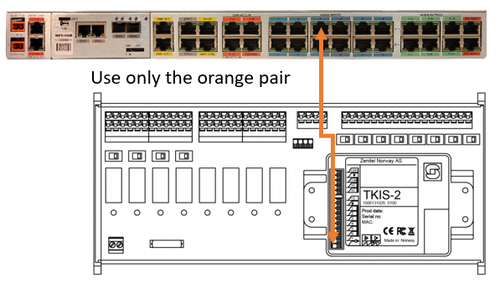 |
| The cabling of the audio output |
Configuration
Setting up the Edge system
Even with a single IP-LCM we need to set up the Edge system so the device becomes fault free. If more than one IP-LCM is used these can all be added to one Edge controller. The description how to set this part up can be found in our IC-Edge Getting started article.
Adding to an ONVIF system
For adding the IP-LCM to the different ONVIF systems there are separate articles in our ONVIF category
When the IP-LCM is added to the ONVIF system you will have 9 relays available. The first relay is the one on the TKIS-2 that is onboard the IP-LCM, the other 8 in order the board relays.
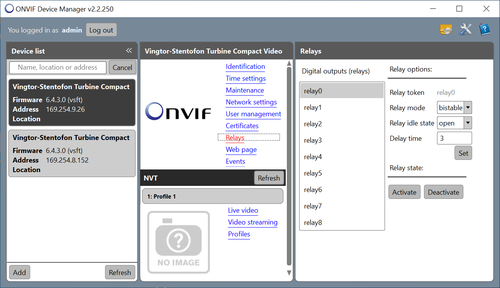 |
| The relays of the IP-LCM |
Play DVA messages
To play a DVA message we set the GPIO input of the Vipedia to establish a fixed route with the DVA message as source and the desired zones as output. And of course one of the inputs can also be configured as a cancel input to cancel playing a message.
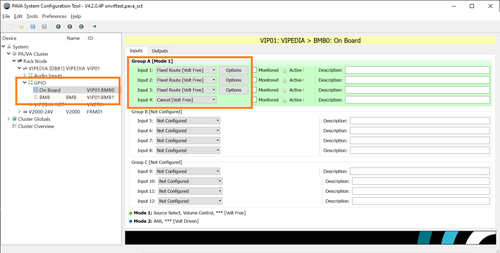 |
| Setting the GPIO for fixed routes |
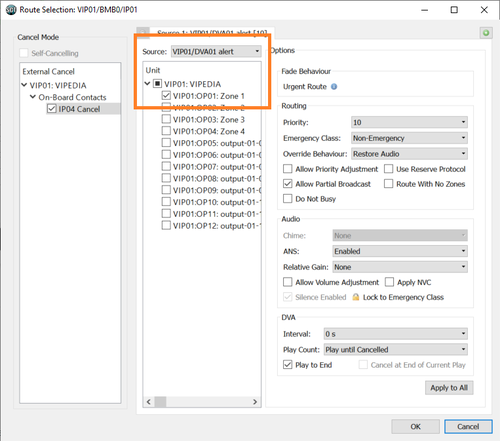 |
| Setting the source and destination |
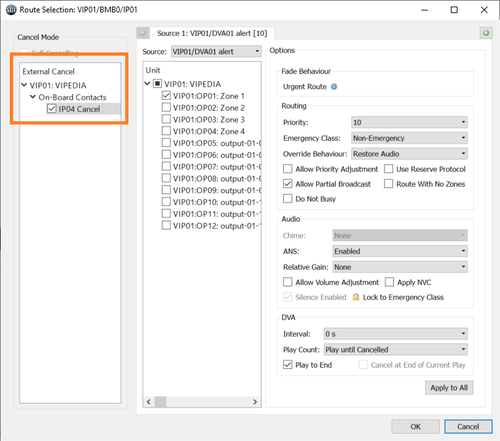 |
| Cancel input |
Live speech to the PAVA system
For the live speech from ONVIF into the PAVA system VOX routing is used in the Vipedia.
In the System Configuration Tool (SCT), select the MISC input used by the IP-LCM. Check the box VOX and define the route to be established when audio is detected on the input.
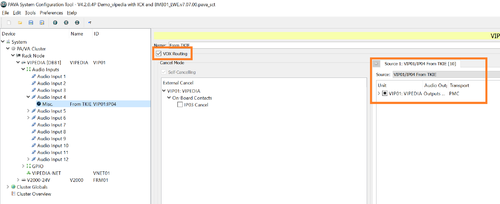 |
| The checkbox for enabling the VOX routing and the source and destination for the route. |
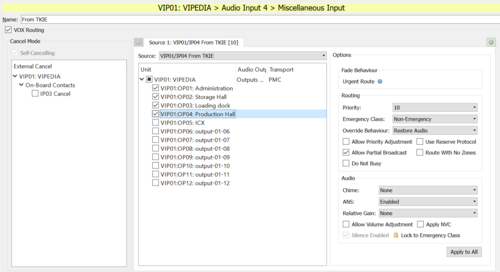 |
| The VOX routing |
Then using the Router Dynamic Tool (RDT) you have to check the box Gate on the input. Also set the threshold and attack, hold and release times. The values in the picture below are a good starting point for use with a IP-LCM.
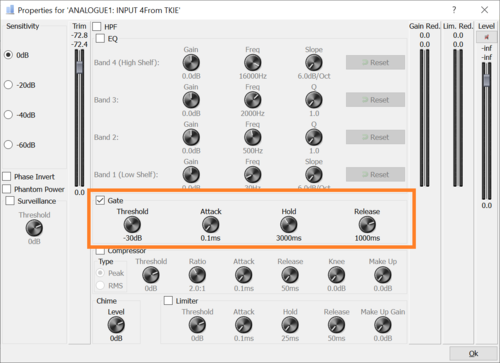 |
| The gate settings |
