ITSV-4/5 as Paging Station for PAVA
From Zenitel Wiki
When there is a need for a paging station with a touch screen an ITSV-4 or ITSV-5 can be used in combination with a IP-LCM. With 8 buttons on the desktop of the ITSV the zones in the Vipedia can be directly addressed. Pressing the button on the desktop will immediately setup a route to the zone and an announcement can be made.
In this article we will describe a setup for a maximum of 8 zones from one ITSV, however with knowledge of an Edge configuration this can be expanded upon to 16 zones from one ITSV.
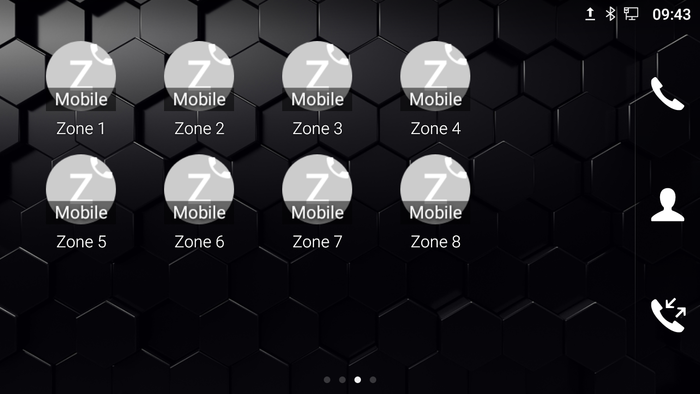 |
| Example screenshot of an ITSV with 8 zones available on the Touch Screen |
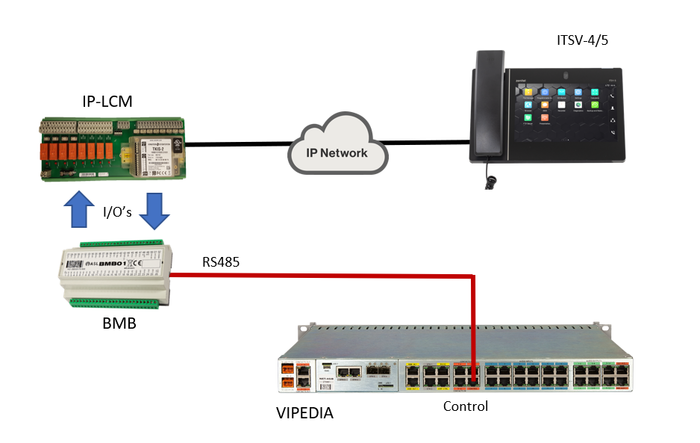 |
| System overview |
Contents
Hardware
The wiring between the Vipedia and IP-LCM is described in the Integration with ASL PAVA using the IP-LCM unit article.
Edge Controller configuration
The IP-LCM will be set up as the IC-Edge Controller and in the "Directory" menu given number 100, see Getting Started with IC-Edge for details.
Multiple accounts for the ITSV
For each zone the ITSV will use a different number to call the IP-LCM. Therefore we will create multiple accounts for the ITSV.
Click the arrow for Manually Added Devices and choose Zenitel Device. Give the new device a Number and Name and do this for each zone you want to address. In the example we used numbers 201-208
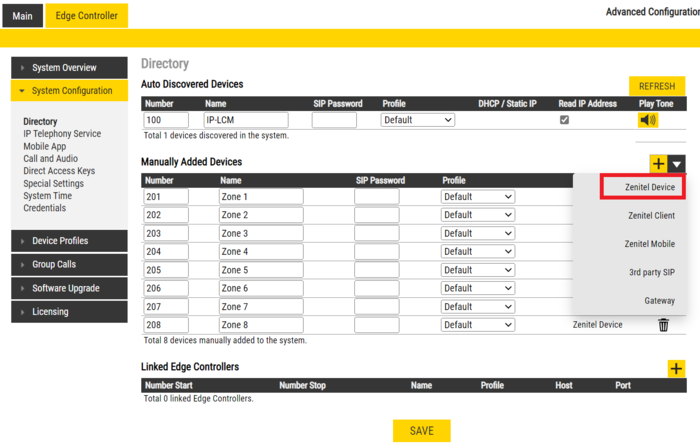 |
| Manually added devices |
Advanced Output Handler
Using the advanced output handler for the IP-LCM we configure the relays to go on when there is an incoming call from one of the numbers configured in the previous step. Each Number will get its own event with the corresponding relay.
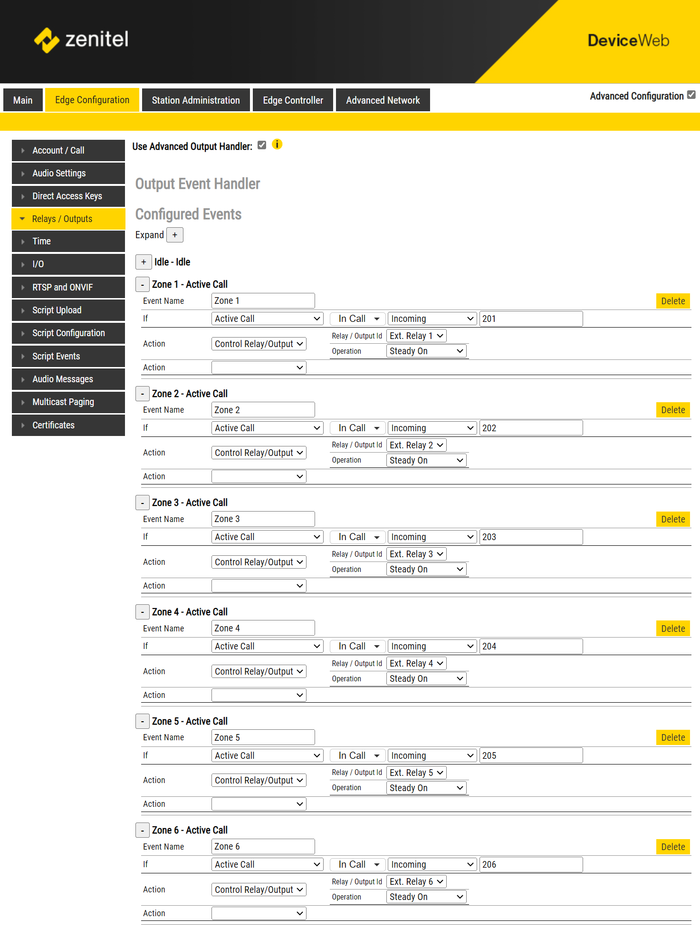 |
| Relays with call state |
Because these events only turn the relays on we need one additional event to turn the relays off when the station goes back to Idle. This can be done with one event that just turns them all off.
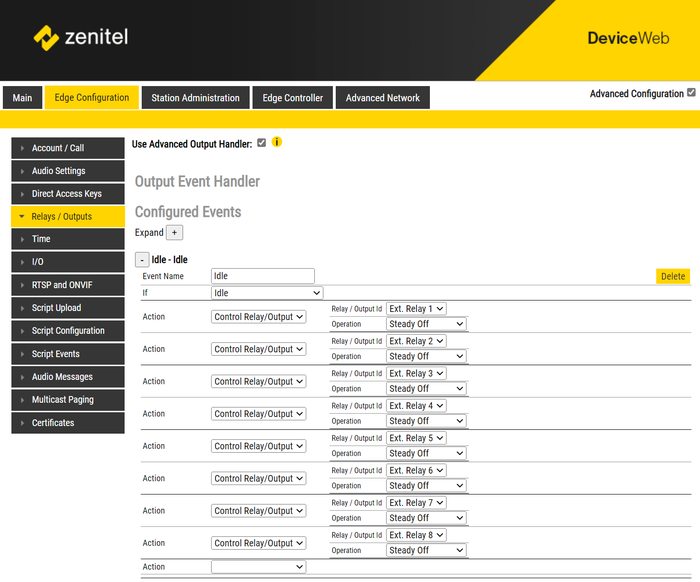 |
| Relays with Idle state |
ITSV
The ITSV will need to have multiple accounts registered to the Edge controller.
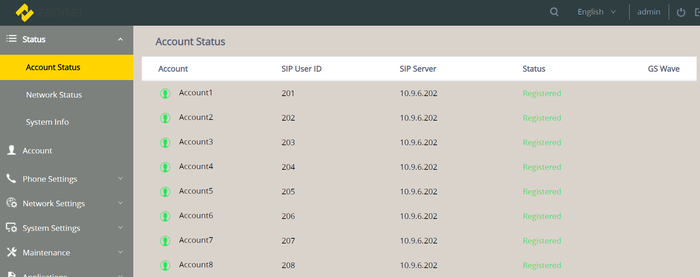 |
| ITSV registration |
Registering multiple accounts
Go into the account settings of the ITSV and fill in one account for each directory number you have created in the edge controller. Remember to set the checkbox Account Active.
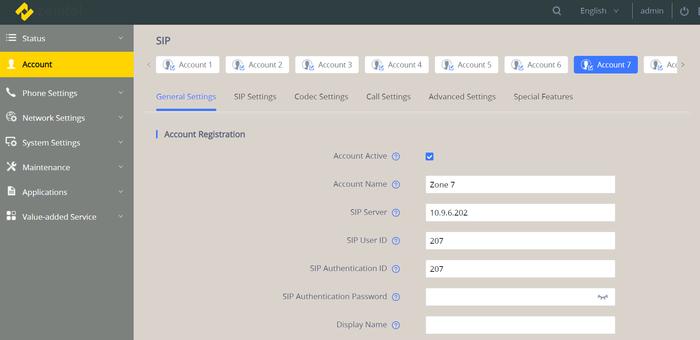 |
| One account example |
After the settings are saved and applied you should see all the accounts as registered on the status page
Creating the phonebook
To make easy to use direct buttons on the desktop we need to have phonebook entries for each zone. We have to start creating a phonebook on the phone but after the first entry we switch to editing a XML file on our laptop.
To create the first entry tap on the person icon in the middle on the right hand side of the screen.
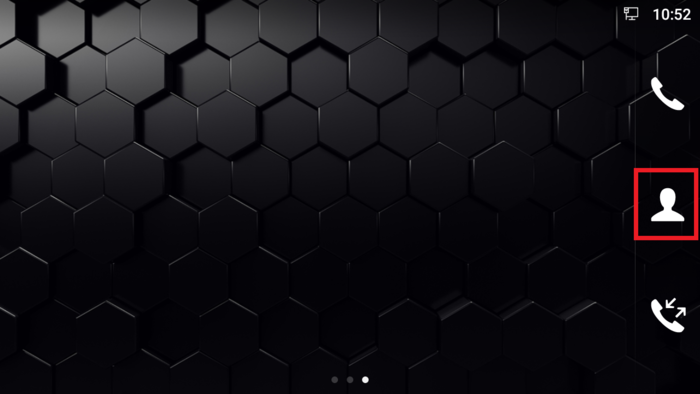 |
| Phonebook icon |
You will be shown the phone book and that there are no entries yet. Tap the add button.
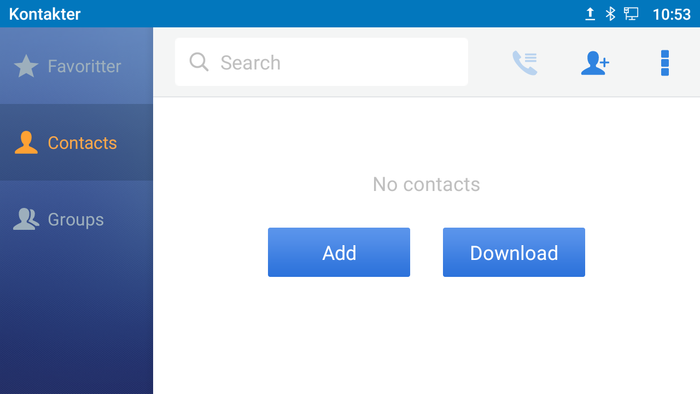 |
| Add contact |
Fill in a name and a number for the first contact, we will edit this one later.
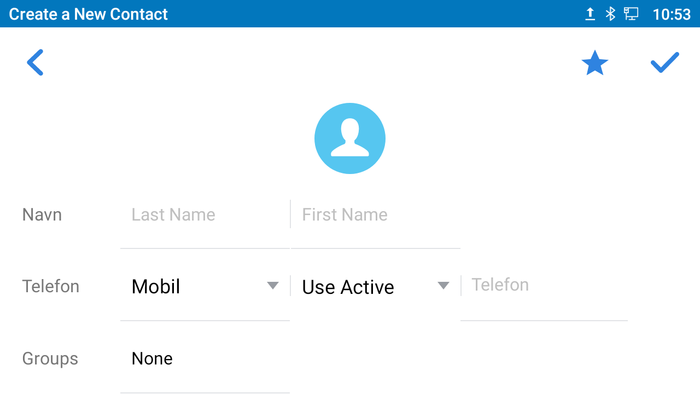 |
| Contact details |
After this we will export the current phonebook, then edit the file and upload it back to the ITSV. In the web interface of the ITSV go to Applications > Contacts, click the Export button. This will save the current phonebook as an XML file to your laptop.
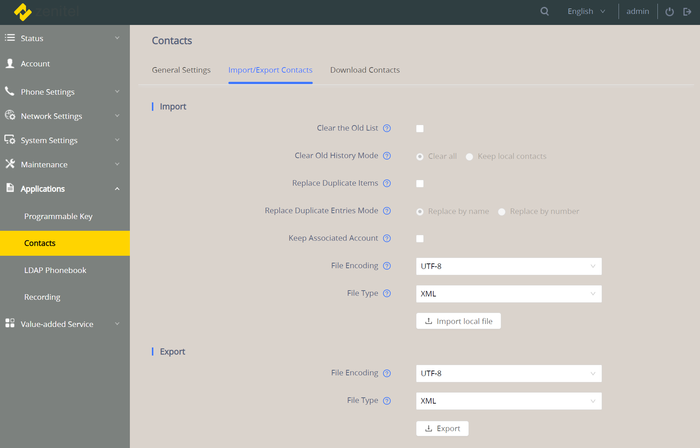 |
| Importing the phone book |
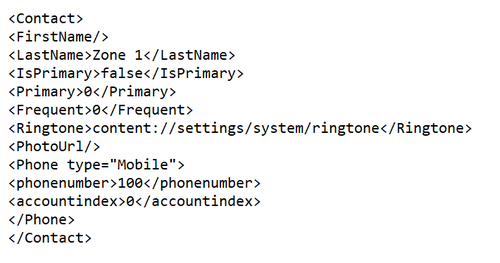
Open the XML file with a text editor. Each phonebook entry looks like this:
 |
| Phonebook contact |
Create one of these for each zone you have. The fields you have to change are LastName and accountindex. LastName is the field that will be displayed on the icons later on. Accountindex is the index of the account to use when making the call. Be aware that the index starts counting from 0 where the names when registering the account started with Account 1, so Account 1 has index 0. The phonenumber is always the number of the IP-LCM, as this is the station being called. You should also see the entry we made to start creating the phonebook. You can either remove this one or change it to one of the zones.
When the file is finished you can use the same page where we exported the phonebook but this time we will use the import function. It is important to check the two boxes Clear the Old List and Keep Associated Account
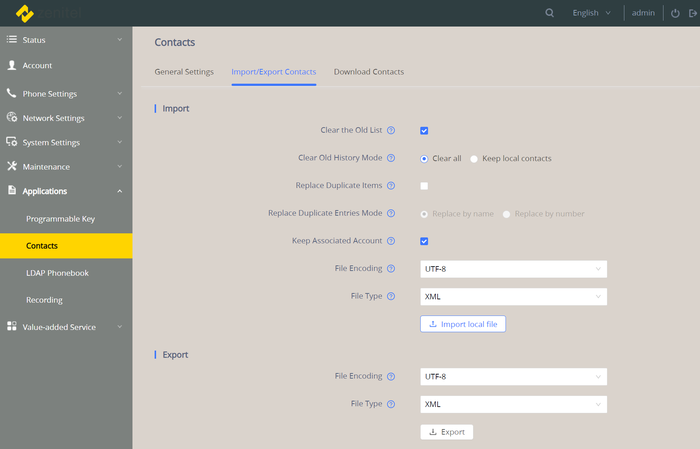 |
| Importing the phone book |
Creating desktop icons
The next step is to create desktop icons on the ITSV to have direct access to calling into the zones. On a empty part of the screen press and hold the screen. A bar will pop up on the right hand side of the screen. Press on Widgets.
| Selecting Widget |
Then there will be a new menu in the bar. Scroll down to Direct Dial.
| Selecting Direct Dial |
You will be presented with a selection menu from the phone book. The entries we created earlier are in there.
| Selecting from the phone book |
Select the entry you want to add to the desktop and it will be placed on the screen. If you want to move the icon around just press and hold and you can drag it around.
Vipedia Configuration
In the SCT (System Config Tool) the inputs of the I/O unit BMB01 will be setup with fixed routes on the Volt-Free Contacts. The relays that are triggered on the IP-LCM is connected to an input of the BMB01. By using a Fixed Route the Vipedia will then set up a correct route to the outputs and zones.
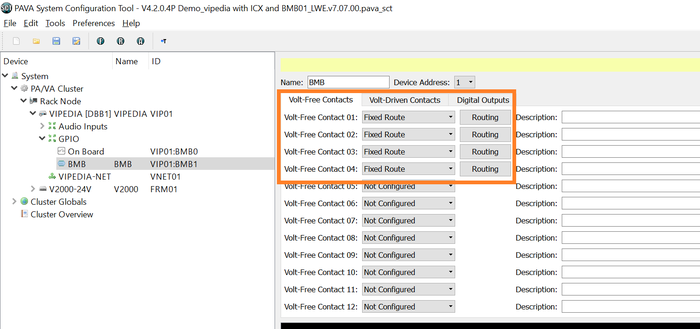 |
| Example of 4 Fixed routes configured |
The Route will be configured from the audio input that the IP-LCM is connected to to one or more audio outputs.
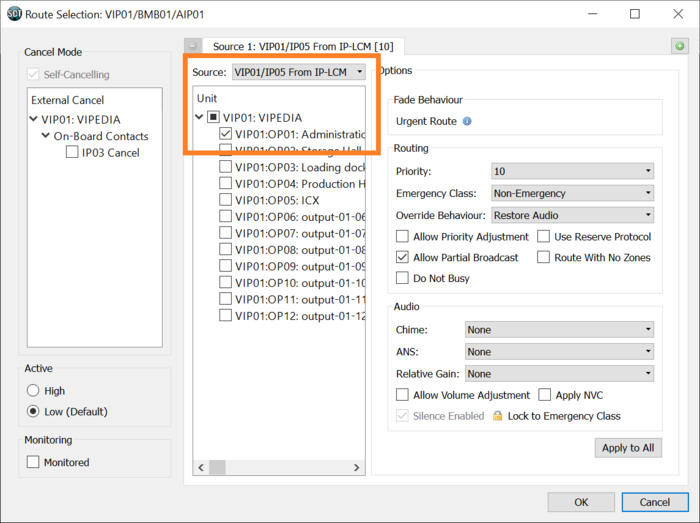 |
| The settings of the fixed route |
